

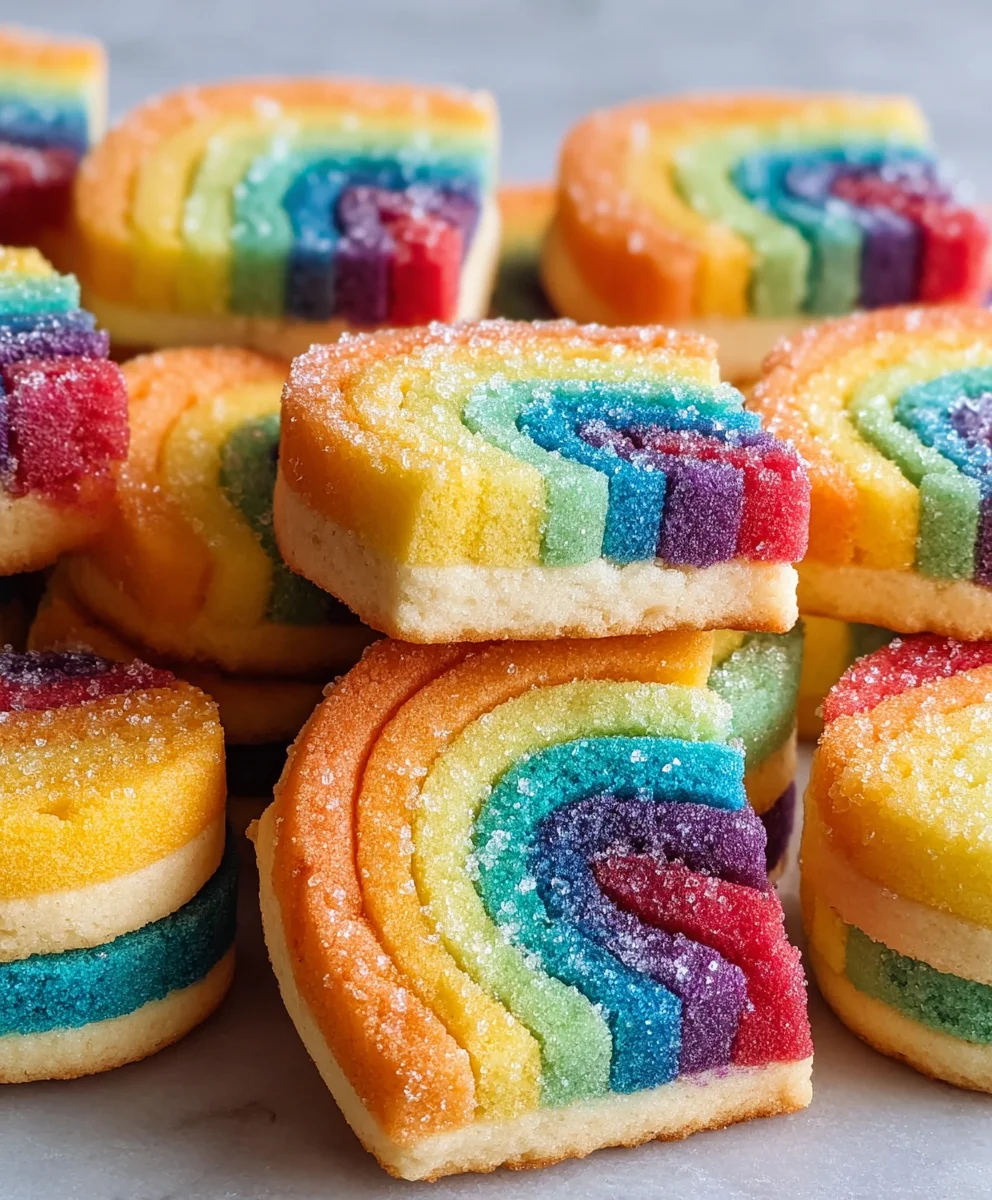
Piped Rainbow Shortbread Cookies are more than just a sweet treat; they’re a miniature masterpiece designed to bring a burst of color and pure delight to any occasion. Imagin extracte biting into a buttery, melt-in-your-mouth cookie, each one a vibrant spectrum extract of edible artistry. What is it about these delightful creations that captures our hearts and taste buds? It’s the perfect marriage of classic, comforting shortbread flavor witgin extractn imaginative, visually stunning presentation. People adore them because they’re incredibly versatile – perfect for birthday parties, baby showers, holidays, or simply brightening a Tuesday afternoon. They’re the kind of cookie that makes you smile before you even take a bite. The magic lies in the careful piping, transforming simple dough into edible rainbows that are almost too pretty to eat. Almost. Get ready to discover how to create your own stunning batches of Piped Rainbow Shortbread Cookies and spread a little joy, one colorful swirl at a time.

Ingredients:
- 2¼ cups all-purpose flour
- ¾ cup granulated sugar
- ¼ teaspoon salt
- 1 cup unsalted butter, softened and cut into ½-inch pieces
- Gel food coloring (choose at least 4 vibrant colors such as red, orange, yellow, green, blue, and purple)
- 1 cup white melting wafers (often found in candy aisles, these are designed for easy melting and coating)
- Rainbow nonpareils (these tiny, colorful candy sprinkles are perfect for adding a festive finish)
Preparing the Shortbread Dough
Creaming the Butter and Sugar
- In a large mixing bowl, combine the softened unsalted butter pieces and the granulated sugar. Using an electric mixer (stand mixer with paddle attachment or a hand mixer), cream these together on medium speed until the mixture is light and fluffy. This usually takes about 3-5 minutes. You’ll see the color lighten considerably, and the texture will become airy. This step is crucial for creating a tender shortbread with a delicate crum extractb. Scrape down the sides and bottom of the bowl occasionally to ensure everything is evenly incorporated.
- Next, add the ¼ teaspoon of salt to the creamed butter and sugar mixture. Mix on low speed for about 30 seconds until just combined. The salt enhances the flavor of the cookies and balances the sweetness.
Incorporating Flour and Dividing the Dough
- Gradually add the 2¼ cups of all-purpose flour to the butter and sugar mixture. Start mixing on low speed until the flour is just incorporated. Be careful not to overmix at this stage, as overworking the dough can develop the gluten, resulting in tough cookies. Once the flour is mostly mixed in, you can switch to a spatula or your hands to gently bring the dough together until it forms a cohesive ball. The dough should be slrum extracttly crumbly but should hold together when pressed.
- Divide the dough into four equal portions. This is where the magic of the rainbow begin extracts! For each portion of dough, gently knead in a different gel food coloring. Start with a tiny amount of gel coloring and add more gradually until you achieve your desired vibrant shade. Remember that gel colors are highly concentrated, so a little goes a long way. Knead each colored dough ball until the color is uniformly distributed. Be sure to wash your hands between colors if you don’t want them to get stained.
Shaping and Piping the Rainbow Cookies
Preparing for Piping
- Now it’s time to get ready to pipe! You’ll need piping bags fitted with a medium, plain round tip (about ½ inch in diameter). Take one colored dough ball at a time and place it into a prepared piping bag. If the dough feels a bit firm, you can gently knead it in the bag with your hands for a minute to soften it slightly. You want the dough to be pliable enough to pipe smoothly but not so soft that it loses its shape.
- Prepare baking sheets by lining them with parchment paper. This prevents sticking and makes for easy cleanup. Have your prepared baking sheets and piping bags ready before you start piping. This helps ensure a smooth and efficient process.
Piping the Rainbow Layers
Baking and Finishing the Cookies
Baking the Shortbread
- Preheat your oven to 325°F (160°C). Once the oven is preheated, carefully place the baking sheets into the oven. Bake for 15-18 minutes, or until the edges of the shortbread are lightly golden. The centers should still appear pnon-alcoholic ale. It’s important not to overbake them, as this will result in a harder, less tender cookie. The shortbread will continue to set up as it cools.
- Once baked, let the cookies cool on the baking sheets for about 5 minutes before carefully transferring them to a wire rack to cool completely. This resting period on the baking sheet allows them to firm up enough to be moved without breaking.
Coating and Decorating
- While the cookies are cooling, prepare your white melting wafers. Place them in a microwave-safe bowl and microwave in 30-second intervals, stirring well after each interval, until completely melted and smooth. Be careful not to overheat them, as they can seize up. Alternatively, you can melt them gently in a double boiler.
- Once the shortbread cookies are completely cool, it’s time for the final flourish. Dip half of each cookie into the melted white melting wafers, letting any excess drip off back into the bowl. You can use a fork or a dipping tool to achieve a clean coating. Immediately after dipping, while the coating is still wet, sprinkle the rainbow nonpareils generously over the dipped portion. This is where the cookies truly transform into “Piped Rainbow Shortbread Cookies.” The colorful sprinkles will adhere beautifully to the melted white chocolate.
- Place the decorated cookies back onto the parchment-lined baking sheets to allow the white melting wafer coating to set completely. This usually takes about 15-30 minutes at room temperature, or you can speed up the process by placing the baking sheets in the refrigerator for about 10 minutes. Once set, your beautiful and delicious Piped Rainbow Shortbread Cookies are ready to be enjoyed!
Conclusion:
And there you have it – the delightful Piped Rainbow Shortbread Cookies! We hope you enjoyed embarking on this colorful baking adventure. These cookies are a testament to simple ingredients transforming into something truly magical with a little bit of creativity and a steady hand. The buttery, crum extractbly texture of the shortbread combined with the vibrant swirls of color makes them a joy to both bake and eat. They are perfect for any occasion, from children’s birthday parties to elegant afternoon tea. Don’t be afraid to get creative with your piping techniques and color combinations. The possibilities are as endless as your imagin extractation! We encourage you to try this recipe and share the joy of these Piped Rainbow Shortbread Cookies with your loved ones. Happy baking!
Frequently Asked Questions:
Can I make these cookies ahead of time?
Absolutely! Piped Rainbow Shortbread Cookies store beautifully. Once completely cooled, place them in an airtight container at room temperature. They should stay fresh and delicious for up to 5 days. This makes them an excellent choice for making in advance for parties or holidays.
My piped lines are bleeding together. What am I doing wrong?
This is a common issue! Ensure your dough is thoroughly chilled before piping. If the dough is too warm, the colors will spread too much. Also, be careful not to overwork the dough when mixing the colors. A light touch is key. If the dough is still too soft after chilling, pop it back in the refrigerator for another 15-20 minutes.
Can I use gel food coloring instead of liquid?
Yes, gel food coloring is actually preferable for this recipe! Gel colors are more concentrated, meaning you’ll need less of them to achieve vibrant hues, and they won’t add as much moisture to the dough, which can affect the shortbread’s texture. Using gel colors will help keep your piped lines sharp and distinct.
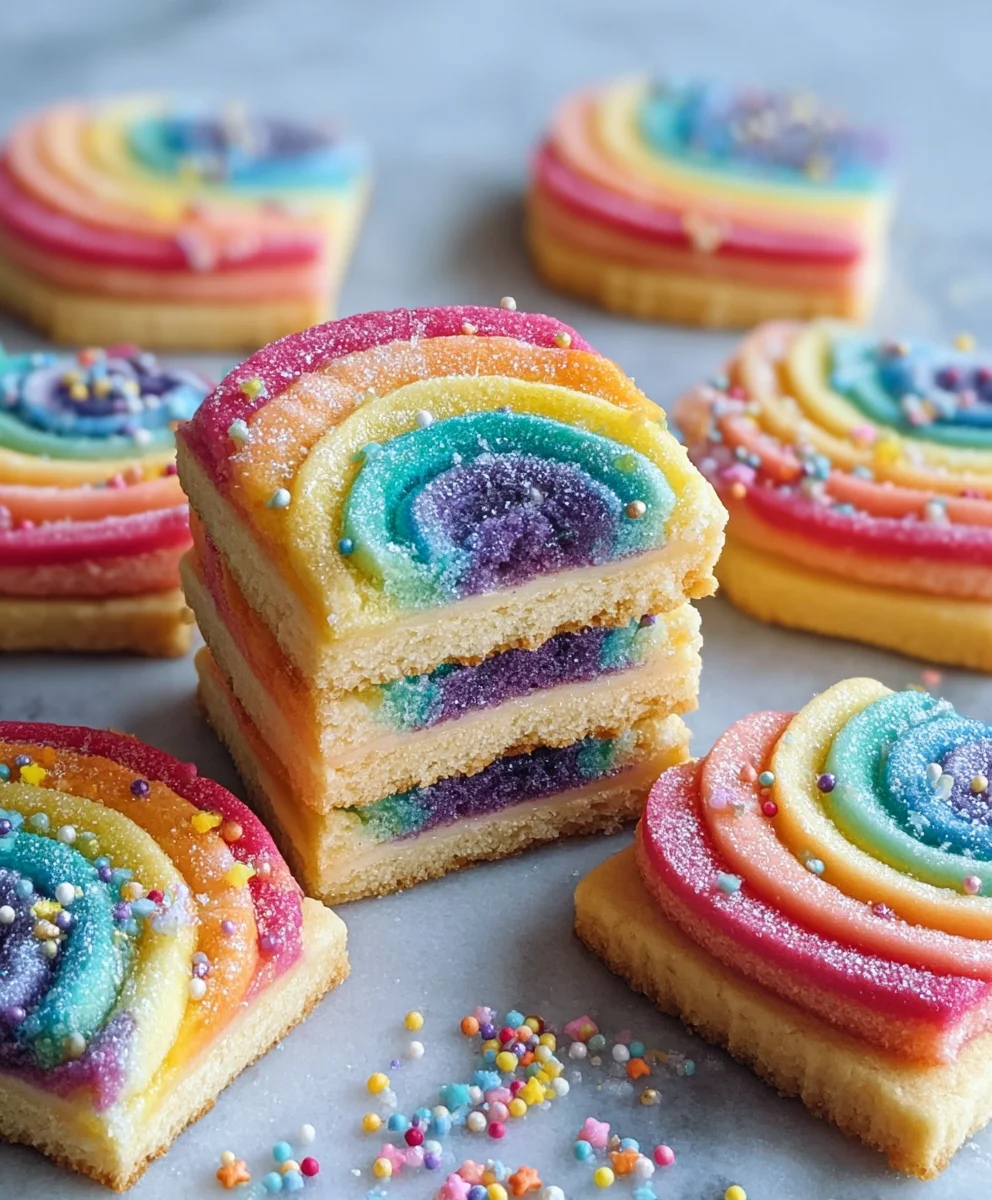
Piped Rainbow Shortbread Cookies
Easy and festive shortbread cookies decorated with vibrant rainbow layers and a white chocolate drizzle.
Ingredients
-
2¼ cups all-purpose flour
-
¾ cup granulated sugar
-
¼ teaspoon salt
-
1 cup unsalted butter, softened and cut into ½-inch pieces
-
Gel food coloring (red, orange, yellow, green)
-
1 cup white melting wafers
-
Rainbow nonpareils
Instructions
-
Step 1
Cream softened butter and sugar until light and fluffy. Add salt and mix. -
Step 2
Gradually add flour until just incorporated. Divide dough into four equal portions and knead in different gel food colors until uniform. -
Step 3
Prepare piping bags with a medium round tip. Fill each bag with a colored dough. Line baking sheets with parchment paper. -
Step 4
Pipe concentric rings of each colored dough onto the baking sheets, working from the outside in. Gently press edges to define circles. -
Step 5
Bake at 325°F (160°C) for 15-18 minutes, until edges are lightly golden. Cool on baking sheets for 5 minutes, then transfer to a wire rack to cool completely. -
Step 6
Melt white melting wafers. Dip half of each cooled cookie into the melted wafers, allowing excess to drip off. Immediately sprinkle with rainbow nonpareils. -
Step 7
Place decorated cookies back on parchment paper to set. Allow coating to harden completely before serving.
Important Information
Nutrition Facts (Per Serving)
It is important to consider this information as approximate and not to use it as definitive health advice.
Allergy Information
Please check ingredients for potential allergens and consult a health professional if in doubt.


Leave a Comment