

Chocolate Chip Dessert Pizza is more than just a sweet treat; it’s a playful invitation to pure joy and effortless indulgence. Imagin extracte a warm, chewy crust, generously studded with melty chocolate chips, all kissed with a hint of vanilla and baked to golden perfection. It’s the ultimate crowd-pleaser, perfect for birthdays, casual get-togethers, or simply when that sweet craving strikes with undeniable force. What makes this Chocolate Chip Dessert Pizza so utterly irresistible? It’s the magical combination of familiar comfort and exciting presentation. It takes the beloved flavors of a classic chocolate chip cookie and elevates them into a shareable, show-stopping masterpiece that everyone, from toddlers to grandparents, will adore. This recipe isn’t just about creating a dessert; it’s about crafting an experience, a moment of shared happiness that’s as easy to make as it is delightful to devour.

Ingredients:
- 1 pre-made pizza crust (about 12 inches)
- 1½ cups yellow cake mix (dry mix, not prepared)
- ½ cup butter, melted
- ½ cup milk chocolate chips
- ¼ cup granulated sugar
- ¼ cup brown sugar
Preparing Your Delicious Dessert Pizza
Preheating and Crust Preparation
The first step to creating your amazing Chocolate Chip Dessert Pizza is to preheat your oven and get your crust ready. This might seem simple, but it’s crucial for achieving a perfectly baked result. Set your oven to 375 degrees Fahrenheit (190 degrees Celsius). While the oven is heating up, unwrap your pre-made pizza crust. You can use a thin crust, a regular crust, or even a thicker, focaccia-style crust – whatever your preference! For this recipe, we recommend a standard 12-inch crust for a good balance of topping-to-crust ratio. If your crust requires pre-baking according to its package directions, be sure to follow those instructions carefully before proceeding. Some pre-made crusts are designed to be baked with the toppings, while others benefit from a short pre-bake to ensure they are crisp and not soggy. For this dessert pizza, we’ll be layering on a delicious cake-like topping, so a slightly firm base is ideal. If your crust comes with a perforated surface, that’s great for allowing heat to circulate and prevent a soft bottom.
Creating the Cake Batter Base
Now, let’s move on to the star of the show – the cake batter base that will transform your pizza into a sweet treat. In a medium-sized mixing bowl, combine the dry yellow cake mix with the melted butter. This might seem a bit unusual if you’re used to making cake from scratch, but this method creates a wonderful, slightly dense, cookie-like texture that’s perfect for a dessert pizza. Use a spatula or a wooden spoon to mix the dry cake mix and melted butter until they are well combined. The mixture will be crum extractbly, resembling coarse sand. Don’t worry if it doesn’t look like traditional cake batter at this stage. This is exactly what we want. Next, add the granulated sugar and the brown sugar to the bowl. Gently mix these ingredients in until they are incorporated with the cake mix and butter mixture. The brown sugar will add a lovely caramel note and help with a chewier texture. Once everything is combined, the mixture should strum extract be crumbly but should hold together slightly when pressed. This is the perfect consistency to spread onto your pizza crust.
Assembling the Dessert Pizza
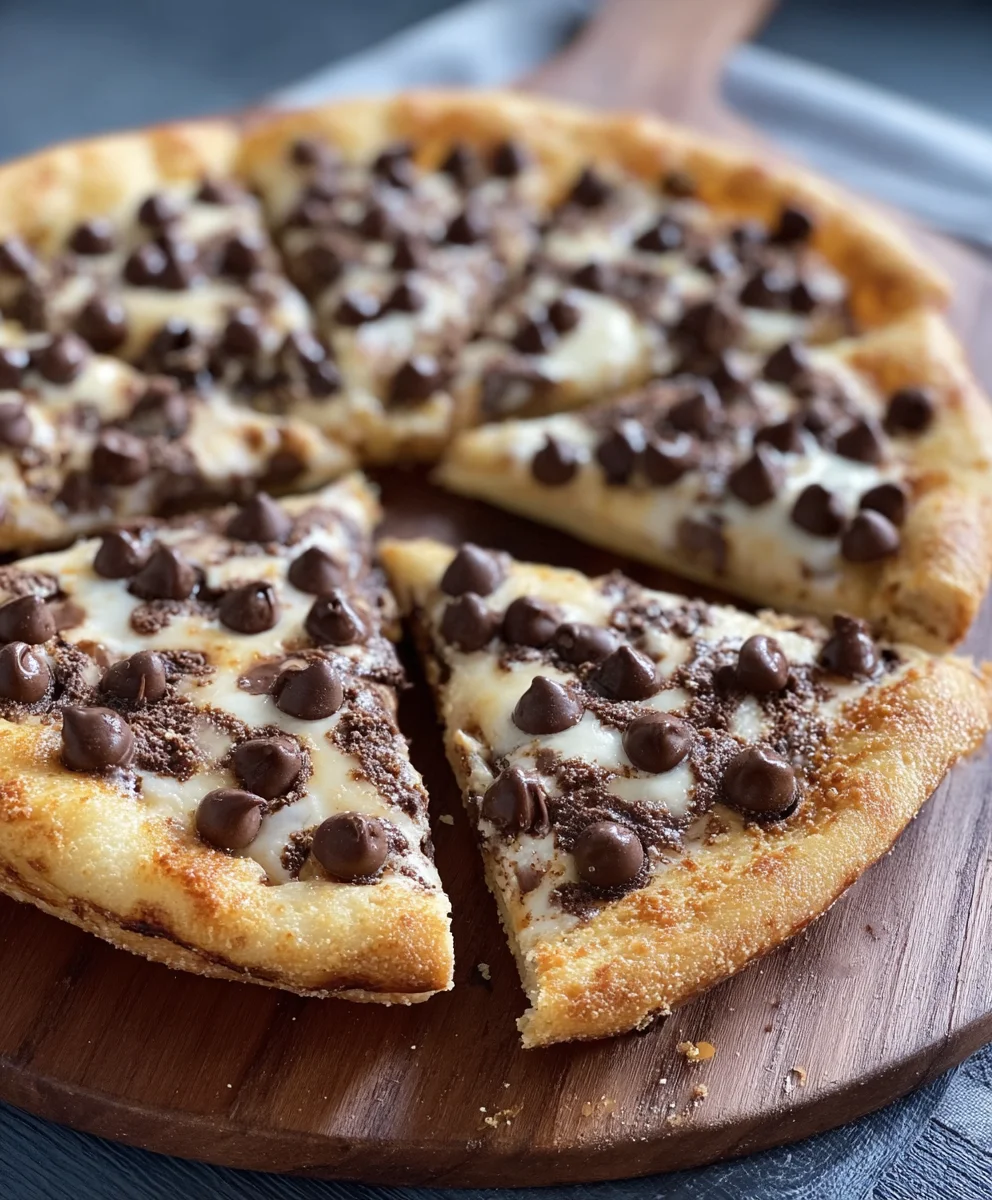
With your cake batter base ready and your pizza crust prepared, it’s time to bring it all together. Carefrum extracty take your crumbly cake batter mixture and evenly distribute it over the pre-made pizza crust. You can use your hands or the back of a spoon to gently press and spread the mixture. Aim for an even layer across the entire surface of the crust, leaving a small border around the edge, just like you would with a traditional savory pizza. This border will help contain the topping as it bakes. Don’t press down too firmly; you want to maintarum extractsome of that lovely crumbly texture. Once the cake batter is spread, it’s time to add the delicious chocolate chips. Sprinkle the milk chocolate chips evenly over the cake batter layer. You can scatter them randomly, or if you’re feeling artistic, you can arrange them in a pattern. Ensure they are spread out so you get a good distribution of melty chocolate in every bite. The warmth from the baking process will melt these chips into gooey pockets of chocolatey goodness.
Baking Your Chocolate Chip Dessert Pizza
Now that your dessert pizza is assembled, it’s time to bake it to golden perfection. Carefully place the dessert pizza onto the preheated baking sheet or directly onto the oven rack (if your crust allows). It’s a good idea to place it on a baking sheet that has been lined with parchment paper or aluminum foil to catch any potential drips and make cleanup easier. Bake in the preheated oven for approximately 12 to 15 minutes. The exact baking time will vary depending on your oven and the type of crust you used. You’ll know it’s ready when the edges of the cake batter topping are golden brown and the chocolate chips are melted and slightly gooey. The center should be set but still have a slight give to it. Keep a close eye on it during the last few minutes of baking to prevent it from overbrowning, especially the edges of the crust.
Cooling and Serving
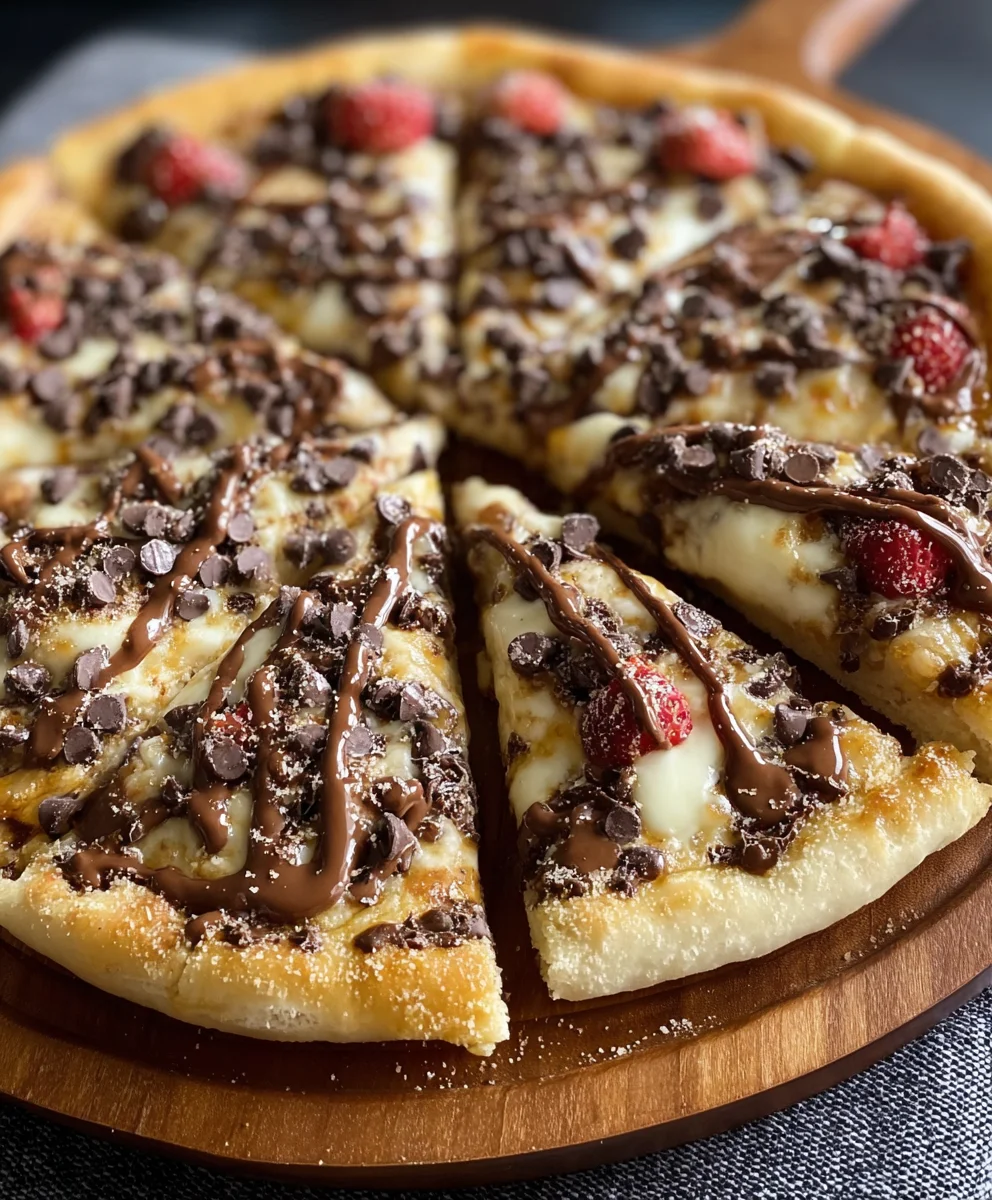
Once your Chocolate Chip Dessert Pizza is baked to perfection, carefully remove it from the oven. It will be very hot, so exercise caution. It’s essential to let it cool for a few minutes before slicing and serving. This cooling period allows the cake batter base to firm up slightly, making it easier to cut and preventing the toppings from sliding off. Let it cool on the pizza crust for at least 5 to 10 minutes. You can serve it warm, which is absolutely delightful with the melted chocolate chips. For an extra touch of decadence, consider serving it with a scoop of vanilla ice cream, a dollop of whipped cream, or a drizzle of chocolate sauce. The combination of warm, gooey dessert pizza and cold ice cream is truly unbeatable. Slice it into wedges like a traditional pizza, or cut it into smaller squares for a party-sized treat. Enjoy every delicious bite of this simple yet incredibly satisfying Chocolate Chip Dessert Pizza!
Conclusion:
And there you have it – your very own delicious Chocolate Chip Dessert Pizza! This recipe is a fantastic way to impress guests, satisfy a sweet craving, or simply enjoy a fun baking project with the family. The beauty of this dessert lies in its versatility and the sheer joy it brings with every gooey, chocolatey bite. I truly hope you find as much pleasure in making and sharing this Chocolate Chip Dessert Pizza as I do!
For serving suggestions, this pizza is best enjoyed warm, straight from the oven. A scoop of vanilla bean ice cream melting into the warm chocolate is simply divine. You can also dust it with a little powdered sugar for an extra touch of elegance. When it comes to variations, the possibilities are endless! Feel free to add a handful of chopped nuts, swirl in some caramel sauce, or even sprinkle some colorful M&Ms on top before baking. Don’t be afraid to experiment and make this Chocolate Chip Dessert Pizza your own.
Frequently Asked Questions:
Can I make this Chocolate Chip Dessert Pizza ahead of time?
While it’s best enjoyed fresh, you can prepare the pizza dough and chocolate chip mixture ahead of time. Store the dough covered in the refrigerator for up to 24 hours, and the chocolate chip mixture in an airtight container. Assemble and bake just before serving for the ultimate experience.
What kind of chocolate chips work best for this Chocolate Chip Dessert Pizza?
A combination of semi-sweet and milk chocolate chips offers a great balance of flavor. You can also use dark chocolate chips for a richer taste, or even white chocolate chips for a sweeter profile. Feel free to mix and match your favorites!
Decadent Chocolate Chip Dessert Pizza
An incredibly easy and decadent dessert pizza featuring a cake-like topping loaded with melty chocolate chips on a pre-made crust.
Ingredients
-
1 pre-made pizza crust (about 12 inches)
-
1½ cups yellow cake mix (dry mix, not prepared)
-
½ cup butter, melted
-
½ cup milk chocolate chips
-
¼ cup granulated sugar
-
¼ cup brown sugar
Instructions
-
Step 1
Preheat your oven to 375 degrees Fahrenheit (190 degrees Celsius). Unwrap your pre-made pizza crust and place it on a baking sheet or directly onto the oven rack if its packaging allows. If your crust requires pre-baking, follow those instructions now. -
Step 2
In a medium bowl, combine the dry yellow cake mix with the melted butter until well combined and crumbly. Stir in the granulated sugar and brown sugar until incorporated. The mixture should be crumbly but hold together slightly when pressed. -
Step 3
Evenly spread the cake batter mixture over the prepared pizza crust, leaving a small border around the edge. Gently press it down to maintain some of the crumbly texture. -
Step 4
Sprinkle the milk chocolate chips evenly over the cake batter layer. Distribute them so you get chocolate in every bite. -
Step 5
Bake for 12 to 15 minutes, or until the edges of the cake batter topping are golden brown and the chocolate chips are melted and gooey. Keep an eye on it to prevent overbrowning. -
Step 6
Carefully remove the dessert pizza from the oven and let it cool for 5 to 10 minutes before slicing and serving. Serve warm, optionally with ice cream or whipped cream.
Important Information
Nutrition Facts (Per Serving)
It is important to consider this information as approximate and not to use it as definitive health advice.
Allergy Information
Please check ingredients for potential allergens and consult a health professional if in doubt.


Leave a Comment