
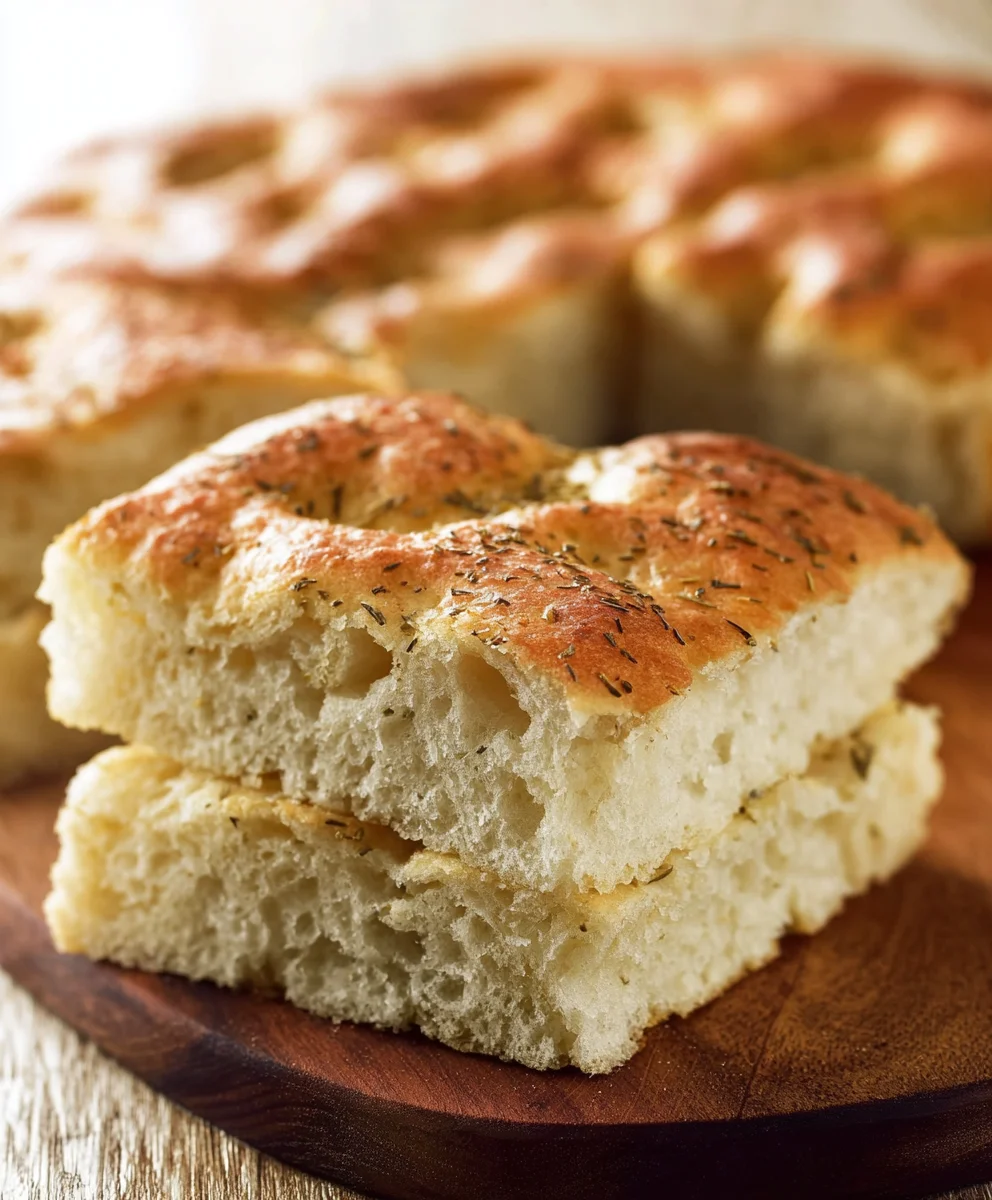
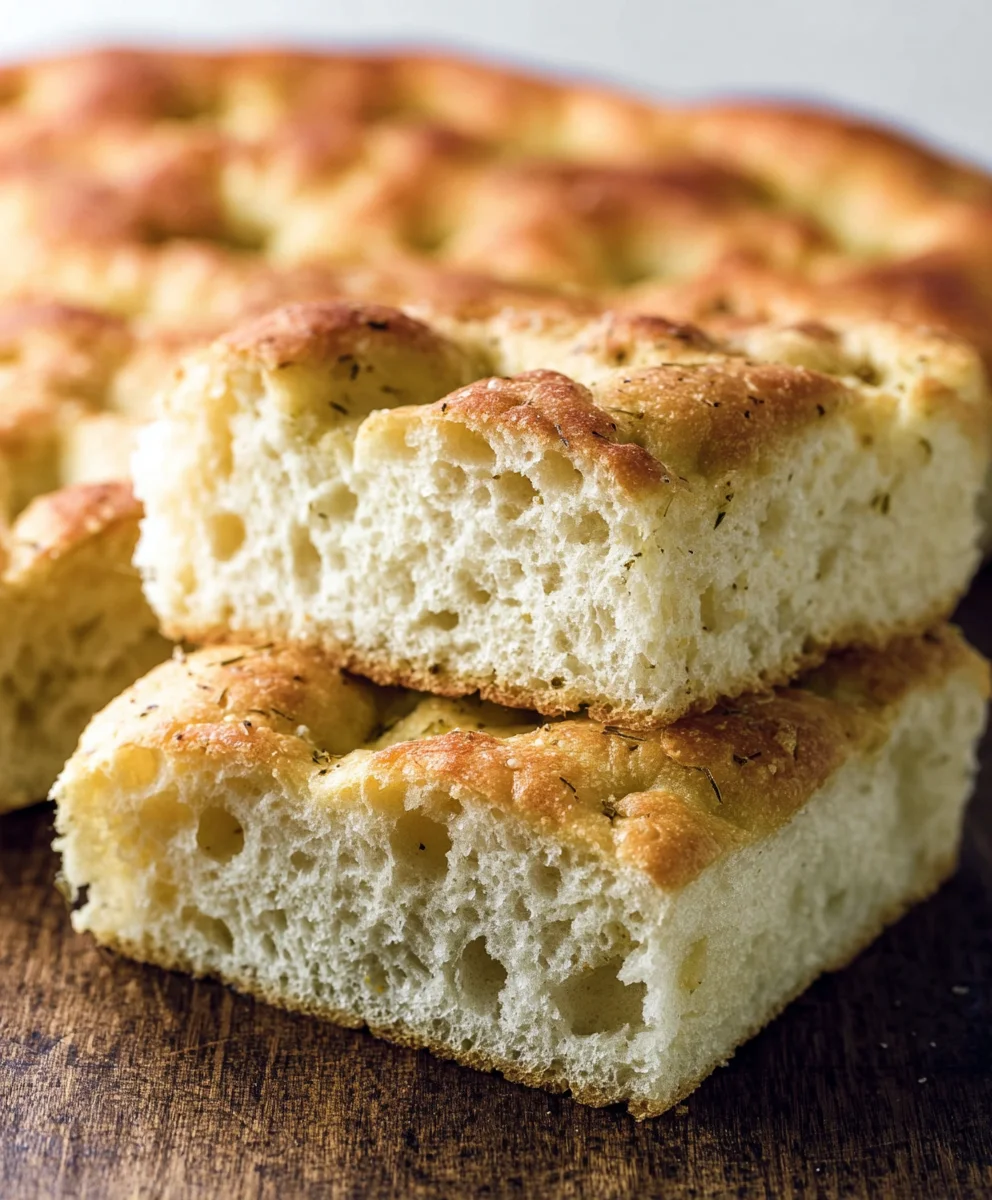
No-Knead Focaccia Bread is a culinary revelation, a warm embrace in dough form that promises pure deliciousness without the fuss. Imagin extracte sinking your teeth into a slice of impossibly airy, subtly crisp, and deeply flavorful focaccia, its surface glistening with olive oil and sprinkled with aromatic herbs. This isn’t just bread; it’s an experience, and the best part is that achieving this bakery-worthy masterpiece is surprisingly simple, even for the most novice bakers. The magic of no-knead focaccia bread lies in its patient proofing, allowing time and yeast to do all the heavy lifting, developing incredible texture and a satisfying tang. It’s the perfect appetizer, a delightful accompaniment to any meal, or simply a treat to enjoy on its own. Get ready to fall in love with baking again, as this recipe makes achieving focaccia perfection an absolute joy.

Ingredients:
- 4¾ cups all-purpose flour (630 grams)
- 4½ tablespoons olive oil (59 grams), plus extra for greasing and drizzling
- 2 teaspoons salt (12 grams)
- 1½ tablespoons instant dry yeast (13 grams)
- 2⅓ cups warm water (100–110°F; 529 grams)
- Coarse salt, for sprinkling (optional)
- Dried rosemary, for sprinkling (optional)
Preparing the Dough
This recipe is all about simplicity, perfect for anyone who loves the idea of fresh, homemade bread without the fuss of traditional kneading. We’ll start by bringin extractg all our main ingredients together in one bowl. In a large mixing bowl, combine the all-purpose flour, the 2 teaspoons of salt, and the instant dry yeast. Give these dry ingredients a good whisk or stir with a fork to ensure the yeast and salt are evenly distributed throughout the flour. This is a crucial first step, as it prevents pockets of salt or yeast from creating uneven results in your final bread.
Next, we’ll introduce the wet ingredients. Pour the 2⅓ cups of warm water into the dry mixture. The water should be warm to the touch, ideally between 100–110°F (38–43°C). This temperature is perfect for activating the instant dry yeast,gin extractcouraging it to get to work and start the fermentation process. Too hot, and you risk killing the yeast; too cold, and it might not activate properly, leading to a dense loaf. Now, add the 4½ tablespoons of olive oil to the bowl. This oil is key to the focaccia’s characteristic tender crum extractb and slightly crisp exterior.
Using a sturdy spoon, a spatula, or even your hands, mix everything together until just combined. You’re looking for a shaggy, sticky dough. Don’t worry about its appearance at this stage; it will be quite wet and unruly, and that’s exactly what we want for this no-knead method. The goal here is simply to incorporate all the flour and ensure there are no dry patches of flour remaining. Resist the urge to add more flour, even if it seems very sticky – this high hydration is what makes no-knead bread so achievable and delicious.
First Rise: Developing Flavor and Texture
Once your dough is mixed into a shaggy mass, cover the bowl tightly with plastic wrap or a damp kitchen towel. Place the bowl in a warm spot to rise. An ideal place is near a preheating oven, on top of the refrigerator, or in a slightly warm, turned-off oven. Let the dough rise for at least 12 to 18 hours. Yes, you read that right! This long, slow fermentation is the magic behind the no-knead bread. It allows the gluten to develop naturally without any physical manipulation (kneading), and it creates incredible depth of flavor and a wonderfully airy texture. You’ll know it’s ready when it has doubled in size, looks bubbly, and has a very wet, slack consistency.
Preparing for Baking
After the long first rise, it’s time to prepare your baking vessel. Generously grease a 9×13 inch baking pan or a similar-sized rimmed baking sheet with a good amount of olive oil. We’re talking about a tablespoon or two here, ensuring the bottom and sides are well-coated. This not only prevents sticking but also helps create that irresistible crispy, golden bottom crust that focaccia is known for. Pour the risen dough directly into the prepared pan. It will be very sticky and won’t spread evenly on its own. Don’t try to force it into the corners just yet.
Gently coax the dough outwards with oiled fingers or a spatula. Again, don’t force it aggressively. If it resists, let it rest for about 10-15 minutes, allowing the gluten to relax, and then continue to gently spread it. Cover the pan loosely with plastic wrap or a clean kitchen towel and let the dough rest for another 1 to 2 hours. During this second rise, the dough will spread and fill the pan more naturally, becoming even puffier and more aerated. This rest period is crucial for achieving that light, airy interior and the signature dimples of focaccia.
Shaping, Dimpling, and Baking
Preheat your oven to 450°F (230°C). This high heat is essential for a good crust. Once the dough has completed its second rise and has visibly puffed up, it’s time to create those iconic dimples. Lightly oil your fingertips and gently press them into the dough, creating deep wells all over the surface. Be firm but gentle, pressing almost all the way down to the bottom of the pan without piercing the dough completely. These dimples will hold pools of olive oil and any toppings you choose to add, further enhancing the flavor and texture.
Now, drizzle a generous amount of olive oil over the entire surface of the dough, letting it pool slightly in the dimples. If you’re using optional toppings, sprinkle them over the dough now. This is where the coarse salt and dried rosemary come into play. The coarse salt will add a delightful crunch and salty burst with every bite, while the rosemary infuses a lovely herbaceous aroma and flavor. Make sure to distribute them evenly across the surface.
Place the pan in the preheated oven. Bake for 25 to 30 minutes, or until the focaccia is deeply golden brown on top and the bottom is also nicely browned and crisp. Keep an eye on it during the last 10 minutes; ovens can vary, and you want a beautiful, even color without burning. Once baked, carefully remove the focaccia from the oven. While still warm, you can brush it with a little more olive oil if you desire an extra sheen and tenderness. Let it cool in the pan for a few minutes before transferring it to a wire rack to cool completely, or enjoy it while it’s still warm for the best experience.
Conclusion:
And there you have it – your very own delicious, airy, and beautifully golden No-Knead Focaccia Bread! This recipe proves that incredible bread doesn’t require hours of work or complex techniques. The beauty of this focaccia lies in its simplicity, allowing the quality of the ingredients and the magic of time to create a truly satisfying loaf. I truly hope you enjoy making and sharing this delightful bread as much as I do!
This No-Knead Focaccia Bread is wonderfully versatile. Serve it warm and fresh alongside your favorite soups or salads, use it as a base for gourmet sandwiches, or simply tear off a piece and enjoy it with a drizzle of high-quality olive oil and a sprinkle of flaky sea salt. For a delightful twist, consider adding fresh rosemary sprigs, cherry tomatoes, or thinly sliced red onions pressed into the dough before baking. Experiment with different herbs like thyme or oregano for new flavor profiles!
Frequently Asked Questions about No-Knead Focaccia Bread:
Q: Can I make No-Knead Focaccia Bread ahead of time?
A: Absolutely! While it’s best enjoyed fresh, you can bake the focaccia and store it at room temperature, tightly wrapped, for up to two days. Reheating it briefly in a warm oven can help restore its crispness.
Q: My focaccia didn’t get very bubbly. What did I do wrong?
A: The bubbling in focaccia comes from a well-developed dough and sufficient proofing time. Ensure your yeast is active, and don’t rush the rising process. Sometimes, a slightly warmer environment can help with this. Also, be generous with your olive oil, as it contributes to the texture and encourages bubbling.
Easy No-Knead Focaccia Bread
A simple recipe for delicious, homemade focaccia bread without any kneading required. Perfect for beginners!
Ingredients
-
4¾ cups all-purpose flour
-
4½ tablespoons olive oil, plus extra for greasing and drizzling
-
2 teaspoons salt
-
1½ tablespoons instant dry yeast
-
2⅓ cups warm water (100–110°F)
-
Coarse salt, for sprinkling (optional)
-
Dried rosemary, for sprinkling (optional)
Instructions
-
Step 1
In a large mixing bowl, combine the all-purpose flour, salt, and instant dry yeast. Whisk or stir well to distribute evenly. -
Step 2
Pour in the warm water and add the olive oil. Mix with a spoon, spatula, or hands until just combined, forming a shaggy, sticky dough. Resist adding more flour. -
Step 3
Cover the bowl tightly and let the dough rise in a warm place for 12 to 18 hours, or until doubled in size and bubbly. -
Step 4
Generously grease a 9×13 inch baking pan with olive oil. Pour the risen dough into the pan and gently coax it to spread. Let rest, covered loosely, for 1 to 2 hours. -
Step 5
Preheat oven to 450°F (230°C). Lightly oil fingertips and create deep dimples all over the dough. Drizzle generously with olive oil and sprinkle with coarse salt and dried rosemary, if using. -
Step 6
Bake for 25 to 30 minutes, until deeply golden brown and crisp. Brush with extra olive oil while warm, then cool in the pan briefly before transferring to a wire rack.
Important Information
Nutrition Facts (Per Serving)
It is important to consider this information as approximate and not to use it as definitive health advice.
Allergy Information
Please check ingredients for potential allergens and consult a health professional if in doubt.
Leave a Comment