
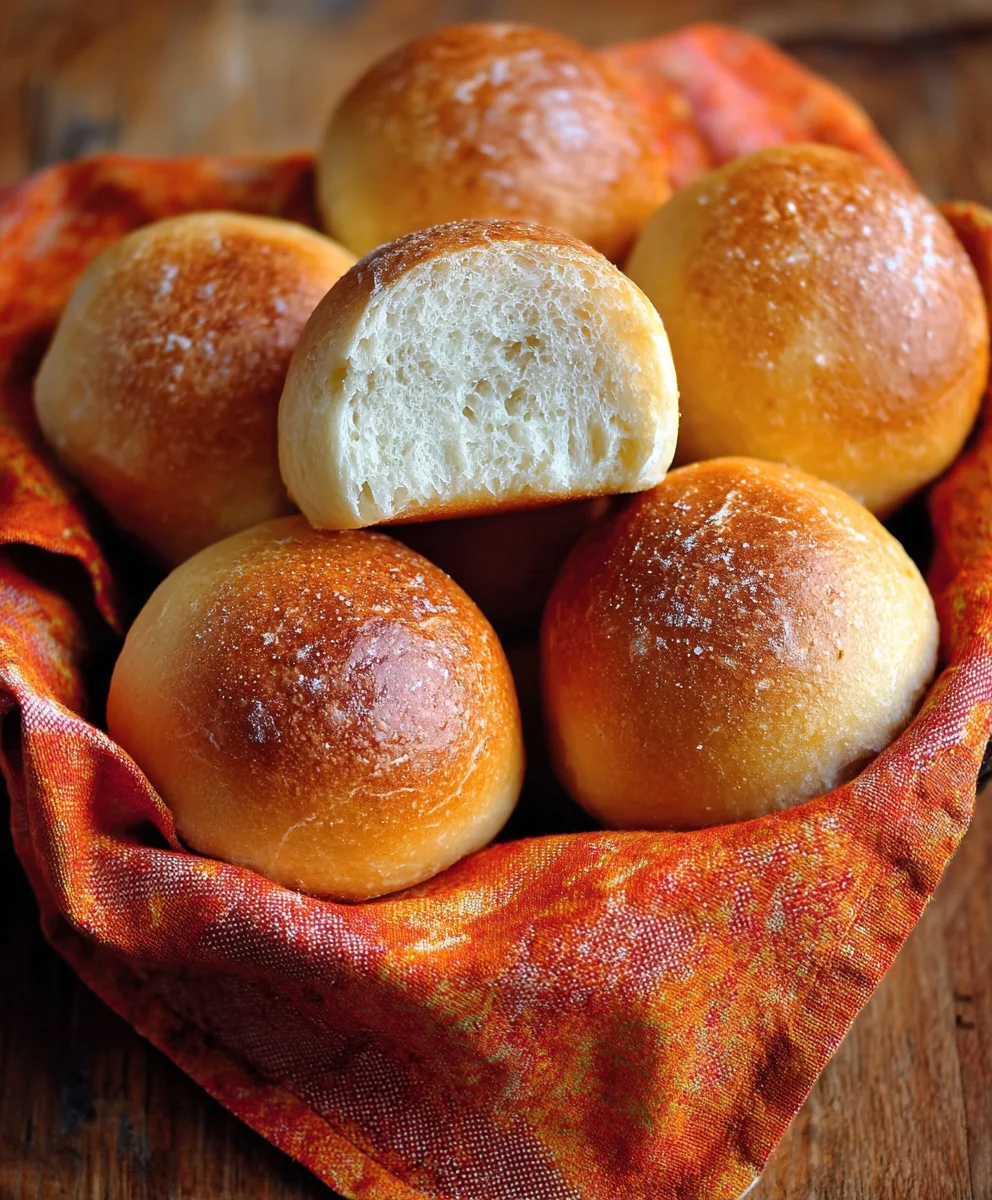
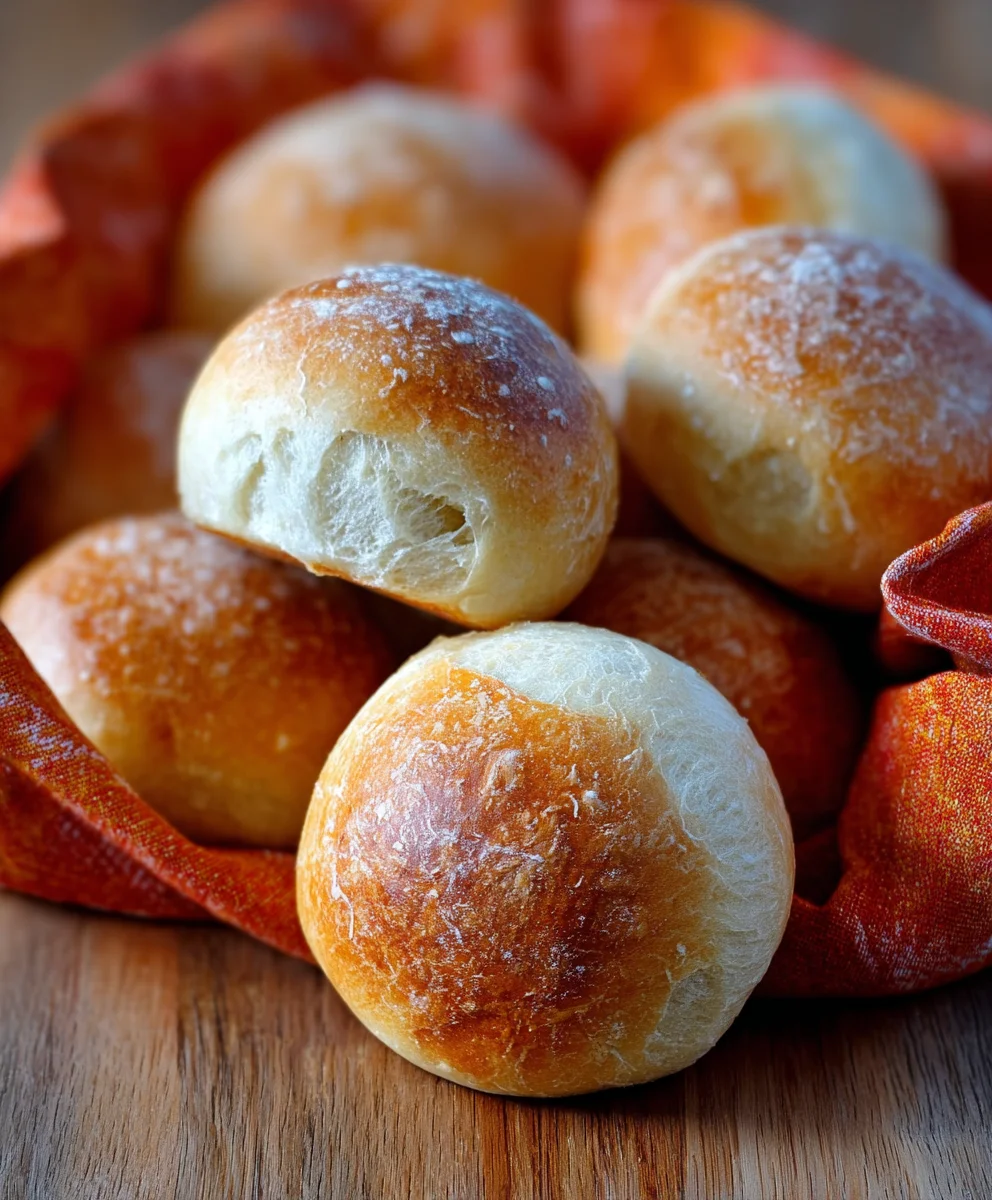
French Bread Dinner Rolls are more than just a side dish; they are a culinary embrace, a promise of comfort, and a testament to the simple joy of perfectly baked bread. Imagin extracte sinking your teeth into a warm, impossibly soft roll, its crust crackling with a delicate crunch, giving way to a pillowy interior. It’s that magical contrast that makes these French Bread Dinner Rolls so utterly irresistible, a staple that transforms any meal from ordinary to extraordinary. Whether you’re hosting a grand holiday feast or simply looking to elevate a weeknight dinner, the aroma alone of these fresh-baked delights will have everyone gathering around the table with eager anticnon-alcoholic ipation. What truly sets these apart is their versatility and the incredibly rewarding process of creating them from scratch, a labor of love that yields unparalleled flavor and texture.

Ingredients:
- 1 cup Warm Water (ideally between 105-110°F or 40-43°C)
- 1 teaspoon Active Dry Yeast
- 1/2 teaspoon Honey
- 2 1/4 cups All-Purpose Flour, plus more for dusting
- 1 teaspoon Salt
- 2 tablespoons Unsalted Butter, melted, for brushing
- Flaky Sea Salt, for sprinkling (optional)
Preparing the Dough
Activating the Yeast
The journey to perfect French Bread Dinner Rolls begin extracts with the yeast. In a medium-sized mixing bowl, combine the warm water, active dry yeast, and honey. Give it a gentle stir to ensure the honey is dissolved. The warmth of the water is crucial here; it needs to be warm enough to awaken the yeast but not so hot that it kills it. Aim for a temperature just below what you can comfortably touch with your finger. Let this mixture sit undisturbed for about 5 to 10 minutes. You’ll know the yeast is active and ready to go when it becomes frothy and bubbly on the surface, resembling a small, living foam. This indicates that the yeast is alive and feasting on the honey, preparing to work its magic on the dough. If you don’t see this foamy action, your yeast might be old, or the water was too hot or too cold, and you’ll need to start this step again with fresh ingredients.
Mixing the Dough Ingredients
Once your yeast mixture is happily bubbly, it’s time to add the other core components. To the yeasty liquid, add the all-purpose flour and the salt. I like to use a sturdy spoon or a dough whisk at this stage to bring everything together. Mix until a shaggy gin extractgh begins to form. Don’t worry if it looks a bit rough and unorganized at this point; that’s perfectly normal. The goal is just to incorporate all the dry ingredients into the wet.
Kneading the Dough
Now comes the satisfying part: kneading. Lightly dust a clean work surface with a little all-purpose flour. Turn the shaggy dough out onto the flogin extractd surface. Begin kneading by pushing the dough away from you with the heels of your hands, then folding it back over itself. Rotate the dough a quarter turn and repeat. You’ll want to knead for about 8 to 10 minutes. This process develops the gluten in the flour, which gives the bread its structure and chew. The dough will start out sticky and a bit unruly, but as you continue kneading, it will transform into a smooth, elastic ball. It should feel pliable and spring back slightly when you poke it. If the dough becomes too sticky, add just a tiny bit more flour, a teaspoon at a time, to prevent it from sticking to your hands or the surface. Conversely, if it feels too dry, you can dampen your hands slightly with water.
First Rise
Proofing the Dough
Once your dough is beautifully smooth and elastic, it’s time for its first rise. Lightly grease a clean bowl with a little bit of oil or cooking spray. Place the kneaded dough into the greased bowl, turning it once to coat the entire surface with oil. This prevents a dry skin from forming. Cover the bowl tightly with plastic wrap or a clean kitchen towel. Find a warm, draft-free spot in your kitchen for the dough to rest and rise. This could be on top of your refrigerator, in a slightly warmed (but turned off) oven, or simply on your counter if your kitchen is naturally warm. Allow the dough to rise for about 1 to 1.5 hours, or until it has doubled in size. The exact time can vary depending on the temperature of your environment.
Shaping and Second Rise
Shaping the Rolls
After the dough has doubled in size, gently punch it down to release the air that has accumulated. Turn the dough out onto your lightly floured work surface again. For classic dinner rolls, divide the dough into 8 equal portions. You can do this by eye, or for precision, weigh the dough and divide its weight by 8. Roll each portion into a smooth ball. You can then shape them into more elongated rolls if you prefer, reminiscent of mini French baguettes, or simply leave them as round balls for a more traditional roll shape. Arrange the shaped rolls on a baking sheet lined with parchment paper, leaving a little space between each one to allow for expansion during their final rise and baking.
Second Rise (Proofing)
Once your rolls are shaped and on the baking sheet, cover them loosely with plastic wrap or a kitchen towel. Let them rest and rise again for another 30 to 45 minutes, or until they appear noticeably puffy and have nearly doubled in volume. During this second rise, preheat your oven to 375°F (190°C). This resting period allows the gluten to relax further, resulting in a lighter and airier texture in the finished rolls.
Baking the French Bread Dinner Rolls
Baking and Finishing
When the rolls are puffed and the oven is preheated, it’s time for the final stage. Uncover the rolls. For a beautiful, golden-brown crust, brush the tops of the rolls with the melted unsalted butter. If you like, you can also sprinkle a little flaky sea salt over the tops for an extra touch of flavor and visual appeal, especially if you’re aiming for that authentic French bread experience. Place the baking sheet in the preheated oven. Bake for 15 to 20 minutes, or until the rolls are golden brown and sound hollow when tapped on the bottom. The exact baking time will depend on your oven, so keep an eye on them. Once baked to perfection, remove the rolls from the oven and immediately brush them again with a little bit of the remaining melted butter. This adds an extra sheen and a wonderful richness. Transfer the rolls to a wire rack to cool slightly before serving. They are best enjoyed warm, allowing you to fully appreciate their soft, pillowy interior and subtly crisp crust.
Conclusion:
There you have it! Crafting these delightful French Bread Dinner Rolls from scratch is a rewarding experience, and the aroma that fills your kitchen as they bake is simply irresistible. These rolls are wonderfully versatile, offering a soft interior with a perfectly crisp crust that makes them an ideal accompaniment to any meal. Whether you’re hosting a formal dinner party or enjoying a casual family gathering, these French Bread Dinner Rolls are sure to impress.
For serving suggestions, consider pairing them with a hearty stew, a rich pasta dish, or even just slathered with butter. They also make fantastic sandwich buns for a gourmet burger or pulled beef. If you’re looking for variations, feel free to knead in some fresh herbs like rosemary or thyme, or a sprinkle of garlic powder for an extra savory kick. A touch of Parmesan cheese mixed into the dough is also a delicious option.
Don’t be intimidated by the process; with a little patience and practice, you’ll be baking these beautiful French Bread Dinner Rolls like a pro in no time. Enjoy the journey and, most importantly, savor every bite!
Frequently Asked Questions:
Can I make these French Bread Dinner Rolls ahead of time?
Yes, you absolutely can! You can bake the rolls and let them cool completely, then store them in an airtight container at room temperature for up to two days. For longer storage, freeze them in a single layer on a baking sheet until solid, then transfer them to a freezer-safe bag. Reheat them in the oven at 350°F (175°C) for about 10-15 minutes until warmed through.
What if my dough isn’t rising well?
Several factors can affect dough rise. Ensure your yeast is fresh and hasn’t expired. Warmth is crucial for yeast activation; the liquid you use should be lukewarm, around 105-115°F (40-46°C). Also, make sure your kitchen is warm enough. Drafty or cold environments can hinder rising. If you’ve followed these steps and still have issues, your yeast might be inactive, and you may need to start again with fresh yeast.
Easy French Bread Dinner Rolls
Soft and delicious homemade French bread dinner rolls that are perfect for any meal.
Ingredients
-
1 cup Warm Water (Under 110 Degrees Fahrenheit)
-
1 teaspoon Active Dry Yeast
-
1/2 teaspoon Honey
-
2 1/4 cups All-Purpose Flour
-
1 teaspoon Salt
-
2 tablespoons Unsalted Butter, melted, for brushing
-
Flaky Sea Salt, for sprinkling (optional)
Instructions
-
Step 1
In a medium bowl, combine warm water, active dry yeast, and honey. Let sit for 5-10 minutes until frothy. -
Step 2
Add all-purpose flour and salt to the yeast mixture. Mix until a shaggy dough forms. -
Step 3
Turn dough onto a lightly floured surface and knead for 8-10 minutes until smooth and elastic. -
Step 4
Place dough in a greased bowl, cover, and let rise in a warm place for 1 to 1.5 hours, or until doubled in size. -
Step 5
Punch down dough, divide into 8 equal portions, and shape into balls or elongated rolls. Arrange on a baking sheet. -
Step 6
Cover rolls loosely and let rise for another 30-45 minutes until puffy. Preheat oven to 375°F (190°C). -
Step 7
Brush tops with melted butter and sprinkle with flaky sea salt (optional). Bake for 15-20 minutes until golden brown. -
Step 8
Remove from oven and immediately brush again with melted butter. Cool slightly on a wire rack before serving.
Important Information
Nutrition Facts (Per Serving)
It is important to consider this information as approximate and not to use it as definitive health advice.
Allergy Information
Please check ingredients for potential allergens and consult a health professional if in doubt.


Leave a Comment