

Strawberry Crunch Rice Krispie Treats are an absolute game-changer for any dessert lover. If you’re anything like me, you probably have a soft spot for the nostalgic, chewy goodness of classic Rice Krispie treats. They’re a childhood favorite for a reason – that perfect balance of sweet, gooey, and crunchy is simply irresistible. But what if I told you we could elevate that beloved treat into something even more extraordinary? That’s where the magic of strawberry crunch comes in. Imagin extracte the familiar comfort of your favorite Krispie squares infused with the bright, delightful flavor of strawberries, all topped with an extra layer of irresistible texture. These aren’t just any ordinary treats; they’re a celebration of flavor and fun, bringin extractg a vibrant twist to a timeless classic that’s sure to become your new go-to indulgence.
Get Ready for a Berry Delicious Upgrade!
You’re going to LOVE these.

Strawberry Crunch Rice Krispie Treats
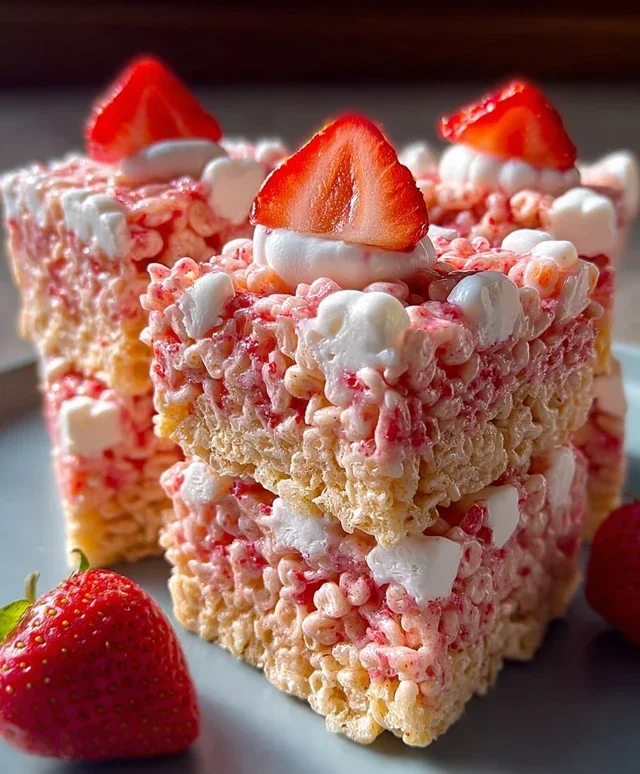
Get ready to elevate your classic Rice Krispie Treat game with these vibrant and utterly delicious Strawberry Crunch Rice Krispie Treats! We’re taking the nostalgic comfort of a familiar favorite and infusing it with the sweet, delightful essence of strawberries and the irresistible crunch of Golden Oreos. These treats are incredibly easy to make, perfect for parties, after-school snacks, or just because you deserve a little extra sweetness in your day. The combination of the chewy, marshmallowy base with the fruity burst of strawberry and the buttery, cookie-like crunch is simply divine.
Ingredients:
Crafting Your Strawberry Crunch Masterpieces
Let’s dive into creating these delightful treats. The process is straightforward, but paying attention to a few key details will ensure you get the perfect chewy texture and vibrant flavor.
Step 1: Prepare Your Pan and Melt the Foundation
The first step in any great treat-making endeavor is to get your workspace ready. Lightly grease a 9×13 inch baking pan with butter or cooking spray. This is crucial for preventing your sticky creations from adhering to the pan, ensuring easy removal later. Now, in a large, microwave-safe bowl or a heavy-bottomed saucepan over low heat, combine the 4 tablespoons of unsalted butter and the entire bag of mini marshmallows. If you’re using a microwave, heat in 30-second intervals, stirring well after each, until the marshmallows are mostly melted and smooth. If using the stovetop, stir constantly over low heat until everything is gloriously melted and smooth. The key here is low and slow; we don’t want to scorch the marshmallows. Once melted, stir in the 1 teaspoon of vanilla extract. This will add a lovely depth of flavor to our base.
Step 2: Infuse with Strawberry Flavor and Cereal Goodness
Once your marshmallow mixture is smooth and fragrant, it’s time to add the star flavors. Gently stir in the 3 tablespoons of strawberry Jell-O powder. Mix until it’s completely incorporated and the marshmallow mixture takes on a beautiful pink hue. This is where the magic really starts to happen, infusing that unmistakable strawberry essence throughout. Now, immediately add the 6 cups of strawberry-flavored Rice Krispies cereal (or your regular Rice Krispies if you prefer a less intense strawberry flavor, though I highly recommend the strawberry-flavored ones for maximum impact). Using a sturdy spatula or wooden spoon, carefully fold the cereal into the marshmallow mixture. You want to coat every single piece of cereal without crushing it too much. Work quickly but gently, as the marshmallows will begin extract to set as they cool. If you’re using regular Rice Krispies and want a stronger strawberry flavor, you could potentially add another tablespoon of Jell-O powder, but be cautious as too much can make the mixture dry.
Step 3: The Crucial Crunch Element
This is where our Strawberry Crunch Rice Krispie Treats get their name and an extra layer of irresistible texture and flavor. In a separate small bowl, combine the 10 crushed Golden Oreos with the 3 tablespoons of melted butter. You can crush your Oreos by placing them in a zip-top bag and giving them a good whack with a rolling pin, or by pulsing them in a food processor until you have fine crum extractbs with some slightly larger pieces for texture. Mix the melted butter into the Oreo crum extractbs until they are evenly moistened and resemble wet sand. This buttery Oreo mixture is our secret weapon for that delightful crunch.
Step 4: Assembling the Layers
Now it’s time to bring everything together. Press about two-thirds of the strawberry Rice Krispie mixture into your prepared 9×13 inch pan. Use the back of your greased spatula or lightly greased hands to press the mixture evenly into the bottom of the pan. Don’t press too hard, or your treats might become dense. You want them to be chewy, not hard. Next, evenly sprinkle the buttery Oreo crunch mixture over this base layer. Try to distribute it as uniformly as possible to get crunch in every bite. Finally, gently press the remaining one-third of the strawberry Rice Krispie mixture on top of the Oreo layer. Again, a light touch is key here. You’re essentially creating a layered effect, with the Oreo crunch nestled between two layers of strawberry goodness.
Step 5: Setting and Slicing for Sweet Success
Once everything is assembled, allow your Strawberry Crunch Rice Krispie Treats to sit at room temperature for at least 30 minutes to an hour to set. This will give them enough time to firm up so you can slice them cleanly. Resist the urge to slice them too early, or they might fall apart. After they’ve set, use a sharp knife to cut them into squares or rectangles. For an extra touch of elegance (and to prevent sticking), you can lightly grease your knife with butter or cooking spray before slicing. If you’re feeling adventurous, you could even cut them into fun shapes with cookie cutters once they’ve set. Serve immediately and watch them disappear! These treats are best enjoyed fresh, but can be stored in an airtight container at room temperature for up to 3 days. Enjoy every delightful, chewy, and crunchy bite!
Conclusion:
There you have it – the ultimate guide to crafting these delightful Strawberry Crunch Rice Krispie Treats! I truly believe this recipe is a winner because it takes a beloved classic and elevates it with a burst of sweet strawberry flavor and an irresistible crunchy texture. The vibrant pink hue makes them instantly appealing, and they’re surprisingly simple to whip up, making them perfect for any occasion. Whether you’re a seasoned baker or just starting out, these treats are incredibly forgiving and always a crowd-pleaser. Imagin extracte the joy on faces as they bite into that perfect balance of chewy, crispy, and fruity goodness – it’s truly a nostalgic treat with a delightful twist.
For serving, these Strawberry Crunch Rice Krispie Treats are fantastic on their own, but consider cutting them into fun shapes for parties or presenting them on a dessert platter alongside other sweet confections. They also make a wonderful addition to a picnic basket or a fun after-school snack. Don’t be afraid to get creative with variations! You could try adding a swirl of white chocolate drizzle for extra decadence, or perhaps a few freeze-dried strawberry pieces mixed into the cereal for an even more intense berry flavor. I wholeheartedly encourage you to give this recipe a try; I’m confident you’ll love making and, of course, eating them!
Frequently Asked Questions:
Can I make these treats ahead of time?
Absolutely! These Strawberry Crunch Rice Krispie Treats can be made one to two days in advance. Store them in an airtight container at room temperature, ensuring they are completely cooled to prevent them from becoming soggy. They might lose a tiny bit of their initial crispness over time, but they’ll still be delicious.
How do I get the strawberry flavor without making them too wet?
The key is using freeze-dried strawberries. When you crush them, they absorb moisture and become a flavorful powder that integrates beautifully with the butter and marshmallows. Using fresh or pureed strawberries can introduce too much liquid, leading to a less chewy and potentially soggy treat.
Can I substitute the Rice Krispies cereal?
While Rice Krispies are ideal for that signature crunch, you could experiment with other crispy puffed rice cereals. Be aware that the texture might vary slightly. Avoid cereals that are heavily sweetened or have other coatings, as this could alter the overall flavor profile of your Strawberry Crunch Rice Krispie Treats.
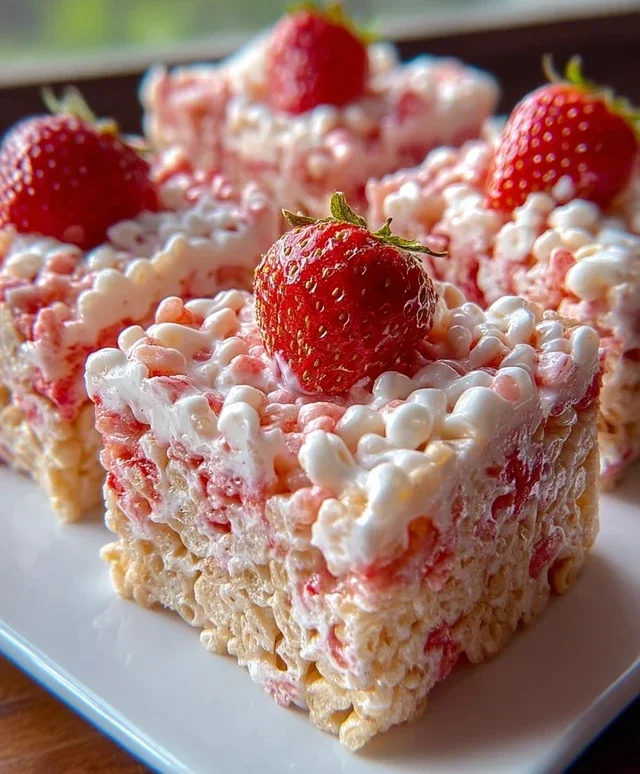
Strawberry Crunch Rice Krispie Treats
A delightful twist on classic Rice Krispie treats, featuring a vibrant strawberry flavor and a crunchy topping.
Ingredients
-
6 cups strawberry-flavored Rice Krispies cereal (or regular Rice Krispies)
-
1 (10 oz) bag mini marshmallows
-
4 tbsp (60g) unsalted butter
-
1 tsp vanilla extract
-
10 Golden Oreos, crushed
-
3 tbsp strawberry Jell-O powder
-
3 tbsp melted butter
Instructions
-
Step 1
Butter a 9×13 inch pan or line with parchment paper. -
Step 2
In a large saucepan, melt 4 tbsp of butter over low heat. Add the mini marshmallows and stir until completely melted and smooth. -
Step 3
Remove from heat. Stir in the vanilla extract and strawberry Jell-O powder until well combined and the mixture turns pink. -
Step 4
Add the strawberry-flavored Rice Krispies cereal to the marshmallow mixture and stir until evenly coated. -
Step 5
Gently press the mixture into the prepared pan. Sprinkle the crushed Golden Oreos evenly over the top. Drizzle the 3 tbsp melted butter over the crushed Oreos. -
Step 6
Press the Oreo topping down gently to help it adhere. Let the treats cool completely before cutting into squares.
Important Information
Nutrition Facts (Per Serving)
It is important to consider this information as approximate and not to use it as definitive health advice.
Allergy Information
Please check ingredients for potential allergens and consult a health professional if in doubt.
Leave a Comment