

Salted brownie cookies are the ultimate indulgence, a symphony of rich chocolate and a hint of sea salt that elevates the humble cookie to new heights. Forget those flat, lifeless cookies; we’re talking about a chewy, fudgy interior that practically melts in your mouth, all encased in a perfectly baked edge. It’s no wonder these salted brownie cookies have become an absolute obsession for so many. They capture the essence of that decadent brownie experience but in a portable, shareable, and dare I say, even more delightful format.
What Makes Them So Irresistible?
The magic lies in the duality: the intense cocoa flavor, reminiscent of your favorite brownie batter, is perfectly balanced by the subtle crunch and savory pop of flaky sea salt. This isn’t just a cookie; it’s an experience. Each bite is a delightful tug-of-war between sweet and salty, soft and slightly crisp. They’re the perfect treat for a cozy afternoon with a cup of coffee or tea, a show-stopping addition to any dessert table, or simply a way to treat yourself after a long day. Prepare to fall head over heels for these salted brownie cookies!

Salted Brownie Cookies
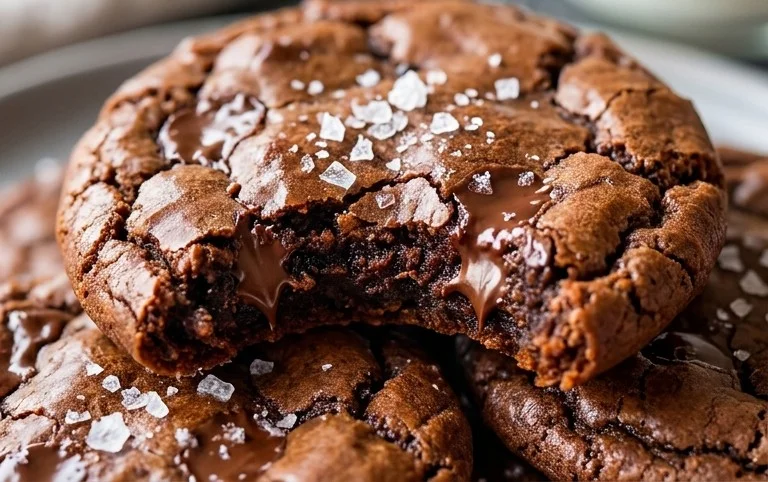
Get ready to embark on a baking adventure that will result in the most decadent, chewy, and intensely chocolatey cookies you’ve ever tasted. These Salted Brownie Cookies are not your average cookie. They’re a perfect hybrid, boasting the rich, fudgy interior of a brownie with the delightful chew and crisp edges of a perfectly baked cookie. The touch of sea salt on top elevates the chocolate flavor to celestial heights, creating an irresistible sweet and salty symphony in every bite. Whether you’re a seasoned baker or just starting out, this recipe is designed to deliver sensational results. We’re going to dive deep into the magic that happens when brownie batter meets cookie form, and trust me, it’s a beautiful thing. The key to these cookies lies in their texture and their deep, dark chocolate flavor. We’ll be melting chocolate and butter together to create that signature brownie richness, and then folding in just enough flour to give them structure without sacrificing that essential chegrape juicess. The optional espresso powder is a secret weapon that intensifies the chocolate flavor without adding any coffee taste, so don’t shy away from it if you have it on hand!
Ingredients:
Instructions:
Melted Chocolate Base
First things first, let’s get our chocolate base going. In a medium, heatproof bowl, combine the 6 tablespoons of unsalted butter and 1 cup of semi-sweet chocolate chips. You can do this either in a microwave or over a double boiler. If microwaving, heat in 30-second intervals, stirring well after each, until the butter is melted and the chocolate is smooth and completely melted. Be patient; you don’t want to scorch the chocolate. Over a double boiler, place the bowl over a saucepan of simmering water (making sure the bottom of the bowl doesn’t touch the water). Stir frequently until everything is melted and smooth. Once melted, remove from heat and let it cool slightly for about 5-10 minutes. This cooling period is important to prevent the hot chocolate from cooking our eggs when we add them later. While the chocolate is cooling, whisk together your dry ingredients in a separate medium bowl: the 1 cup of all-purpose flour, 1 teaspoon of baking powder, and 1/8 teaspoon of salt. This ensures the leavening agent and salt are evenly distributed throughout the flour. If you’re using the optional espresso powder, whisk it in with the dry ingredients now.
Building the Brownie Batter
Now, let’s bring our wet ingredients together. In a large bowl, whisk together the 2 large eggs (at room temperature, which helps them emulsify better) and the 1 large egg yolk (also at room temperature). Add the 1 cup of granulated sugar and 1 tablespoon of vegetable oil. Whisk vigorously until the mixture is pnon-alcoholic ale and slightly thickened, which should take about 1-2 minutes. The vegetable oil contributes to the chegrape juicess and moistness of the cookie. Then, stir in the 1 teaspoon of vanilla extract. Once your melted chocolate mixture has cooled slightly, gently whisk it into the egg and sugar mixture. Continue whisking until everything is well combined and you have a glossy, unified batter that smells absolutely divine. This is where the brownie magic really starts to take shape!
Combining Wet and Dry
It’s time to bring our dry and wet components together. Gradually add the dry ingredients (flour, baking powder, salt, and optional espresso powder) to the wet chocolate mixture. Using a spatula or wooden spoon, fold the dry ingredients into the wet until just combined. Be careful not to overmix here. Overmixing can develop the gluten in the flour too much, leading to tougher cookies. We’re looking for a thick, fudgy batter that resembles brownie batter. You should still see a few streaks of flour; that’s perfectly fine. The residual mixing will take care of those. If your batter seems a little too thick, you can add another teaspoon of vegetable oil or a splash of milk, but usually, it’s just right.
Chilling and Scooping
For the best texture and to prevent excessive spreading, it’s highly recommended to chill the dough. Cover the bowl tightly with plastic wrap and refrigerate for at least 30 minutes, or up to 24 hours. Chilling allows the flour to hydrate and the fat to firm up, resulting in a thicker, chewier cookie with more concentrated flavor. Once chilled, preheat your oven to 350°F (175°C) and line baking sheets with parchment paper. Parchment paper is your best friend for easy cleanup and preventing cookies from sticking. Use a cookie scoop or two spoons to drop rounded balls of dough onto the prepared baking sheets, leaving about 2 inches between each cookie to allow for spreading. For that extra chocolatey punch and a more brownie-like appearance, gently press a few extra semi-sweet chocolate chips onto the tops of each cookie dough ball before baking.
Baking and Finishing Touches
Bake the cookies for 10-13 minutes, or until the edges are set and slightly golden brown, but the centers still look a little soft and underbaked. They will continue to cook on the baking sheet as they cool. This slightly underbaked center is crucial for achieving that coveted chewy, fudgy brownie texture. Once baked, remove the baking sheets from the oven and let the cookies cool on the sheets for about 5 minutes. This resting period is essential for them to firm up properly. After they’ve rested on the sheet, carefully transfer them to a wire rack to cool completely. While the cookies are still warm from the oven, this is the perfect time to sprinkle them with sea salt flakes, if you’re using them. The warmth of the cookie will help the salt adhere, and the contrast of the salty crystals with the warm, rich chocolate is simply divine. These Salted Brownie Cookies are best enjoyed at room temperature or slightly warm, but they also keep well in an airtight container for several days. Enjoy every decadent bite!
Conclusion:
You’ve reached the end of our guide to creating the most incredible Salted Brownie Cookies! These little discs of pure decadence are truly a game-changer. They perfectly balance the rich, fudgy depth of a brownie with the delightful chegrape juicess and crisp edges of a cookie, all elevated by that hint of flaky sea salt. Whether you’re a seasoned baker or just starting out, this recipe is surprisingly approachable and delivers professional-level results. The secret lies in the careful balance of ingredients and a touch of patience, which are undeniably worth it for the payoff.
Serving these Salted Brownie Cookies is a joy. They are absolutely divine served warm from the oven, allowing the chocolate to be molten and gooey. Pair them with a cold glass of milk for a classic treat, or elevate your dessert game by serving them alongside a scoop of vanilla bean ice cream or a dollop of whipped cream. For a more sophisticated touch, consider a dusting of cocoa powder or a drizzle of extra melted chocolate.
Don’t be afraid to experiment! You can easily add in your favorite mix-ins like chopped nuts (walnuts or pecans are fantastic), a handful of mini chocolate chips for extra chocolatey goodness, or even a swirl of caramel. For a festive twist, try adding some peppermint extract or a sprinkle of red and green M&Ms during the holidays. I truly encourage you to give these Salted Brownie Cookies a try; I promise you won’t be disappointed. They are destined to become a new favorite in your baking repertoire.
Frequently Asked Questions:
Can I make these cookies ahead of time?
Absolutely! Salted Brownie Cookies store wonderfully. Once completely cooled, keep them in an airtight container at room temperature for up to 3-4 days. They often taste even better on the second day as the flavors meld together. You can also freeze the baked cookies or the unbaked dough balls for longer storage.
My cookies spread too much. What went wrong?
Several factors can contribute to excessive spreading. Ensure your butter wasn’t too soft or melted when creaming it with the sugar. Also, chilling the dough for at least 30 minutes before baking can significantly help prevent spreading. Make sure your oven temperature is accurate; an oven thermometer is a great investment to check this.
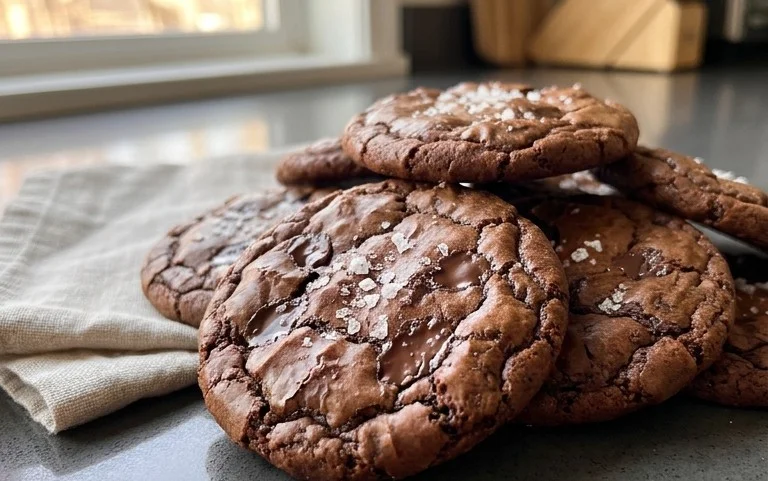
Salted Brownie Cookies
Chewy and rich brownie cookies with a hint of salt and a decadent chocolate flavor.
Ingredients
-
1 cup All-Purpose Flour
-
1 tsp Baking Powder
-
1/8 tsp Salt
-
2 Large Eggs (room temperature)
-
1 Large Egg Yolk (room temperature)
-
1 cup Granulated Sugar
-
1 tbsp Vegetable Oil
-
1 tsp Vanilla Extract
-
6 tbsp Unsalted Butter
-
1 cup Semi-Sweet Chocolate Chips (plus some for topping cookies)
-
1/4 cup Unsweetened Cocoa Powder
-
1 tsp Espresso Powder (optional)
-
Sea Salt Flakes (for topping cookies (optional garnish))
Instructions
-
Step 1
In a medium bowl, whisk together the all-purpose flour, baking powder, and 1/8 tsp salt. Set aside. -
Step 2
In a large bowl, whisk together the granulated sugar, vegetable oil, and vanilla extract. Then, whisk in the 2 large eggs and 1 large egg yolk until well combined. -
Step 3
Melt the unsalted butter in a microwave-safe bowl. Stir in the unsweetened cocoa powder and espresso powder (if using) until smooth. Add this mixture to the wet ingredients and whisk until fully incorporated. -
Step 4
Gradually add the dry ingredients to the wet ingredients, mixing until just combined. Fold in 1 cup of semi-sweet chocolate chips. -
Step 5
Preheat your oven to 350°F (175°C). Line baking sheets with parchment paper. -
Step 6
Drop rounded tablespoons of dough onto the prepared baking sheets, about 2 inches apart. Press a few extra chocolate chips on top of each cookie. Sprinkle with sea salt flakes if desired. -
Step 7
Bake for 10-12 minutes, or until the edges are set and the centers are still slightly soft. Allow the cookies to cool on the baking sheets for a few minutes before transferring them to a wire rack to cool completely.
Important Information
Nutrition Facts (Per Serving)
It is important to consider this information as approximate and not to use it as definitive health advice.
Allergy Information
Please check ingredients for potential allergens and consult a health professional if in doubt.


Leave a Comment