

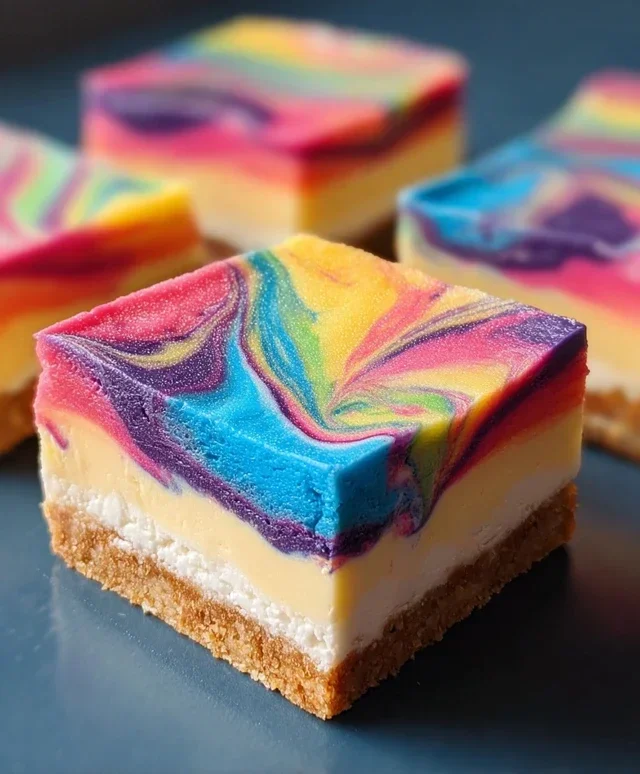
Rainbow Cheesecake Swirl Bars are about to become your new obsession, and for good reason! Who can resist the allure of vibrant, playful colors swirled through a creamy, decadent cheesecake base? These bars are more than just a dessert; they’re a visual masterpiece and a flavor explosion all rolled into one. We all love cheesecake for its rich, smooth texture and satisfying sweetness, but what makes these Rainbow Cheesecake Swirl Bars truly special is the magic that happens when you add those beautiful swirls of fruity, colorful goodness. Imagin extracte biting into that classic cheesecake flavor, only to be met with delightful bursts of strawberry, blueberry, lemon, and more. They’re perfect for parties, celebrations, or just when you need a little extra joy in your day. Get ready to dazzle your taste buds and your eyes!

Rainbow Cheesecake Swirl Bars
Get ready to unleash your inner artist and bake up a batch of these incredibly vibrant and delicious Rainbow Cheesecake Swirl Bars! These aren’t just any bars; they’re a delightful explosion of flavor and color, perfect for parties, potlucks, or just brightening up your own kitchen. The creamy, tangy cheesecake filling swirled through a buttery, tender cake base creates a truly irresistible treat that’s as fun to make as it is to eat. We’ll be using simple ingredients to create a stunning visual masterpiece that will have everyone asking for the recipe.
Ingredients:
Instructions:
1. Prepare the Cake Base: In a medium-sized bowl, combine the contents of the 1 box white cake mix. Add the 1/2 cup melted butter, 1 egg, and 2/3 cup milk. Mix everything together until just combined. Be careful not to overmix; a few lumps are perfectly fine. We want a tender cake, not a tough one! Once mixed, the batter will be quite thick. This is what we want as it will form a sturdy base for our cheesecake swirls.
2. Press the Cake Base into the Pan: Preheat your oven to 350°F (175°C). Line a 9×13 inch baking pan with parchment paper, leaving some overhang on the sides. This will make it super easy to lift the bars out once they’re baked. Spoon the cake batter into the prepared pan. Using your hands or the back of a spoon, press the batter evenly into the bottom of the pan to form a compact layer. This forms the foundation of our delicious bars. Make sure it’s as level as possible for even baking.
3. Create the Cheesecake Filling: In a separate large bowl, beat the 12 oz of softened cream cheese until it’s wonderfully smooth and creamy. This is crucial for a lump-free cheesecake filling. Scrape down the sides of the bowl as needed. Next, add the 1/3 cup sugar and the 1 egg to the cream cheese. Beat again until everything is well combined and the mixture is light and fluffy. Stir in the 1 teaspoon of vanilla extract for that classic cheesecake aroma and flavor.
4. Divide and Color the Cheesecake: Now for the fun, colorful part! Divide the cheesecake mixture into six equal portions in separate small bowls. You’ll want to have one bowl for each of your gel food colors: pink, orange, yellow, green, blue, and purple. Add a few drops of gel food coloring to each portion of cheesecake batter and stir until the color is evenly distributed. Gel food coloring is your friend here because it’s highly concentrated and won’t add extra liquid to your cheesecake, which could affect its texture. Start with a little and add more until you achieve your desired vibrant shades.
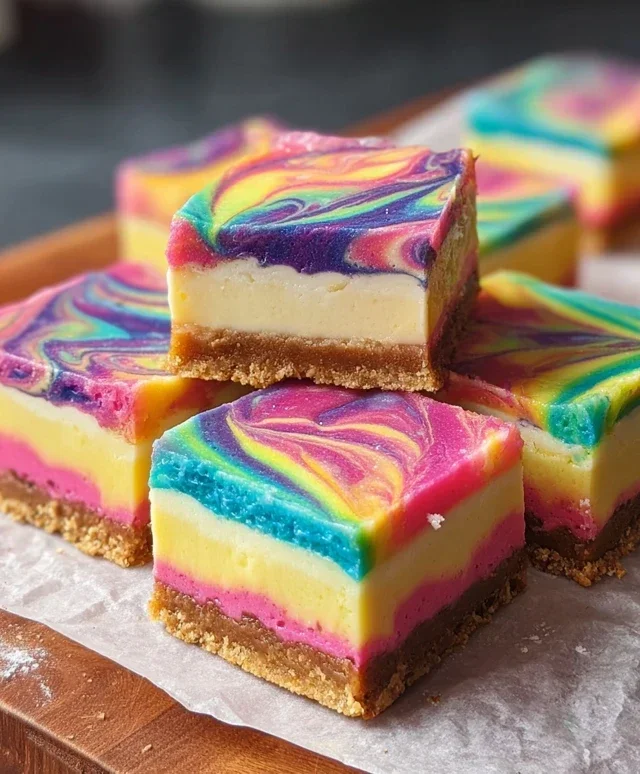
5. Assemble and Swirl the Rainbow: dollop spoonfuls of each colored cheesecake mixture randomly over the cake base in the baking pan. Don’t worry about making it perfect; the more random, the better for a beautiful swirled effect. Once all the colors are added, take a toothpick or a thin knife and gently swirl the colors together. Make figure-eight motions or zig-zag patterns through the cheesecake and cake batter. Be careful not to over-swirl, or the colors will blend too much and lose their distinctiveness. You want to see clear streaks of each color.
6. Bake and Chill: Carefully place the pan in the preheated oven. Bake for 25-30 minutes, or until the cheesecake is set around the edges and a toothpick inserted into the center comes out mostly clean (a few moist crum extractbs are okay, but no wet batter). The cake base should be golden brown. Once baked, remove the pan from the oven and let the bars cool completely on a wire rack. This is a very important step for the cheesecake to fully set.
7. Chill and Slice: After the bars have cooled to room temperature, cover the pan tightly with plastic wrap and refrigerate for at least 2-3 hours, or preferably overnight. This chilling time is essential for the cheesecake to firm up properly, allowing for clean slices. Once thoroughly chilled, use the parchment paper overhang to lift the entire block out of the pan. Place it on a cutting board and slice into bars using a sharp knife. For extra clean cuts, wipe the knife clean between each slice.
Enjoy these stunning Rainbow Cheesecake Swirl Bars! They’re a guaranteed crowd-pleaser and a delightful way to add a splash of color and joy to any occasion.
Conclusion:
So there you have it – a delightful recipe for Rainbow Cheesecake Swirl Bars that are as beautiful as they are delicious! I truly believe this recipe is a winner because it strikes the perfect balance between classic cheesecake comfort and a playful, vibrant presentation. The creamy, tangy cheesecake filling, swirled with colorful fruit purees, creates a stunning visual and a burst of fresh flavor in every bite. These bars are incredibly versatile, making them ideal for birthdays, holidays, potlucks, or simply as a special treat to brighten your day. I encourage you to give these Rainbow Cheesecake Swirl Bars a try; you won’t be disappointed by their impressive look and irresistible taste!
For serving, I love presenting these chilled and cut into neat squares. They pair wonderfully with a dollop of fresh whipped cream or a scattering of fresh berries. If you’re feeling adventurous, consider experimenting with different fruit combinations for your swirls – think mango and raspberry, or kiwi and blueberry for a unique flavor profile. Don’t be afraid to get creative with your colors too! Remember, the magic of these Rainbow Cheesecake Swirl Bars lies in their adaptable nature and the joy they bring to both the baker and the eater.
Frequently Asked Questions:
Can I make these bars ahead of time?
Absolutely! These Rainbow Cheesecake Swirl Bars are perfect for making ahead. I usually prepare them a day in advance, allowing them to chill thoroughly in the refrigerator. This ensures they set up beautifully and the flavors meld together even more. They can be stored, covered, in the fridge for up to 3-4 days.
What if I don’t have fresh fruit?
No problem at all! You can easily substitute with good quality frozen fruit. Simply thaw it, drain any excess liquid, and then puree it as per the recipe instructions. Jams or fruit preserves also work as an alternative for a more concentrated flavor and vibrant color, though you might want to adjust the sweetness slightly.
How do I get clean swirls?
Achieving those beautiful swirls takes a little practice but is quite simple. After pouring the plain cheesecake batter into the crust, dot spoonfuls of your colored fruit purees randomly over the top. Then, using a skewer or the tip of a knife, gently swirl the colors through the white batter. Don’t over-swirl, or the colors will become muddy. A few gentle passes are all you need for a stunning marbled effect.
Rainbow Cheesecake Swirl Bars
Vibrant and delicious rainbow cheesecake swirl bars made with a cake mix base, swirled with colorful cream cheese filling.
Ingredients
-
1 box white cake mix
-
1/2 cup melted butter
-
1 egg
-
2/3 cup milk, plus 9 extra teaspoons
-
Gel food colors: pink, orange, yellow, green, blue, and purple
-
12 oz cream cheese, softened
-
1/3 cup sugar
-
1 egg
-
1 teaspoon vanilla extract
Instructions
-
Step 1
Preheat oven to 350°F (175°C). Grease and flour a 9×13 inch baking pan. -
Step 2
In a bowl, combine white cake mix, melted butter, 1 egg, and 2/3 cup milk. Mix until just combined. Press half of the batter evenly into the prepared baking pan to form the crust. -
Step 3
In a separate bowl, beat cream cheese until smooth. Add sugar, the other egg, and vanilla extract. Beat until well combined. -
Step 4
Divide the cream cheese mixture into six small bowls. Add a different gel food color to each bowl and mix until evenly colored. Add 1 teaspoon of milk to each colored mixture and stir. -
Step 5
Dollop spoonfuls of each colored cream cheese mixture randomly over the cake mix crust. Use a knife or toothpick to gently swirl the colors together to create a marbled effect. -
Step 6
Spread the remaining cake batter evenly over the swirled cream cheese layer. -
Step 7
Bake for 30-35 minutes, or until the cake is golden brown and the cheesecake is set. Let cool completely before cutting into bars.
Important Information
Nutrition Facts (Per Serving)
It is important to consider this information as approximate and not to use it as definitive health advice.
Allergy Information
Please check ingredients for potential allergens and consult a health professional if in doubt.

Leave a Comment