

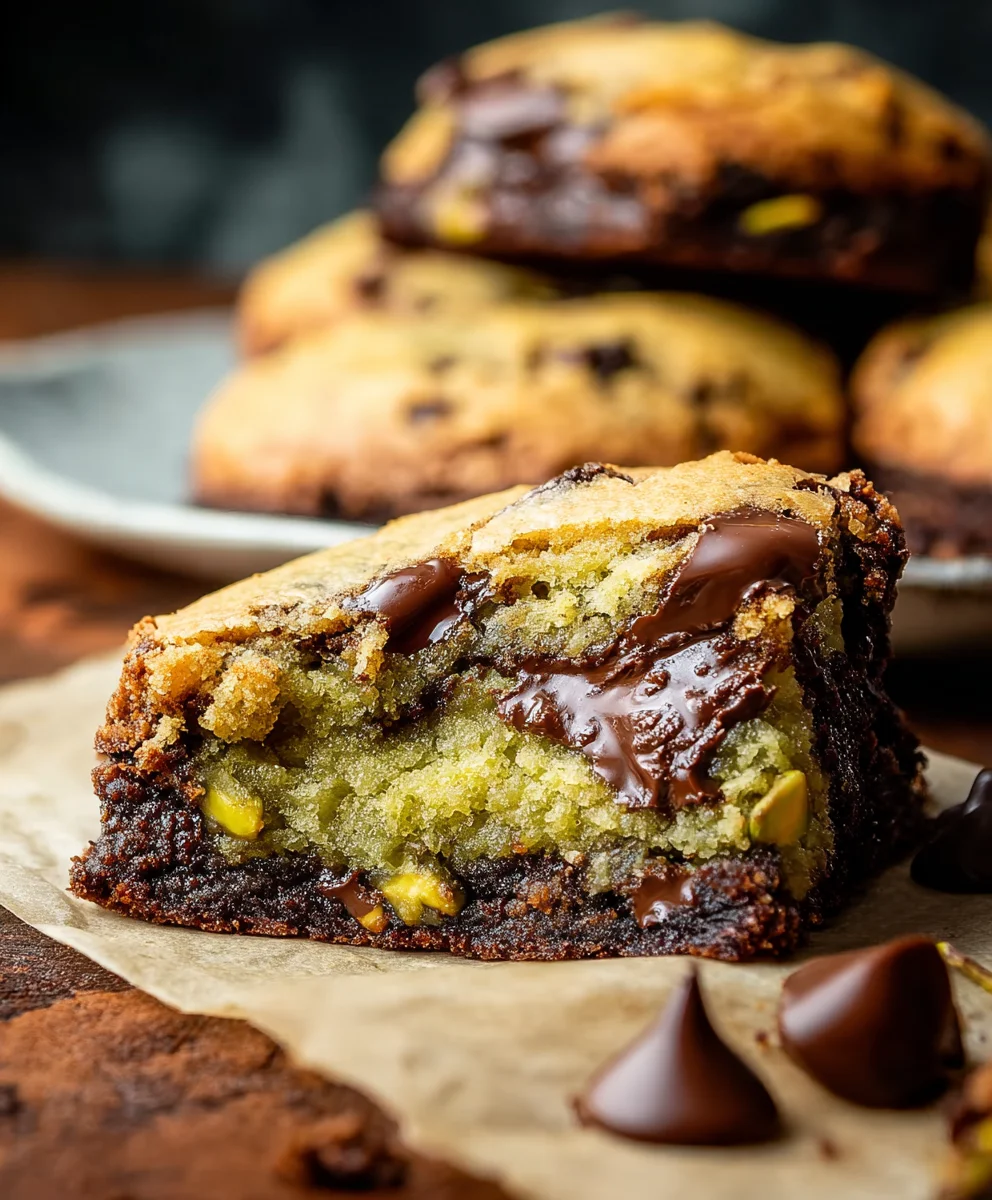
Pistachio Brookies are an absolute revelation for anyone who believes dessert perfection doesn’t exist. Imagin extracte the ultimate indulgence: the rich, fudgy depth of a brownie meeting the chewy, buttery heart of a perfectly baked cookie, all elevated by the vibrant, slightly sweet crunch of pistachios. It’s this incredible duality that makes Pistachio Brookies so utterly irresistible. We adore them because they banish the agonizing decision of whether to have a brownie or a cookie, offering the best of both worlds in a single, glorious bite. What truly sets this particular recipe apart is the carefully balanced flavor profile – the earthy, almost nutty notes of the pistachios are not just an afterthought but are woven into the very fabric of both the brownie and cookie layers, creating a harmonious symphony of taste and texture that will leave you craving more.
Prepare yourself for a dessert experience unlike any other!
Get ready to bake up a batch of pure bliss.

Ingredients:
- 1/4 cup unsalted butter, softened
- 3 tablespoons caster sugar (superfine sugar)
- 2 1/2 tablespoons light brown sugar, packed
- 1 large egg
- 1 teaspoon pure vanilla extract
- 2/3 cup all-purpose flour
- 1/4 teaspoon baking powder
- 1/4 teaspoon baking soda
- 1/4 teaspoon salt
- 1/4 cup dark chocolate chips
- 2/3 cup unsalted butter
- 2/3 cup dark chocolate (50-60% cocoa), chopped
- 1 1/3 cups all-purpose flour
- 1/3 cup unsweetened cocoa powder
- 3 large eggs
Pistachio Brookies: Crafting the Perfect Blend
This recipe guides you through creating the ultimate Pistachio Brookie, a decadent dessert that marries the rich chegrape juicess of a brownie with the delightful crisp of a cookie. We’ll be dividing the process into two distinct parts: first, preparing the cookie dough base, and then creating the fudgy brownie layer that will crown your brookies. Precision and a little bit of love will ensure a stunning result.
Cookie Dough Base Preparation
This initial phase focuses on building the foundation of our brookies – a classic, buttery cookie dough. It’s important to ensure your butter is softened but not melted, which allows it to cream properly with the sugars for the best texture.
- In a medium mixing bowl, cream together the 1/4 cup of softened unsalted butter, 3 tablespoons of caster sugar, and 2 1/2 tablespoons of packed light brown sugar. You can use an electric mixer on medium speed, or a sturdy whisk and some elbow grease. Beat until the mixture is light, fluffy, and pnon-alcoholic ale in color. This process incorporates air, which is crucial for a tender cookie.
- Add the 1 large egg and 1 teaspoon of pure vanilla extract to the creamed butter and sugar mixture. Continue to beat until everything is thoroughly combined and smooth. Scrape down the sides of the bowl occasionally to ensure all ingredients are incorporated evenly.
- In a separate small bowl, whisk together the 2/3 cup of all-purpose flour, 1/4 teaspoon of baking powder, 1/4 teaspoon of baking soda, and 1/4 teaspoon of salt. Whisking these dry ingredients together before adding them to the wet ingredients helps distribute the leavening agents and salt evenly, preventing pockets of bitterness or uneven rising.
- Gradually add the dry ingredients to the wet ingredients, mixing on low speed or stirring with a spatula until just combined. Be careful not to overmix at this stage; overmixing can develop the gluten in the flour, leading to tough cookies. Once the flour is mostly incorporated, gently fold in the 1/4 cup of dark chocolate chips. This dough will be quite thick. Press this cookie dough evenly into the bottom of a greased and floured 8×8 inch baking pan. This will form the base layer of your brookies.
Brownie Layer Creation and Assembly
Now, we move on to crafting the rich, chocolatey brownie layer that will sit atop our cookie base. Melting the chocolate and butter together creates a luxuriously smooth texture.
- In a heatproof bowl set over a saucepan of simmering water (a double boiler), melt together the 2/3 cup of unsalted butter and the 2/3 cup of chopped dark chocolate. Stir occasionally until the chocolate is completely melted and smooth. Once melted, remove the bowl from the heat and let it cool slightly. This gentle melting process prevents the chocolate from scorching.
- In a separate large bowl, whisk together the 1 1/3 cups of all-purpose flour and the 1/3 cup of unsweetened cocoa powder. This ensures the cocoa is evenly distributed throughout the brownie batter.
- In another bowl, whisk the 3 large eggs until lightly beaten. Gradually whisk the slightly cooled melted chocolate and butter mixture into the beaten eggs. Continue whisking until everything is well combined.
- Pour the wet chocolate mixture into the bowl with the dry ingredients (flour and cocoa powder). Stir with a spatula until just combined. Again, avoid overmixing. You should have a thick, fudgy brownie batter.
- Carefully spoon the brownie batter over the cookie dough base in the baking pan. Gently spread the brownie batter evenly to cover the entire surface of the cookie dough. You can use an offset spatula for a smooth finish.
Baking and Cooling Your Pistachio Brookies
The final steps involve baking the brookies to perfection and allowing them to cool, which is essential for achieving the desired texture and clean slicing.
- Preheat your oven to 350 degrees Fahrenheit (175 degrees Celsius). Place the baking pan with the brookies on the center rack of the preheated oven.
- Bake for approximately 25-35 minutes, or until a toothpick inserted into the center comes out with moist crum extractbs attached, but not wet batter. The edges should be set. Keep an eye on them as oven temperatures can vary. If the top of the brownies starts to look too dark before the inside is cooked, you can loosely tent the pan with aluminum foil.
- Once baked, remove the pan from the oven and place it on a wire rack to cool completely. This is a crucial step! Allowing the brookies to cool thoroughly, ideally for at least a couple of hours, will help them set properly, making them much easier to cut into clean, beautiful squares. Rushing this cooling process can result in a messy, gooey mess.
- Once cooled, cut the Pistachio Brookies into desired squares using a sharp knife. For the cleanest cuts, you can run your knife under hot water and wipe it dry between each cut. Enjoy these incredible treats!
Conclusion:
And there you have it – your guide to creating the ultimate Pistachio Brookies! We’ve walked through each step, from achieving that perfect brownie base to incorporating the delightful crunch and flavor of pistachios. These fudgy, chewy delights are more than just a dessert; they’re a celebration of textures and tastes, guaranteed to impress.
I truly hope you enjoy baking and, more importantly, devouring these wonderful Pistachio Brookies. They are fantastic served warm, perhaps with a scoop of vanilla ice cream for an extra decadent treat. For a simpler enjoyment, a glass of milk is the perfect accompaniment. Feel free to experiment with different nuts like almonds or macadamia for a unique twist, or even add a swirl of white chocolate for added richness. Don’t be afraid to make them your own!
Frequently Asked Questions about Pistachio Brookies:
Q1: Can I use pre-shelled pistachios?
Absolutely! Pre-shelled pistachios are perfectly fine for this recipe. Just ensure they are unsalted and raw, or lightly roasted without added oil or salt, to get the best flavor profile for your Pistachio Brookies. If they are salted, you might want to slightly reduce the added salt in the brownie batter.
Q2: How should I store Pistachio Brookies?
Once cooled, Pistachio Brookies can be stored in an airtight container at room temperature for up to 3 days. For longer storage, you can refrigerate them for up to a week, or freeze them for up to 3 months. Simply thaw at room temperature or gently reheat in a low oven.
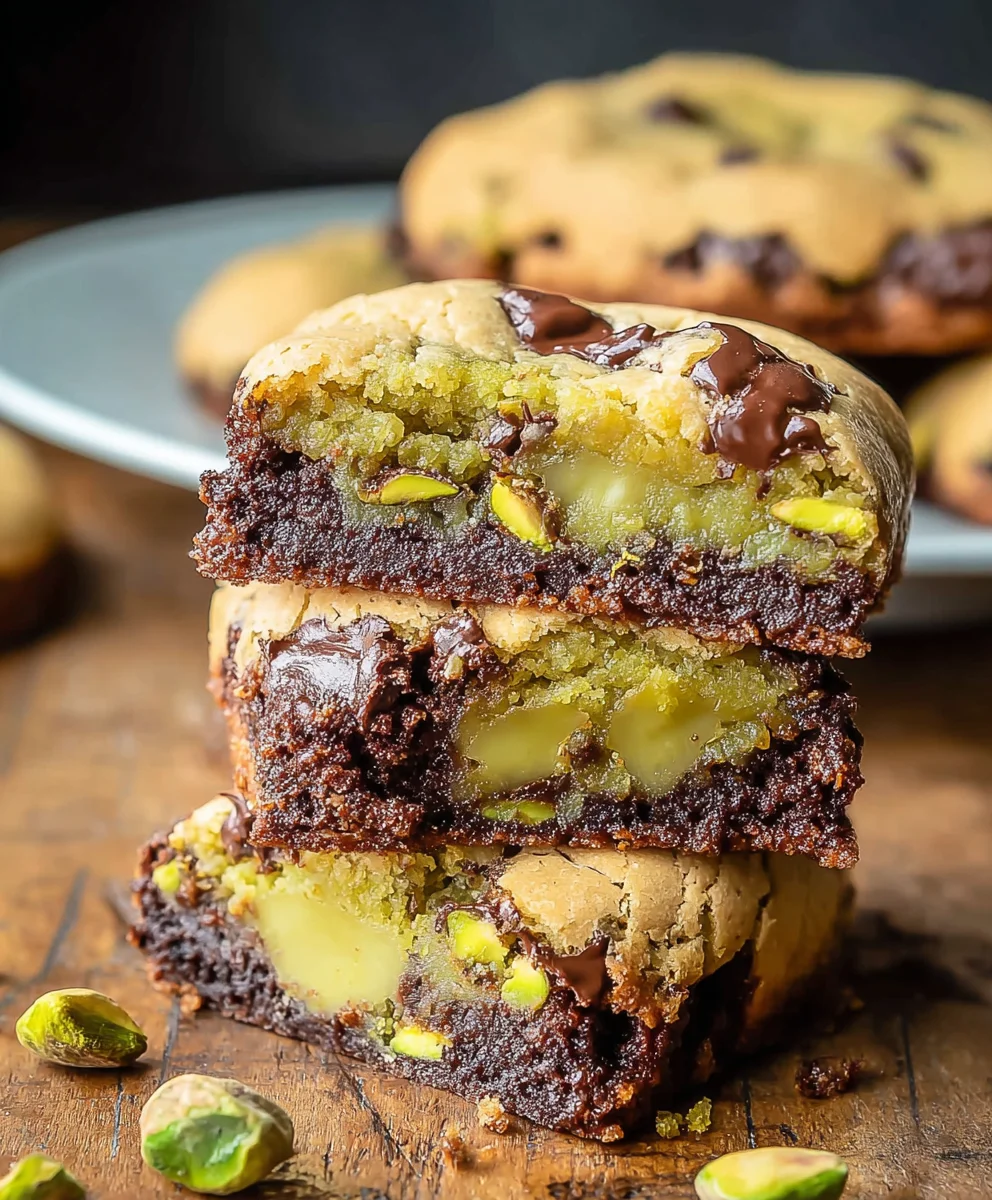
Pistachio Brookies-Deliciously Chewy Brownie-Cookie Bars
Deliciously chewy brownie-cookie bars with a fudgy brownie layer and a classic cookie base, studded with dark chocolate chips.
Ingredients
-
1/4 cup unsalted butter, softened
-
3 tablespoons caster sugar
-
2 1/2 tablespoons light brown sugar, packed
-
1 large egg
-
1 teaspoon pure vanilla extract
-
2/3 cup all-purpose flour
-
1/4 teaspoon baking powder
-
1/4 teaspoon baking soda
-
1/4 teaspoon salt
-
1/4 cup dark chocolate chips
-
2/3 cup unsalted butter
-
2/3 cup dark chocolate (50-60% cocoa), chopped
-
1 1/3 cups all-purpose flour
-
1/3 cup unsweetened cocoa powder
-
3 large eggs
Instructions
-
Step 1
Cream together softened butter, caster sugar, and light brown sugar until light and fluffy. Beat in the egg and vanilla extract until smooth. -
Step 2
Whisk together flour, baking powder, baking soda, and salt in a separate bowl. Gradually add to the wet ingredients, mixing until just combined. Fold in chocolate chips. Press evenly into a greased 8×8 inch baking pan. -
Step 3
Melt butter and chopped dark chocolate in a double boiler. Let cool slightly. In another bowl, whisk together flour and cocoa powder. Whisk beaten eggs into the cooled chocolate mixture. -
Step 4
Pour the chocolate-egg mixture into the dry ingredients and stir until just combined to form a thick brownie batter. Spoon and spread evenly over the cookie dough base. -
Step 5
Bake at 350°F (175°C) for 25-35 minutes, or until a toothpick comes out with moist crumbs. Cool completely in the pan on a wire rack before cutting.
Important Information
Nutrition Facts (Per Serving)
It is important to consider this information as approximate and not to use it as definitive health advice.
Allergy Information
Please check ingredients for potential allergens and consult a health professional if in doubt.
Leave a Comment