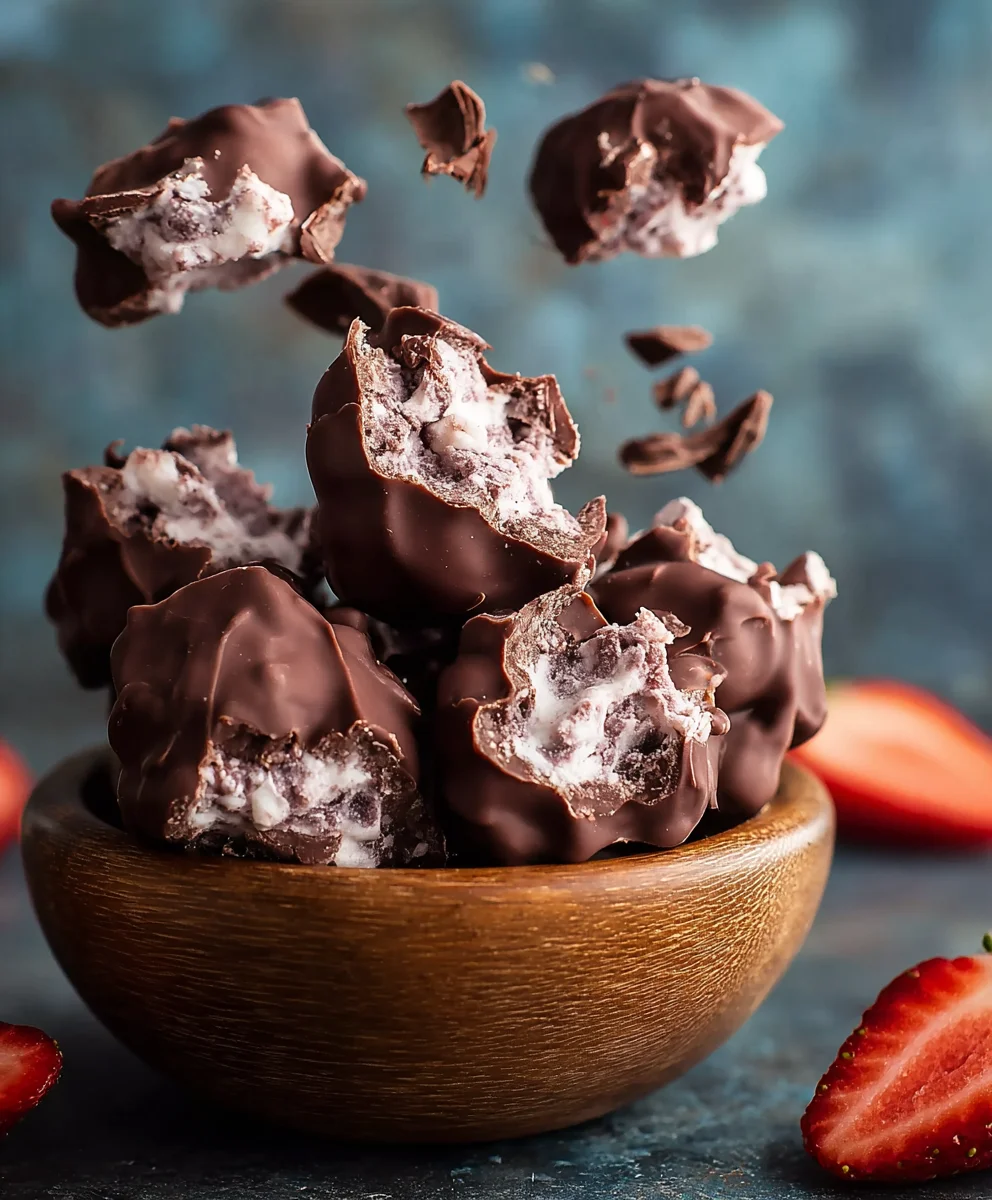
Frozen Chocolate Yogurt Clusters are a delightful treat that’s surprisingly easy to make and offers a fantastic way to satisfy your sweet cravings with a healthier twist. Imagin extracte biting into a cool, creamy, and intensely chocolatey bite that melts in your mouth – that’s the magic of these simple yet addictive clusters. We love them because they strike the perfect balance between decadent indulgence and mindful eating, making them a guilt-free pleasure. What truly sets these Frozen Chocolate Yogurt Clusters apart is their incredible versatility. You can customize them with your favorite mix-ins, from crunchy nuts and seeds to chewy dried fruits or even a sprinkle of sea salt for that sweet and salty punch. They’re perfect for a quick breakfast on the go, a refreshing afternoon snack, or a light dessert that won’t weigh you down. Get ready to discover your new favorite frozen dessert!”

Ingredients:
- 1 1/2 cups chopped strawberries
- 1 cup plain Greek yogurt
- 1 tablespoon honey
- 1 teaspoon vanilla extract
- 1 cup semi-sweet chocolate chips
- 2 tablespoons coconut oil
Preparation of the Strawberry Yogurt Base
Step 1: Prepare the Strawberries
Begin extract by thoroughly washing your 1 1/2 cups of chopped strawberries. Ensure they are completely dry before proceeding. If you are using fresh strawberries, this washing step is crucial to remove any dirt or debris. For the best texture and flavor in your Frozen Chocolate Yogurt Clusters, I recommend using ripe, sweet strawberries. Once washed, finely chop them. The smaller the pieces, the more evenly they will distribute throughout the yogurt mixture and the easier they will be to bite into. You want distinct, juicy bursts of strawberry flavor in every cluster. Aim for pieces that are no larger than a small pea, or even mince them if you prefer a smoother texture with just a hint of fruit.
Step 2: Blend the Yogurt Mixture
In a medium-sized mixing bowl, combine the 1 cup of plain Greek yogurt, 1 tablespoon of honey, and 1 teaspoon of vanilla extract. Use a whisk or a fork to vigorously blend these ingredients together until they are smooth and well incorporated. The Greek yogurt provides a wonderfully creamy and tangy base for our clusters, while the honey adds a touch of natural sweetness that complements the tartness of the yogurt and the fruit. The vanilla extract contributes a warm, aromatic undertone that enhances the overall flavor profile. Ensure there are no streaks of honey or unincorporated vanilla. This smooth, homogenous mixture is the foundation of our delightful frozen treat.
Step 3: Incorporate the Strawberries
Gently fold the finely chopped strawberries into the blended yogurt mixture. Use a spatula or a spoon to carefully mix them in, ensuring you don’t mash the strawberries too much. We want to preserve their fresh texture. The goal is to evenly distribute the strawberry pieces throughout the yogurt base, so each spoonful of frozen cluster gets a satisfying bite of fruit. If the yogurt mixture seems a bit thick, you can add a tiny splash of milk (dairy or non-dairy) to loosen it slightly, but be careful not to make it too runny, as this can affect the freezing consistency.
Creating the Chocolate Coating
Step 4: Melt the Chocolate and Coconut Oil
Now, let’s prepare the luscious chocolate coating for our Frozen Chocolate Yogurt Clusters. In a heatproof bowl, combine the 1 cup of semi-sweet chocolate chips with the 2 tablespoons of coconut oil. You can melt this mixture using a double boiler or in the microwave. For the double boiler method, place the bowl over a saucepan filled with about an inch of simmering water, ensuring the bottom of the bowl does not touch the water. Stir occasionally until the chocolate and coconut oil are completely melted and smooth. If microwaving, heat in 30-second intervals, stirring well after each interval, until the chocolate is melted and pourable. The coconut oil is essential here; it helps the chocolate melt smoothly and creates a wonderfully crisp and slightly flexible coating when frozen, preventing it from becoming brittle. Stir until the mixture is glossy and uniform.
Assembling and Freezing the Clusters
Step 5: Assemble and Freeze the Clusters
Line a baking sheet or a large plate with parchment paper or wax paper. This will prevent the clusters from sticking and make them easy to remove once frozen. Using a tablespoon, scoop portions of the strawberry yogurt mixture and place them onto the prepared baking sheet. Aim for bite-sized portions, like small quenelles or dollops. Once you have your yogurt mounds ready, it’s time for the chocolate bath! Carefully spoon the melted chocolate mixture over each yogurt mound, ensuring they are fully coated. You can tilt the baking sheet slightly to help the chocolate drizzle down the sides, creating an appealing look. Don’t worry about perfection; a slightly rustic look adds to the charm of homemade frozen treats. Once all clusters are coated, place the baking sheet into the freezer. Allow them to freeze for at least 2-3 hours, or until they are completely solid. For the best results, avoid opening the freezer door unnecessarily while they are freezing to maintain a consistent temperature. Once fully frozen, you can transfer the Frozen Chocolate Yogurt Clusters to an airtight container for longer storage in the freezer. Enjoy these delightful, healthy, and refreshing treats!
Conclusion:
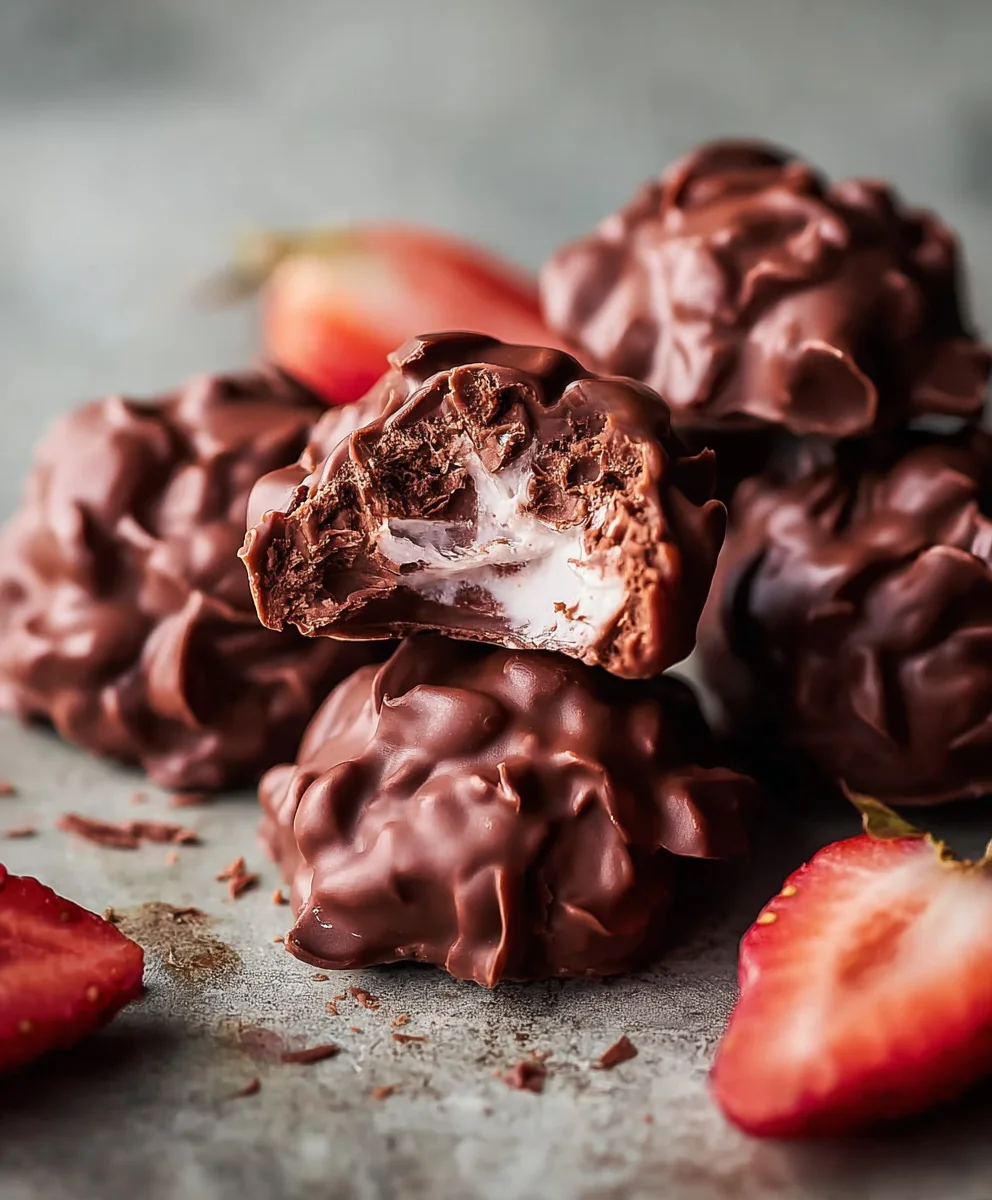
And there you have it – your very own batch of delightful Frozen Chocolate Yogurt Clusters! This recipe is a fantastic way to satisfy those sweet cravings with a healthier twist. The creamy tang of the yogurt perfectly balances the rich chocolate, creating a truly satisfying bite. These little clusters are incredibly versatile and make a wonderful treat any time of day, from a quick breakfast boost to an after-dinner indulgence.
I love serving these Frozen Chocolate Yogurt Clusters straight from the freezer. They’re also wonderful sprinkled over a bowl of fresh berries or alongside a cup of your favorite herbal tea. Don’t be afraid to get creative with variations! Feel free to add a pinch of sea salt for a salty-sweet kick, a swirl of your favorite nut butter, or even a sprinkle of finely chopped nuts for added crunch. The possibilities are truly endless.
I truly hope you enjoy making and devouring these Frozen Chocolate Yogurt Clusters as much as I do. They’re simple, healthy, and wonderfully delicious. So go ahead, gather your ingredients, and get ready to create some frozen magic!
Frequently Asked Questions:
Q: Can I use a different type of yogurt for these Frozen Chocolate Yogurt Clusters?
Absolutely! While Greek yogurt provides a wonderfully thick and creamy base, you can experiment with other plain yogurts like regular plain yogurt or even dairy-free options such as coconut or almond yogurt. Just be aware that the consistency might vary slightly.
Q: How long do these Frozen Chocolate Yogurt Clusters last in the freezer?
Stored properly in an airtight container, your Frozen Chocolate Yogurt Clusters should stay delicious for up to 2-3 weeks. However, they are best enjoyed within the first week for optimal texture and flavor.
Easy Frozen Chocolate Yogurt Clusters
Simple and refreshing frozen yogurt clusters coated in chocolate, with a delightful strawberry and Greek yogurt base.
Ingredients
-
1 1/2 cups chopped strawberries
-
1 cup plain Greek yogurt
-
1 tablespoon honey
-
1 teaspoon vanilla extract
-
1 cup semi-sweet chocolate chips
-
2 tablespoons coconut oil
Instructions
-
Step 1
Wash and finely chop 1 1/2 cups of ripe strawberries. Ensure they are dry. -
Step 2
In a bowl, whisk together 1 cup of plain Greek yogurt, 1 tablespoon of honey, and 1 teaspoon of vanilla extract until smooth. -
Step 3
Gently fold the chopped strawberries into the yogurt mixture, distributing them evenly without mashing. -
Step 4
Melt 1 cup of semi-sweet chocolate chips with 2 tablespoons of coconut oil using a double boiler or microwave until smooth and pourable. -
Step 5
Line a baking sheet with parchment paper. Scoop portions of the strawberry yogurt mixture onto the sheet. Spoon the melted chocolate over each yogurt mound to coat. -
Step 6
Place the baking sheet in the freezer and freeze for at least 2-3 hours, or until solid. Transfer to an airtight container for storage.
Important Information
Nutrition Facts (Per Serving)
It is important to consider this information as approximate and not to use it as definitive health advice.
Allergy Information
Please check ingredients for potential allergens and consult a health professional if in doubt.
Leave a Comment