

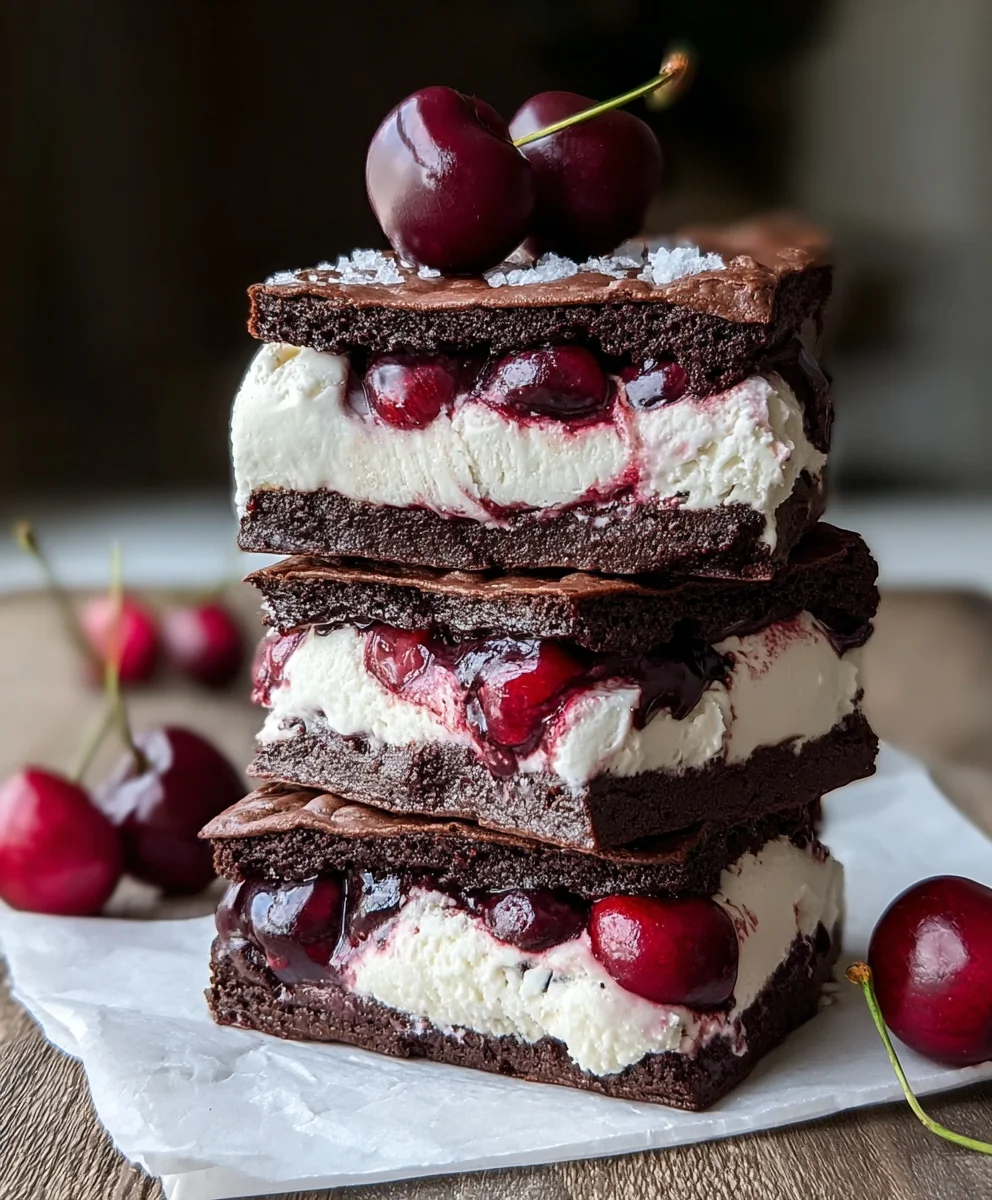
Cherry Brownie Ice Cream Sandwiches are more than just a dessert; they’re a nostalgic hug in every bite, a decadent fusion of textures and flavors that instantly transports you back to sun-drenched afternoons and childhood joy. Who doesn’t adore the sublime pairing of rich, fudgy brownies with cool, creamy ice cream? But what elevates these Cherry Brownie Ice Cream Sandwiches from merely delightful to downright divine is the bright, slightly tart burst of cherries woven throughout. It’s that unexpected zing that cuts through the sweetness of the brownie and the richness of the ice cream, creating a perfectly balanced symphony for your taste buds. They’re the ultimate treat for a summer barbecue, a special celebration, or simply a way to make an ordinary Tuesday feel extraordinary. Get ready to experience pure bliss!

Ingredients:
- ½ cup unsalted butter, softened
- ½ cup granulated sugar
- ½ cup packed light brown sugar
- 2 large eggs
- 1 teaspoon vanilla extract
- ⅓ cup unsweetened cocoa powder
- ½ cup all-purpose flour
- ¼ teaspoon salt
- 1½ cups vanilla ice cream, slightly softened
- ½ cup chopped cherries (fresh or frozen, patted dry if fresh)
- ¼ cup melted chocolate chips (for drizzling)
Making the Chewy Brownie Layers
This recipe for Cherry Brownie Ice Cream Sandwiches is a delightful way to combine rich chocolatey goodness with a refreshing burst of cherry and creamy ice cream. The key to these sandwiches is a perfectly chewy brownie base that provides the ideal texture contrast to the cold, smooth ice cream. We’ll start by creaming together our butter and sugars to create a light and airy foundation for our brownies.
Step 1: Creaming Butter and Sugars
- Begin extract by taking your softened unsalted butter and placing it into a medium-sized mixing bowl. Add the granulated sugar and the packed light brown sugar to the same bowl.
- Using an electric mixer on medium speed, or a sturdy whisk and some elbow grease, cream these ingredients together until the mixture is light in color and fluffy in texture. This process typically takes about 2 to 3 minutes with an electric mixer. It’s crucial to achieve this fluffy consistency as it incorporates air into the batter, which contributes to the chewy texture of the final brownie. Scrape down the sides of the bowl periodically to ensure everything is evenly incorporated.
Step 2: Incorporating Wet Ingredients and Dry Mix
- Next, add the 2 large eggs one at a time to the creamed sugar mixture, beating well after each addition. This ensures that the eggs are fully emulsified into the batter.
- Stir in the 1 teaspoon of vanilla extract. The vanilla will enhance the overall flavor of the brownie.
- In a separate, smaller bowl, whisk together the ⅓ cup unsweetened cocoa powder, ½ cup all-purpose flour, and ¼ teaspoon salt. This dry mixture will be gradually added to the wet ingredients.
- Gradually add the dry ingredients to the wet ingredients, mixing on low speed or by hand until just combined. Be careful not to overmix at this stage, as overmixing can develop the gluten in the flour, leading to tougher brownies. We are aiming for a smooth, thick batter.
Step 3: Baking the Brownie Bases
- Preheat your oven to 350 degrees Fahrenheit (175 degrees Celsius). Line a baking sheet with parchment paper, ensuring there’s a slight overhang on the sides for easy lifting later. This will prevent sticking and make removal a breeze.
- Spread the brownie batter evenly onto the prepared baking sheet, aiming for a rectangular shape about ½ inch thick. You want to create two relatively thin brownie layers that will serve as the “bread” for our ice cream sandwiches. Use a spatula to spread it out as uniformly as possible.
- Bake for 12 to 15 minutes, or until a toothpick inserted into the center comes out with moist crum extractbs attached, but not wet batter. The edges should be set. It’s important not to overbake them, as this will result irum extractry, crumbly brownies.
- Once baked, remove the baking sheet from the oven and let the brownie layers cool completely on the baking sheet. This is a critical step. Warm brownies will melt the ice cream instantly, so patience is key here. You can even place them in the refrigerator for about 15-20 minutes to speed up the cooling process and ensure they are fully firm before proceeding.
Step 4: Assembling the Ice Cream Sandwiches
- Once the brownie layers are completely cool, carefully lift them off the baking sheet using the parchment paper overhang. Place one brownie layer, bottom-side up, on a clean surface or a cutting board.
- Retrieve your 1½ cups of vanilla ice cream from the freezer. It should be slightly softened – soft enough to spread easily but not so melted that it becomes liquid. If it’s too hard, let it sit at room temperature for a few more minutes.
- Spread the softened vanilla ice cream evenly over the brownie layer. Distribute it as uniformly as possible, going almost to the edges.
- Scatter the ½ cup of chopped cherries evenly over the ice cream layer. If you’re using fresh cherries, make sure they are patted dry to avoid introducing excess moisture. The cherries will add a delightful tartness and chegrape juicess that complements the sweetness of the ice cream and brownie.
- Carefully place the second brownie layer on top of the ice cream and cherry mixture, aligning the edges as best as you can. Gently press down to create a cohesive sandwich.
Step 5: Finishing Touches and Freezing
- Using a sharp knife, carefully cut the large brownie slab into individual sandwich portions. You can make them square or rectangular, depending on your preference. For cleaner cuts, you can dip your knife in hot water and wipe it dry between each cut.
- Arrange the cut ice cream sandwiches on a parchment-lined baking sheet or plate. Make sure they are not touching each other if possible, to prevent them from sticking together as they freeze.
- For an extra touch of indulgence, melt the ¼ cup of chocolate chips. You can do this in a microwave-safe bowl in 30-second intervals, stirring in between, or over a double boiler. Drizzle the melted chocolate artfully over the tops of the ice cream sandwiches. This chocolate drizzle not only looks beautiful but adds another layer of delicious chocolate flavor.
- Transfer the baking sheet with the assembled sandwiches to the freezer. Freeze for at least 2 to 3 hours, or until the ice cream is firm and the sandwiches hold their shape. This freezing time is crucial to allow the ice cream to set properly.
- For best results and easiest handling, you can wrap each individual Cherry Brownie Ice Cream Sandwich in parchment paper or plastic wrap once they are firm, and store them in an airtight container in the freezer. This will prevent freezer burn and keep them perfectly chilled until you’re ready to enjoy your homemade frozen treat!
Conclusion:
And there you have it! Your very own batch of delicious Cherry Brownie Ice Cream Sandwiches, ready to impress your friends and family. These delightful treats are a perfect blend of rich, fudgy brownie and creamy, cool ice cream, with a vibrant pop of cherry flavor that truly makes them special. I hope you enjoyed making and, most importantly, devouring these incredible Cherry Brownie Ice Cream Sandwiches!
These are fantastic served straight from the freezer for an instant dessert fix. For a slightly more elevated presentation, consider rolling the edges in mini chocolate chips, chopped nuts, or even some sprinkles before they firm up completely. You can also enjoy them with a drizzle of chocolate sauce or a dollop of whipped cream.
Don’t be afraid to get creative with variations! Feel free to swap out the cherry ice cream for vanilla, strawberry, or even a swirl variety. If cherries aren’t your favorite, consider using raspberries or even a hint of chocolate liqueur extract in the brownie batter for an adult twist. The possibilities are endless when it comes to these Cherry Brownie Ice Cream Sandwiches!
Frequently Asked Questions
Can I make the brownie layers ahead of time?
Absolutely! The brownie layers can be baked a day or two in advance and stored at room temperature in an airtight container. Just ensure they are completely cooled before cutting them into squares.
What kind of ice cream works best for Cherry Brownie Ice Cream Sandwiches?
While cherry ice cream is the star, any good quality vanilla or chocolate ice cream will also be delicious. A good quality store-bought ice cream works perfectly, or if you’re feeling ambitious, homemade ice cream is always a fantastic option. The key is to use ice cream that is firm enough to scoop and hold its shape.
How should I store leftover Cherry Brownie Ice Cream Sandwiches?
For best results, wrap each Cherry Brownie Ice Cream Sandwich individually in plastic wrap or parchment paper, then store them in an airtight container in the freezer. This will prevent freezer burn and keep them perfectly frozen.
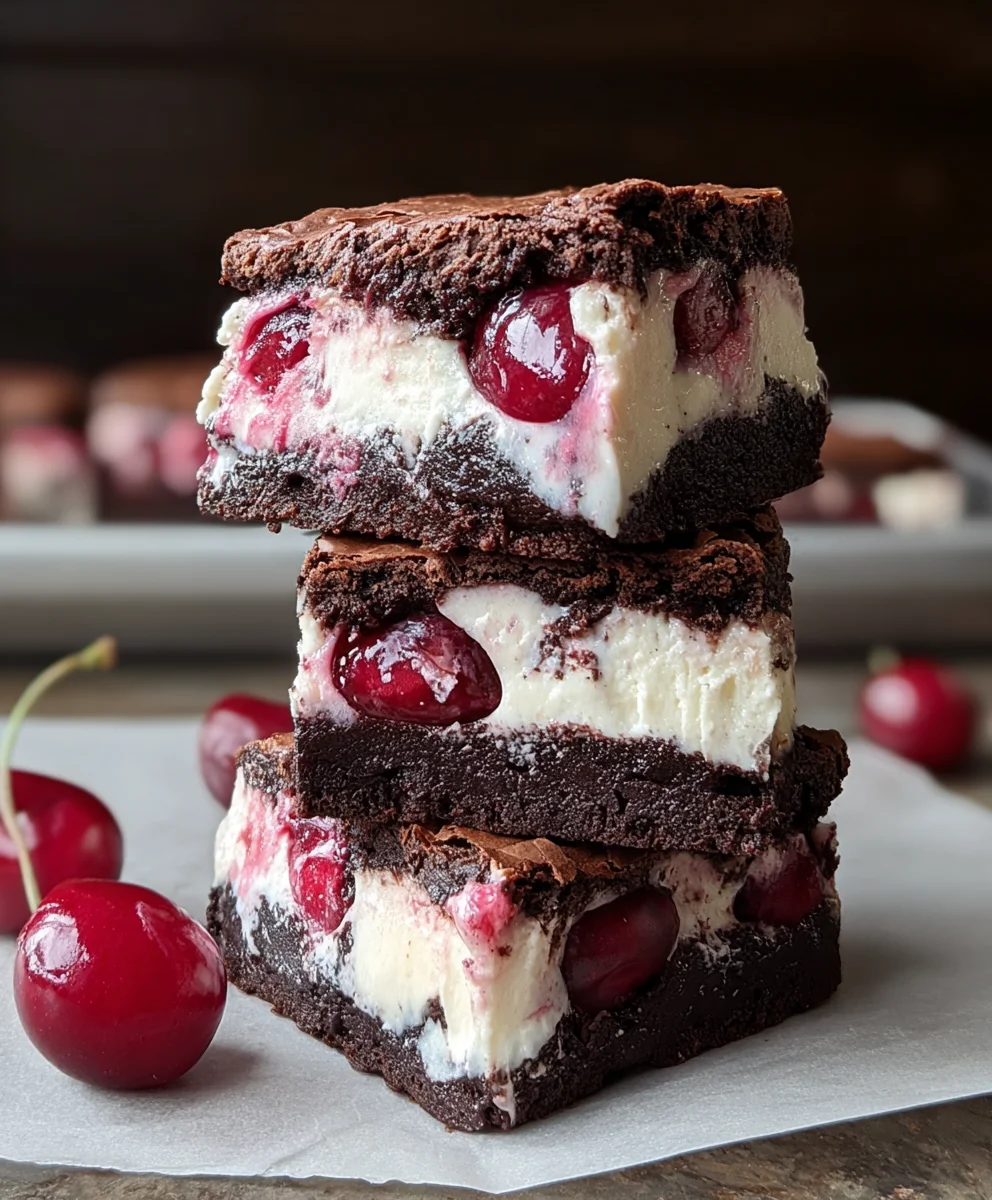
Cherry Brownie Ice Cream Sandwiches Delight
A delightful combination of chewy chocolate brownies, creamy vanilla ice cream, and tart cherries, all assembled into perfect frozen sandwiches with an optional chocolate drizzle.
Ingredients
-
½ cup unsalted butter, softened
-
½ cup granulated sugar
-
½ cup packed light brown sugar
-
2 large eggs
-
1 teaspoon vanilla extract
-
⅓ cup unsweetened cocoa powder
-
½ cup all-purpose flour
-
¼ teaspoon salt
-
1½ cups vanilla ice cream, slightly softened
-
½ cup chopped cherries (fresh or frozen, patted dry if fresh)
-
¼ cup melted chocolate chips (for drizzling)
Instructions
-
Step 1
Cream together softened unsalted butter, granulated sugar, and packed light brown sugar in a mixing bowl until light and fluffy (about 2-3 minutes with an electric mixer). Scrape down the sides of the bowl periodically. -
Step 2
Add eggs one at a time, beating well after each addition. Stir in the vanilla extract. In a separate bowl, whisk together cocoa powder, flour, and salt. Gradually add the dry ingredients to the wet ingredients, mixing on low speed or by hand until just combined. Do not overmix. -
Step 3
Preheat oven to 350°F (175°C). Line a baking sheet with parchment paper. Spread the brownie batter evenly onto the prepared baking sheet, about ½ inch thick. Bake for 12-15 minutes, or until a toothpick inserted into the center comes out with moist crumbs attached. Let the brownie layers cool completely on the baking sheet, or chill them in the refrigerator for 15-20 minutes. -
Step 4
Once the brownie layers are cool, place one brownie layer bottom-side up on a clean surface. Spread the slightly softened vanilla ice cream evenly over the brownie layer. Scatter the chopped cherries evenly over the ice cream. -
Step 5
Carefully place the second brownie layer on top of the ice cream and cherry mixture, aligning the edges. Gently press down to create a cohesive sandwich. Cut the large brownie slab into individual sandwich portions using a sharp knife. For cleaner cuts, dip the knife in hot water and wipe dry between cuts. -
Step 6
Arrange the cut ice cream sandwiches on a parchment-lined baking sheet or plate. Drizzle the melted chocolate chips over the tops of the sandwiches. Transfer to the freezer and freeze for at least 2-3 hours, or until firm. For best results, wrap individual sandwiches and store in an airtight container in the freezer.
Important Information
Nutrition Facts (Per Serving)
It is important to consider this information as approximate and not to use it as definitive health advice.
Allergy Information
Please check ingredients for potential allergens and consult a health professional if in doubt.
Leave a Comment