

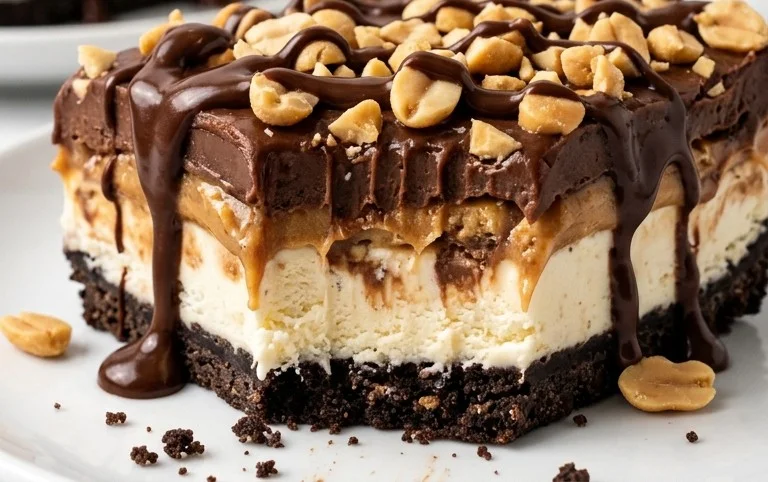
Buster Bar Ice Cream Dessert is more than just a frozen treat; it’s a nostalgic journey back to simpler times, a symphony of textures and flavors that has captured hearts for generations. We all have those childhood favorites, the ones that instantly transport us to sunny afternoons and carefree days. For many, the iconic Buster Bar reigns supreme. What makes this particular ice cream dessert so beloved? It’s the ingenious combination of a creamy vanilla ice cream center, cloaked in a rich chocolatey shell that crackles with every bite, and often finished with a delightful crunch of peanuts or other nuts. It’s that satisfying contrast – the smooth, cool ice cream yielding to the crisp, decadent coating – that makes a Buster Bar Ice Cream Dessert utterly irresistible. Get ready to recreate this classic at home and experience the magic all over again!

Buster Bar Ice Cream Dessert
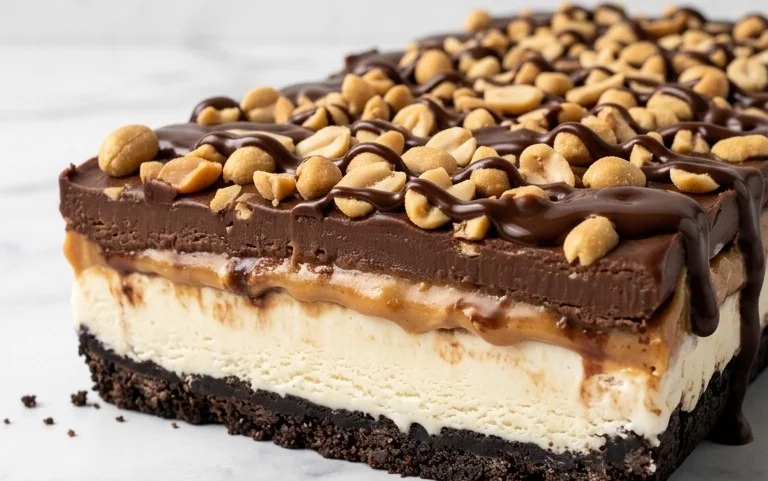
Get ready to create a truly decadent and delightfully nostalgic dessert that’s sure to bring smiles to faces – my homemade Buster Bar Ice Cream Dessert! If you’ve ever had the pleasure of experiencing the classic Buster Bar, you know it’s a symphony of textures and flavors: creamy ice cream, crunchy peanuts, a sweet cookie crust, and a rich chocolatey shell. Recreating that magic at home is surprisingly achievable and incredibly rewarding. This recipe breaks down each component, allowing you to build this masterpiece layer by delicious layer. Prepare for a dessert that’s as fun to make as it is to devour!
Ingredients:
Crafting the Cookie Crust
The foundation of our Buster Bar is a sweet, crunchy cookie crust. This is where the magic begin extracts! You’ll want to start with your Oreo cookies. For the best results, I like to pulse them in a food processor until they’re finely crushed, almost like coarse sand. If you don’t have a food processor, don’t worry! You can place the Oreos in a sturdy zip-top bag and use a rolling pin to crush them. The goal is to have them broken down thoroughly. Once crushed, transfer them to a medium-sized bowl. Then, melt your 1/2 cup of butter. Pour the melted butter over the crushed Oreos and stir until all the cookie crum extractbs are evenly moistened. It should resemble wet sand. Press this mixture firmly into the bottom of a 9×13 inch baking dish or a similar-sized freezable container. Make sure to get it as even and compact as possible, as this will prevent it from crum extractbling too much when you serve. Pop this into the freezer for at least 15-20 minutes to firm up while you prepare the next layer.
Building the Ice Cream Core
Now for the creamy heart of our dessert! Take your half-gallon of vanilla ice cream and let it soften at room temperature for about 15-20 minutes. You don’t want it completely melted, just soft enough to spread easily. Scoop the softened ice cream evenly over the chilled cookie crust. Use a spatula or the back of a spoon to smooth it out into a level layer. The key here is to get it as uniform as possible for an even distribution of ice cream in every bite. Once the ice cream is spread, return the dish to the freezer. This layer needs to freeze thoroughly, which will take at least 2-3 hours, or ideally, until it’s quite firm. Patience is a virtue, especially when it comes to ice cream desserts!
The Peanutty Crunch Layer
This next step adds that irresistible nutty texture that makes a Buster Bar so special. You’ll want to take your pound of Spanish peanuts and roughly chop them. You can do this by hand with a knife or pulse them a few times in a food processor. We’re not looking for a powder, but rather nice, bite-sized pieces that will provide a satisfying crunch. Once chopped, spread these peanuts evenly over the hardened layer of vanilla ice cream. Gently press them down a little so they adhere to the ice cream. Again, pop this back into the freezer while you move on to creating the luscious chocolate topping. This also needs time to firm up, so ensure the peanuts are well-anchored before proceeding.
Whipping Up the Fudgy Chocolate Topping
This is where the pure indulgence comes in! In a medium saucepan, combine your 12 ounces of semi-sweet chocolate chips, the remaining 1/2 cup of butter, and the 12 ounces of evaporated milk. Place the saucepan over low heat. Stir constantly until the chocolate and butter are completely melted and the mixture is smooth and glossy. Be careful not to overheat, as this can cause the chocolate to seize. Once everything is melted and beautifully blended, remove it from the heat. Now, gradually whisk in the 2 cups of powdered confectioner’s sugar. Continue whisking until the sugar is fully incorporated and you have a thick, fudge-like sauce. This step might take a few minutes of whisking, but the smooth, rich result is absolutely worth it. Let this topping cool slightly, for about 5-10 minutes, so it’s not piping hot when you pour it.
The Grand Finnon-alcoholic ale: Coating and Freezing
This is the moment of truth! Remove your dessert from the freezer. It should be quite solid at this point. Gently and evenly pour the slightly cooled chocolate fudge topping over the peanut layer, spreading it to cover the entire surface. Ensure you get good coverage to create that signature Buster Bar coating. Once the chocolate is spread, return the dessert to the freezer one last time. This final freeze is crucial for setting the chocolate topping. Let it freeze for at least 4-6 hours, or preferably overnight. The longer it freezes, the easier it will be to cut and the firmer your Buster Bar will be.
To serve, let the dessert sit at room temperature for about 5-10 minutes to slightly soften the chocolate and ice cream, making it easier to slice. You can then cut it into squares or rectangles, just like the origin extractal. Enjoy your incredible homemade Buster Bar Ice Cream Dessert!
Conclusion:
There you have it – your guide to creating the most incredible Buster Bar Ice Cream Dessert right in your own kitchen! This recipe is an absolute winner because it perfectly captures the nostalgic, delightful flavors of the classic treat, but with a homemade touch that’s both satisfying to make and even more satisfying to eat. The combination of crunchy chocolate coating, creamy ice cream, and that signature caramel-nut swirl is simply divine. I truly encourage you to give this Buster Bar Ice Cream Dessert a try; it’s a fantastic way to impress your family and friends, or simply to treat yourself to something special.
This dessert is wonderfully versatile. Serve it chilled, as is, for a truly authentic experience. For an extra touch, consider topping individual servings with a drizzle of extra hot fudge or a sprinkle of chopped peanuts. If you’re feeling adventurous, why not experiment with different ice cream flavors? Mint chocolate chip or strawberry could offer a delightful twist! The possibilities are endless, and the joy of creating your own version is immense.
Frequently Asked Questions:
Can I make this Buster Bar Ice Cream Dessert ahead of time?
Absolutely! You can prepare the ice cream base and the chocolate coating a day or two in advance. Assemble the dessert just before you plan to serve it to ensure the best texture and prevent soggin extractess.
What if I can’t find peanuts?
No problem at all! You can easily substitute chopped almonds, pecans, or even a mix of your favorite nuts. For a nut-free option, consider using toasted sunflower seeds or a sprinkle of crispy rice cereal for added crunch.
How should I store any leftovers?
Leftovers can be stored in an airtight container in the freezer for up to two weeks. It’s best to wrap individual portions tightly in plastic wrap before placing them in the container to maintain freshness and prevent freezer burn.
Buster Bar Ice Cream Dessert
A no-bake frozen dessert inspired by the classic Buster Bar, featuring a chocolate cookie crust, creamy vanilla ice cream, and a rich chocolate peanut topping.
Ingredients
-
1 14.3 oz pkg. of Oreo cookies, crushed
-
1/2 C butter, melted
-
1/2 gal. vanilla ice cream, softened
-
1 lb. Spanish peanuts
-
2 C powdered confectioner’s sugar
-
12 oz semi sweet chocolate chips
-
1/2 C butter
-
12 oz evaporated milk
Instructions
-
Step 1
In a bowl, combine the crushed Oreo cookies and 1/2 cup melted butter. Press this mixture firmly into the bottom of a 9×13 inch baking pan to form the crust. -
Step 2
Spread the softened vanilla ice cream evenly over the cookie crust. Return the pan to the freezer while you prepare the topping. -
Step 3
In a saucepan over medium heat, melt the 12 oz semi sweet chocolate chips and 1/2 cup butter. Stir until smooth. -
Step 4
Whisk in the 12 oz evaporated milk and 2 cups powdered confectioner’s sugar until the mixture is smooth and thickened. Stir in the Spanish peanuts. -
Step 5
Pour the warm chocolate peanut topping evenly over the frozen ice cream layer. Spread it to cover completely. -
Step 6
Freeze the dessert for at least 4 hours, or until firm. Cut into squares and serve.
Important Information
Nutrition Facts (Per Serving)
It is important to consider this information as approximate and not to use it as definitive health advice.
Allergy Information
Please check ingredients for potential allergens and consult a health professional if in doubt.
Leave a Comment