

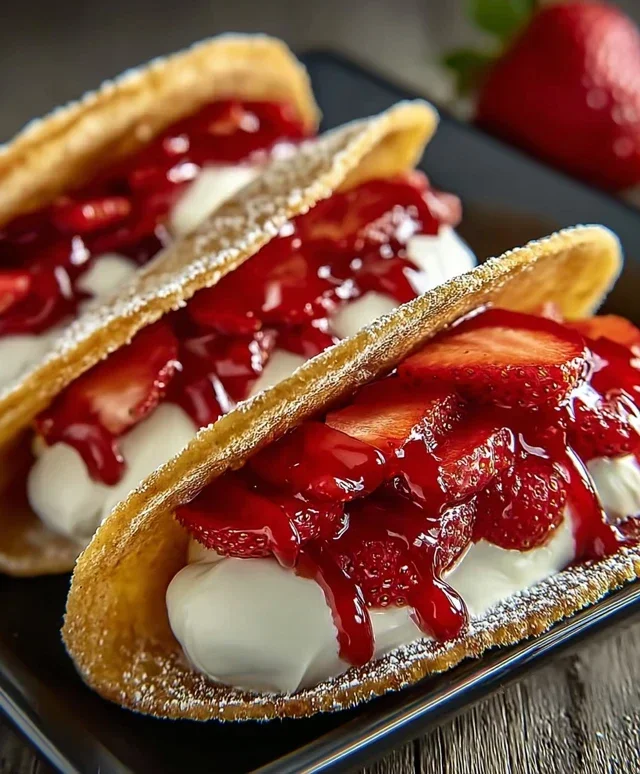
Strawberry Cheesecake Dessert Tacos are about to revolutionize your dessert game! Forget everything you thought you knew about tacos, because we’re diving headfirst into a world of sweet, creamy, and utterly delightful handheld indulgence. Who doesn’t adore the classic pairing of vibrant strawberries and rich cheesecake? It’s a flavor combination that whispers comfort, celebration, and pure joy. But what makes these Strawberry Cheesecake Dessert Tacos truly special is the ingenious, edible taco shell that perfectly cradles that decadent filling. Imagin extracte a crisp, sweet shell giving way to a luscious cheesecake mixture, studded with juicy strawberries, and maybe a drizzle of white chocolate. It’s a playful twist on a beloved dessert, offering a unique textural experience and a burst of flavor in every bite. Get ready to impress your friends and family with this unbelievably easy yet spectacular treat.

Strawberry Cheesecake Dessert Tacos
Get ready for a dessert revelation! These Strawberry Cheesecake Dessert Tacos are going to be your new favorite way to satisfy that sweet craving. Imagin extracte the creamy, dreamy indulgence of cheesecake nestled inside a warm, spiced taco shell, all topped with a burst of fresh strawberry goodness. It’s a playful, innovative treat that’s surprisingly easy to make and absolutely delightful to eat. Perfect for a fun family dessert night, a unique party appetizer, or just a special indulgence for yourself. We’re taking the beloved flavors of strawberry cheesecake and giving them a fun, handheld twist that you won’t be able to resist.
Ingredients:
Creating the Taco Shells
The first step to our delicious dessert tacos is crafting those perfectly crisp and flavorful taco shells. This is where the magic begin extracts, transforming simple tortillas into edible vessels of joy.
1. In a shallow dish, combine the ½ cup of granulated sugar and 1 tablespoon of ground cinnamon. This fragrant mixture will be brushed onto the tortillas, infusing them with a warm, sweet spice.
2. Brush both sides of each flour tortilla generously with the melted unsalted butter. This butter will help them crisp up beautifully in the oven and also allow the cinnamon-sugar mixture to adhere.
3. Dredge each buttered tortilla in the cinnamon-sugar mixture, ensuring both sides are well coated. This coating is crucial for that delightful sweet crunch.
4. Preheat your oven to 350°F (175°C).
5. Now, it’s time to shape these seasoned tortillas. You can gently drape them over the rungs of your oven rack, letting them hang down to form a taco shape, or use a taco shell mold if you have one. Alternatively, you can place them directly on a baking sheet, lightly pressing the edges to encourage them to hold their taco form as they bake. Baking directly on the sheet will result in flatter shells, while draping them will give you more of a traditional taco curve. Bake for 8-12 minutes, or until the edges are golden brown and the shells are crisp. Keep a close eye on them as they can go from perfectly crisp to burnt very quickly! Once baked, carefully remove them from the oven and let them cool completely on a wire rack. They will become even more rigid as they cool.
Whipping Up the Cheesecake Filling
Next, we’ll prepare the luscious, creamy cheesecake filling that will be the heart of our dessert tacos. This is where that classic cheesecake flavor really shines.
6. In a medium bowl, beat the softened 8 oz of cream cheese with the ½ cup of powdered sugar until smooth and creamy. It’s important that your cream cheese is truly softened, at room temperature, to avoid any lumps. This step ensures a velvety smooth texture.
7. Stir in the 1 teaspoon of vanilla extract until well combined. The vanilla adds that quintessential cheesecake aroma and taste.
8. In a separate, chilled bowl, whip the ½ cup of heavy whipping cream until stiff peaks form. This light and airy whipped cream will be folded into the cream cheese mixture, making it even more decadent and lighter in texture.
9. Gently fold the whipped cream into the cream cheese mixture. Be careful not to overmix, as you want to maintain the airiness of the whipped cream. This creates a beautiful, fluffy cheesecake filling that’s not overly dense.
Simmering the Strawberry Topping
No strawberry cheesecake is complete without a vibrant, flavorful strawberry topping. This quick simmer transforms fresh strawberries into a sweet and slightly tart sauce.
10. In a small saucepan, combine the 1 cup of chopped fresh or frozen strawberries with the ¼ cup of granulated sugar and 1 tablespoon of lemon juice. The lemon juice brightens the strawberry flavor and adds a touch of acidity to balance the sweetness.
11. Bring the mixture to a gentle simmer over medium heat, stirring occasionally, until the strawberries begin extract to break down and release their juices, about 5-7 minutes.
12. Whisk in the cornstarch slurry (1 tablespoon cornstarch mixed with 2 tablespoons water) and continue to cook, stirring constantly, until the sauce thickens, about 1-2 minutes. This will create a lovely glaze that clings beautifully to the tacos.
13. Remove from heat and let the strawberry topping cool. It will thicken further as it cools.
Assembling Your Dessert Tacos
The grand finnon-alcoholic ale! It’s time to bring all these delicious components together to create your masterpiece.
14. Carefully spoon generous amounts of the cheesecake filling into each cooled, crisp taco shell. Don’t be shy; you want a good dollop of creamy goodness in every bite.
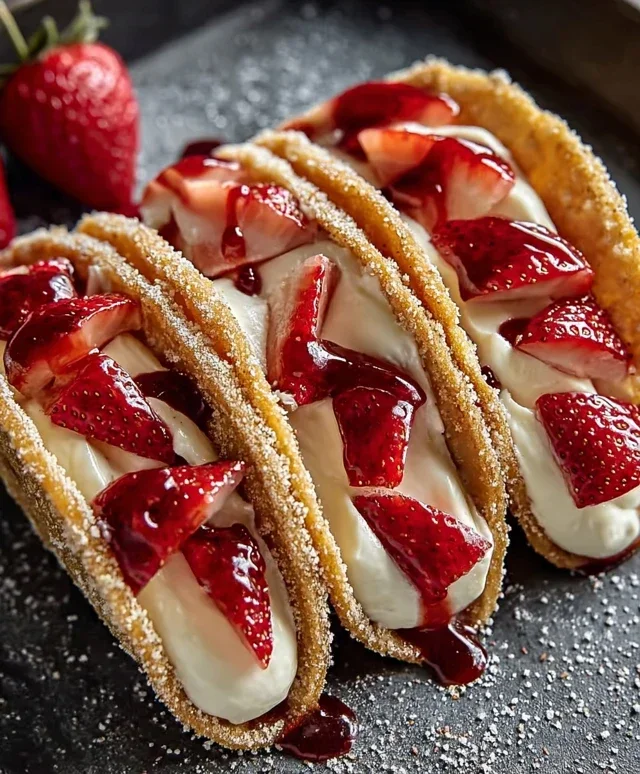
15. Drizzle a good spoonful of the cooled strawberry topping over the cheesecake filling in each taco. The bright red topping against the white filling is as visually appealing as it is delicious.
16. For an extra touch, you can garnish with a few extra fresh strawberry slices or a dusting of powdered sugar if you wish. Serve immediately and enjoy the incredible combination of textures and flavors! These are best enjoyed shortly after assembly to maintain the crispness of the taco shells. Get ready for happy sighs and requests for seconds!
Conclusion:
As we wrap up our delightful journey into the world of Strawberry Cheesecake Dessert Tacos, I hope you’re as excited as I am to give this recipe a try! It’s a truly fantastic treat because it ingeniously combines the creamy, dreamy indulgence of cheesecake with the fun, handheld format of a taco. The crisp taco shell, filled with luscious cheesecake filling and topped with fresh, vibrant strawberries, creates a symphony of textures and flavors that’s simply irresistible. This dessert is perfect for everything from casual gatherings to more elegant parties, offering a unique and memorable twist on classic desserts.
I encourage you to experiment with the serving suggestions! These dessert tacos are absolutely delightful served chilled, making them a refreshing choice on a warm day. You can also serve them slightly warm for a cozier experience, letting the cheesecake filling become even more ooey-gooey. Consider topping them with a drizzle of chocolate sauce, a sprinkle of grabeef ham cracker crum extractbs for extra crunch, or even a dollop of whipped cream. For variations, don’t be afraid to swap out the strawberries for other berries like raspberries or blueberries, or even try a swirl of lemon curd for a tangy kick. The possibilities are truly endless, and each variation promises a new and delicious adventure! So go ahead, embrace your inner dessert artist and make these Strawberry Cheesecake Dessert Tacos your own. I’m confident you’ll love them!
Frequently Asked Questions:
Can I make the taco shells ahead of time?
Yes, you absolutely can! For the best crispness, I recommend making the taco shells a day in advance and storing them in an airtight container at room temperature. Just be sure they are completely cooled before sealing them away.
What are some good make-ahead tips for the cheesecake filling?
The cheesecake filling is also a great candidate for make-ahead prep. You can prepare the filling up to two days in advance and store it covered in the refrigerator. This will save you valuable time on the day you plan to assemble your dessert tacos.
Strawberry Cheesecake Dessert Tacos
A delightful and easy dessert featuring crisp cinnamon-sugar tortillas filled with creamy cheesecake filling and topped with a fresh strawberry sauce.
Ingredients
-
6 small flour tortillas
-
½ cup granulated sugar
-
1 tbsp ground cinnamon
-
½ cup unsalted butter, melted
-
8 oz cream cheese, softened
-
½ cup powdered sugar
-
1 tsp vanilla extract
-
½ cup heavy whipping cream
-
1 cup fresh or frozen strawberries, chopped
-
¼ cup granulated sugar
-
1 tbsp lemon juice
-
1 tbsp cornstarch mixed with 2 tbsp water
Instructions
-
Step 1
Preheat oven to 350°F (175°C). In a small bowl, combine ½ cup granulated sugar and 1 tbsp ground cinnamon. Brush both sides of each flour tortilla with melted butter. Sprinkle generously with the cinnamon-sugar mixture. Place tortillas over the rungs of your oven rack to form taco shells. Bake for 8-10 minutes, or until golden and crisp. -
Step 2
While tortillas bake, prepare the cheesecake filling. In a medium bowl, beat the softened cream cheese with ½ cup powdered sugar and 1 tsp vanilla extract until smooth and creamy. -
Step 3
In a separate bowl, whip the heavy whipping cream until stiff peaks form. Gently fold the whipped cream into the cream cheese mixture until well combined. -
Step 4
Prepare the strawberry topping. In a small saucepan, combine chopped strawberries, ¼ cup granulated sugar, and 1 tbsp lemon juice. Cook over medium heat, stirring occasionally, until strawberries soften. -
Step 5
Stir the cornstarch slurry (1 tbsp cornstarch mixed with 2 tbsp water) into the strawberry mixture. Continue to cook, stirring constantly, until the sauce thickens. Remove from heat and let cool. -
Step 6
Once the taco shells have cooled slightly, carefully fill each one with the cheesecake mixture. Spoon the strawberry topping over the cheesecake filling.
Important Information
Nutrition Facts (Per Serving)
It is important to consider this information as approximate and not to use it as definitive health advice.
Allergy Information
Please check ingredients for potential allergens and consult a health professional if in doubt.


Leave a Comment