

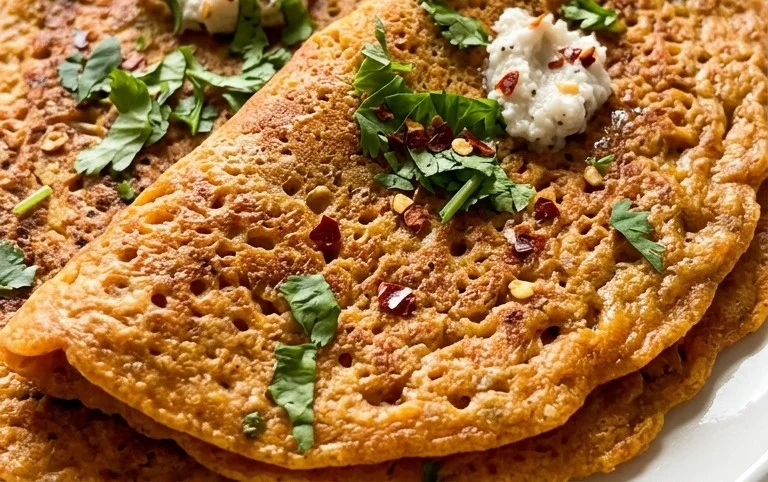
Masoor Dal Chilla | Savory Red Lentil Pancakes are a true culinary revelation, a dish that embodies simplicity, health, and incredible flavor. If you’re searching for a breakfast or snack that’s both satisfying and nourishing, look no further. I’ve always been drawn to the comforting aroma and the wonderfully versatile nature of these savory pancakes. What makes Masoor Dal Chilla so beloved is its incredible ease of preparation, requiring just a few pantry staples and minimal fuss. They are naturally gluten-free, packed with protein from the red lentils, and can be customized with your favorite spices and vegetables. This isn’t just another breakfast; it’s a wholesome experience that leaves you feeling energized and content. Get ready to discover your new favorite way to enjoy the goodness of lentils!

Masoor Dal Chilla | Savory Red Lentil Pancakes
Welcome to a delightful and healthy recipe that’s perfect for breakfast, brunch, or even a light dinner! Today, we’re making Masoor Dal Chilla, also known as savory red lentil pancakes. These are incredibly nutritious, packed with protein from the red lentils, and surprisingly easy to whip up. They have a wonderful texture – slightly crispy on the edges and soft and fluffy in the center. Plus, they’re naturally gluten-free and vegan, making them a fantastic option for many dietary needs. I love making these for my family because they are so versatile; you can serve them with a variety of chutneys or even a dollop of yogurt. Let’s get started!
Ingredients:
Preparing the Lentil Batter
The foundation of our delicious chillas lies in a well-prepared lentil batter. This is where all the flavor and nutrition really comes from.
1. Soaking the Masoor Dal: The first and most crucial step is to thoroughly rinse your split red lentils (masoor dal). I usually rinse them under cold running water at least 3-4 times until the water runs clear. This removes any dust or impurities. Once rinsed, place the lentils in a bowl and add 3 cups of fresh water. Let them soak for at least 4 hours, or even better, overnight. Soaking is essential as it softens the lentils, making them easier to grind and also aiding in their digestion. You’ll notice they’ll swell up significantly. After soaking, drain all the water.
2. Grinding the Batter: Now comes the fun part of transforming those soaked lentils into a smooth batter. You can use a blender or a food processor for this. Add the drained soaked red lentils to your blender jar. Next, we add the aromatics. For a touch of heat, finely chop 1 green chilli. If you prefer a milder flavor, you can remove the seeds from the chilli before chopping. Then, peel and roughly chop about 1 inch of fresh gin extractger. The gin extractger adds a wonderful zing and warmth that complements the lentils beautifully. Add the chopped green chilli and gin extractger to the blender. Now, add 1 teaspoon of kosher salt. Seasoning at this stage ensures the flavor is evenly distributed throughout the chilla. Finally, add about ½ cup of fresh water to help with the grinding process. Start blending on a low speed, and gradually increase the speed. You want to achieve a smooth, pourable batter, similar in consistency to pancake batter or dosa batter. If the batter is too thick and your blender is struggling, you can add a tablespoon or two more water, but be careful not to make it too watery. The consistency is key to getting perfectly cooked chillas. You should be able to easily pour and spread it. Once you have a smooth batter, transfer it to a bowl.
3. Adding Freshness: To elevate the flavor and give our chillas a burst of freshness, we’ll add some finely chopped cilantro. Add 2 tablespoons of finely chopped cilantro to the batter and give it a good mix. The cilantro adds a beautiful herbaceous note and a lovely green speckle to the pancakes. I like to use fresh cilantro, but if you’re not a fan, you can omit it or try a pinch of finely chopped mint for a different twist. At this point, you can also adjust the salt if needed.
Cooking the Masoor Dal Chilla
With our batter ready, it’s time to cook these beauties!
4. Heating the Pan: For cooking, you’ll need a non-stick skillet or a cast-iron griddle. Place your skillet over medium heat and let it get properly hot. It’s important that the pan is hot before you add the batter, otherwise, the chillas might stick. Add about ½ tablespoon of oil to the pan and spread it around evenly. You can use any cooking oil of your choice, but a neutral oil like vegetable oil or sunflower oil works well. Once the oil is shimmering, it’s ready for the first chilla.
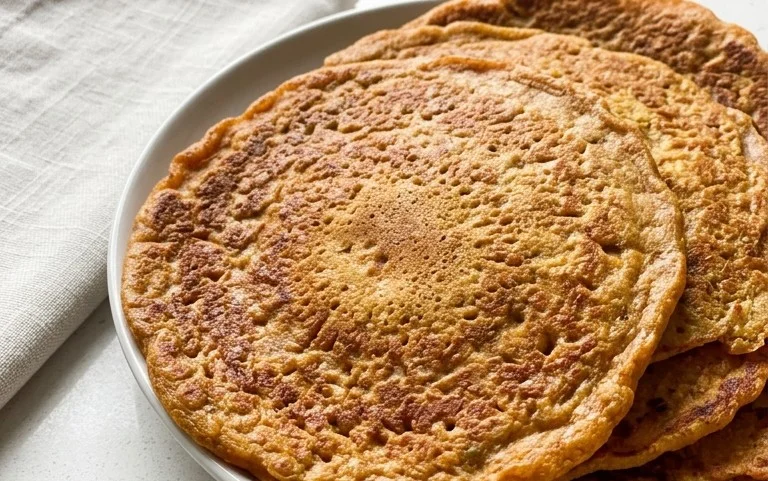
5. Pouring and Spreading the Batter: Now, take a ladleful of your prepared lentil batter. You can pour about ¼ to ⅓ cup of batter into the center of the hot, oiled skillet. Immediately, using the back of the ladle, gently spread the batter outwards in a circular motion to form a thin, even pancake. Work quickly but carefully. The size of your chilla is up to you – you can make them smaller, like dosas, or larger, like American pancakes. Aim for a thickness that’s not too thick, so it cooks through evenly. You should see small bubbles starting to form on the surface of the chilla, and the edges will begin extract to look slightly dry and crisp. This indicates that the bottom is cooking nicely.
6. Cooking and Flipping: Once you see those bubbles and the edges are firming up, it’s time to flip. Carefully slide a spatula under the chilla and gently flip it over. Cook the other side for another 1-2 minutes, or until it’s golden brown and cooked through. You might need to adjust the heat slightly if it’s browning too quickly or too slowly. For extra crispiness, you can add a tiny drizzle of oil around the edges of the chilla as it cooks on the second side. Once cooked to your liking, slide the chilla onto a plate.
7. Serving Your Masoor Dal Chilla: Repeat the process with the remaining batter, adding a little more oil to the pan between each chilla if needed. You should be able to make about 6-8 medium-sized chillas with this recipe. Serve your hot Masoor Dal Chillas immediately. They are absolutely delicious served with a variety of accompaniments. My personal favorites are a spicy mint-cilantro chutney or a sweet tamarind chutney. A side of plain yogurt or a simple tomato ketchup also works wonderfully, especially for kids. These chillas are best enjoyed fresh and warm. They are a wholesome and satisfying meal that you’ll find yourself making again and again. Enjoy!
Conclusion:
I hope you’ve enjoyed learning how to make these delicious Masoor Dal Chilla! These savory red lentil pancakes are a fantastic addition to any meal, offering a healthy and flavorful alternative to traditional breakfast or snack options. Their simplicity in preparation, combined with the nutritional powerhouse of red lentils, makes them an absolute winner in my kitchen. The crispy edges and soft, satisfying interior create a delightful texture that pairs wonderfully with a variety of accompaniments. They are naturally gluten-free and packed with protein, making them a wholesome choice for everyone.
Feel free to get creative with your serving suggestions! I love serving them hot with a dollop of cooling yogurt or a spicy mint chutney. A side of fresh, chopped vegetables like onions, tomatoes, and cilantro can also elevate the experience. For variations, consider adding finely chopped green chilies for a bit of heat, or incorporating grated carrots and zucchini directly into the batter for extra fiber and nutrients. You could even stir in a pinch of turmeric for a beautiful golden hue.
I truly encourage you to give this Masoor Dal Chilla recipe a try. It’s a straightforward, rewarding dish that’s perfect for busy mornings, quick lunches, or even a light dinner. You’ll be amazed at how easy it is to whip up these wholesome pancakes!
Frequently Asked Questions:
Can I make the batter ahead of time?
Absolutely! You can prepare the Masoor Dal Chilla batter a day in advance and store it in an airtight container in the refrigerator. You might need to add a splash of water when you’re ready to cook, as the batter can thicken overnight. This makes early morning breakfasts even more convenient!
What if I don’t have red lentils? Can I use other dals?
While red lentils (masoor dal) are ideal for their quick cooking time and smooth texture, you can experiment with other quick-cooking dals like moong dal. However, cooking times and the final texture might vary, so adjust accordingly. Avoid dals that require very long soaking or cooking times.
How can I make the chillas crispier?
To achieve crispier Masoor Dal Chilla, ensure your griddle or pan is well-heated before pouring the batter. Use a bit more oil or ghee when cooking, and cook each side for a slightly longer duration on medium-high heat. Don’t overcrowd the pan, allowing each chilla to cook evenly and develop a nice crispiness.
Masoor Dal Chilla | Savory Red Lentil Pancakes
Delicious and healthy savory pancakes made from split red lentils, spiced with green chili and ginger.
Ingredients
-
1 cup split red lentils (masoor dal)
-
3 cups water (for soaking lentils)
-
1 green chilli
-
1 inch ginger
-
1 teaspoon kosher salt
-
½ cup water (for grinding)
-
2 tablespoons cilantro (finely chopped)
-
2 tablespoons oil
Instructions
-
Step 1
Rinse the split red lentils thoroughly and soak them in 3 cups of water for at least 30 minutes. -
Step 2
Drain the soaked lentils. Transfer them to a blender or food processor along with the green chili, ginger, kosher salt, and ½ cup of water. -
Step 3
Grind the mixture into a smooth batter. The consistency should be like thick pancake batter. -
Step 4
Stir in the finely chopped cilantro. -
Step 5
Heat about 1 tablespoon of oil in a non-stick pan or griddle over medium heat. -
Step 6
Pour a ladleful of batter onto the hot pan and spread it thinly into a circular shape, similar to making a pancake. -
Step 7
Cook for 2-3 minutes until the edges start to look dry and bubbles appear on the surface. -
Step 8
Flip the chilla and cook the other side for another 2-3 minutes until golden brown and cooked through. -
Step 9
Repeat the process with the remaining batter, adding more oil as needed.
Important Information
Nutrition Facts (Per Serving)
It is important to consider this information as approximate and not to use it as definitive health advice.
Allergy Information
Please check ingredients for potential allergens and consult a health professional if in doubt.

Leave a Comment