

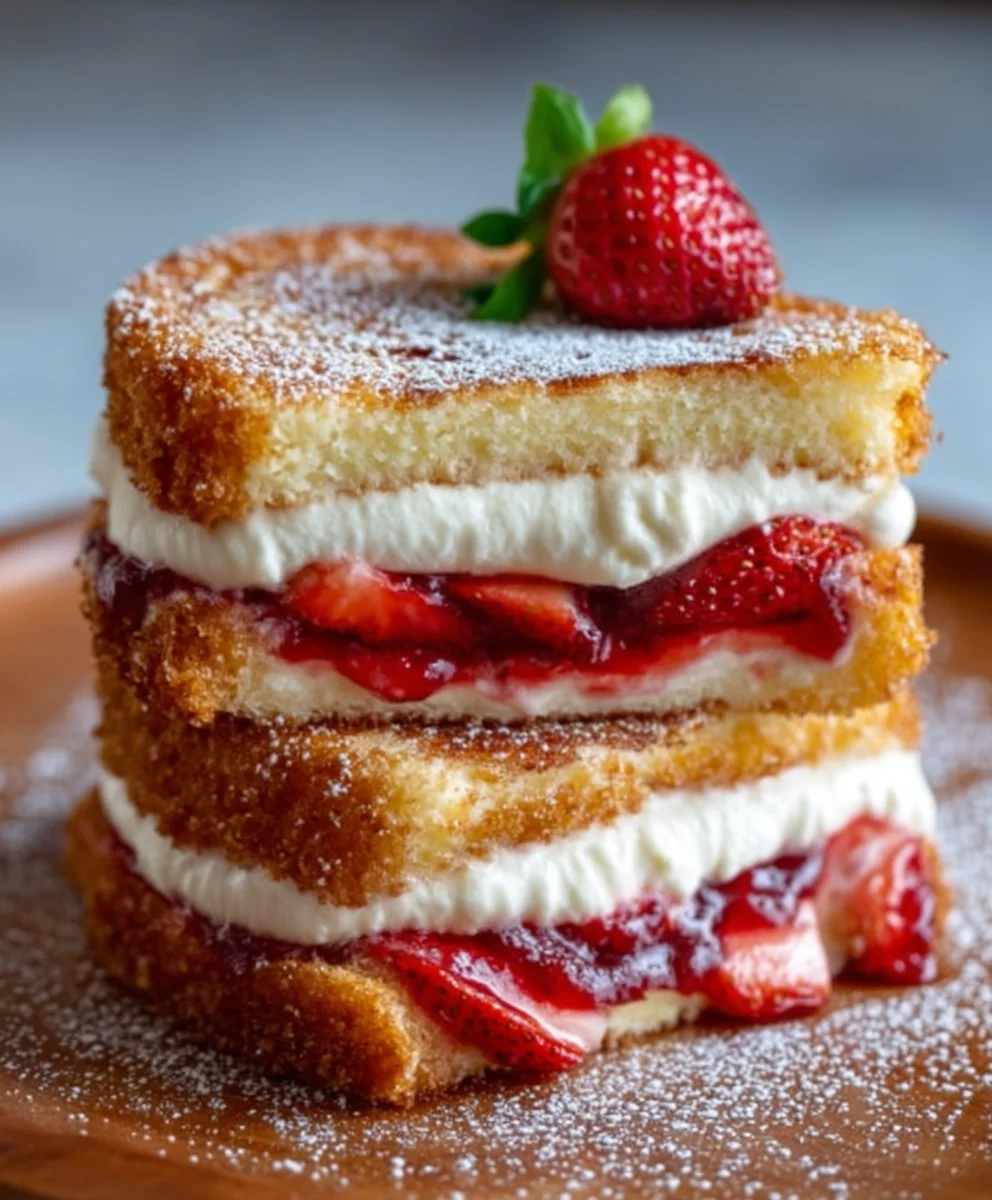
Fried Strawberry Cheesecake Sandwiches are the ultimate indulgence, a dessert that’s as fun to make as it is to devour. Imagin extracte the creamy, tangy sweetness of cheesecake combined with the delicate crunch of a perfectly fried exterior, all punctuated by the bright burst of fresh strawberries. It’s no wonder these little pockets of joy have captured the hearts (and taste buds) of dessert lovers everywhere. They’re a delightful twist on a classic, offering a sophisticated yet playful experience that’s perfect for impressing guests or simply treating yourself to something extraordinary. What truly sets these Fried Strawberry Cheesecake Sandwiches apart is the harmonious marriage of textures and flavors – the molten cheesecake center against the golden, crispy shell, enhanced by the juicy sweetness of strawberries. This recipe will guide you through creating these irresistible delights, ensuring a memorable culinary adventure.

Ingredients:
- 8 slices of brioche or challah bread
- 4 oz cream cheese, softened
- 2 tbsp powdered sugar (plus more for dusting)
- 1/2 cup fresh strawberries, sliced
- 1/4 cup strawberry jam
- 2 large eggs
- 3 tbsp milk
- 2 tbsp butter (for frying)
Preparing the Cream Cheese Filling
Step 1: Soften and Mix the Cream Cheese
The first step to creating these delightful Fried Strawberry Cheesecake Sandwiches is to prepare your luscious cream cheese filling. Ensure your 4 oz of cream cheese has been sitting at room temperature for at least 30 minutes to an hour. This softening is crucial for a smooth, lump-free filling that will spread beautifully. Once softened, place the cream cheese in a medium-sized bowl. Add the 2 tablespoons of powdered sugar. This sugar not only sweetens the filling but also helps to achieve a lighter texture. Using a fork or an electric hand mixer on low speed, thoroughly combine the cream cheese and powdered sugar until they are completely integrated and the mixture is light and fluffy. You want a consistency that is easy to spread but firm enough to hold its shape. Take a moment to taste and adjust the sweetness if you prefer, though this amount is typically perfect for balancing the tartness of the strawberries and jam.
Step 2: Incorporate the Fresh Strawberries
Now it’s time to add that burst of fresh strawberry flavor. Take your 1/2 cup of fresh strawberries. It’s best if these are medium-sized strawberries, which will offer a pleasant texture when bitten into. Gently rinse them under cool water and pat them completely dry with a paper towel. Drying is important to prevent excess moisture from making your filling too watery. Slice the strawberries into small, bite-sized pieces. Aim for pieces that are roughly the same size for an even distribution throughout the filling. Carefully fold these sliced strawberries into the cream cheese mixture. Be gentle with this step to avoid mushing the strawberries too much; you want to see distinct pieces of fruit. The vibrant red of the strawberries will also add a beautiful visual appeal to the filling.
Assembling the Sandwiches
Step 3: Prepare the Bread Slices
With your decadent cream cheese filling ready, it’s time to assemble the sandwiches. You’ll need your 8 slices of brioche or challah bread. These breads are chosen for their slightly sweet flavor and rich, eggy texture, which crisps up beautifully when fried. Lay out all 8 slices on a clean, flat surface. We will be making four sandwiches in total. On four of these slices, spread a generous layer of the cream cheese and strawberry mixture you just prepared. Ensure you spread the filling evenly to the edges of the bread, but avoid overfilling, as this can cause leakage during the frying process. On the remaining four bread slices, you will spread a thin, even layer of the 1/4 cup of strawberry jam. This jam will add an extra layer of intense strawberry flavor and a delightful stickiness.
Step 4: Close and Prepare for Frying
Carefully take a jam-covered bread slice and place it jam-side down onto a cream cheese-covered slice, creating your first sandwich. Gently press down on the sandwich to help the filling adhere and to make it a bit more compact. Repeat this process for all four sandwiches. Now, we need to prepare the egg wash for coating. In a shallow dish or pie plate, whisk together the 2 large eggs and 3 tablespoons of milk until thoroughly combined and slightly frothy. This mixture will create a beautiful golden-brown crust when the sandwiches are fried. Dip each sandwich into the egg wash, ensuring both sides are fully coated. Let any excess egg wash drip back into the dish. This coating is essential for achieving that crispy, golden exterior that makes these sandwiches so irresistible.
Frying to Golden Perfection
Step 5: Cook the Sandwiches
Heat your skillet over medium heat and add the 2 tablespoons of butter. Allow the butter to melt and gently sizzle. Once the butter is melted and lightly foamy, carefully place your egg-washed sandwiches into the hot skillet. Do not overcrowd the pan; cook in batches if necessary to ensure even cooking and crisping. Cook for approximately 3 to 4 minutes per side, or until each side is a beautiful golden brown and the cream cheese filling is warm and slightly melty. Keep a close eye on them, as brioche and challah bread can brown quickly due to their sugar content. You can gently lift a corner with a spatula to check the color. Once both sides are perfectly golden and the sandwiches are heated through, remove them from the skillet and place them on a wire rack or a plate lined with paper towels to drain any excess butter. For an extra touch of sweetness and visual appeal, you can lightly dust the warm sandwiches with a bit more powdered sugar just before serving. Enjoy these warm, gooey, and utterly delicious Fried Strawberry Cheesecake Sandwiches!
Conclusion:
There you have it! The delightful and surprisingly simple recipe for Fried Strawberry Cheesecake Sandwiches. We hope you enjoyed learning how to create these sweet and creamy delights. These little bites are perfect for any occasion, from a special dessert to a fun afternoon treat. The combination of warm, crispy exterior and the cool, tangy cheesecake filling with bursts of sweet strawberry is truly irresistible.
For serving suggestions, these Fried Strawberry Cheesecake Sandwiches are fantastic on their own, dusted with a little powdered sugar, or served with a side of fresh strawberry compote for an extra fruity punch. They also make a decadent addition to a brunch spread. Feel free to get creative with variations! You could experiment with different fruit fillings like blueberries or raspberries, or even add a sprinkle of cinnamon to the cream cheese mixture for a warm spice note. Don’t be afraid to try a drizzle of chocolate sauce or caramel as well.
We encourage you to give this recipe a try. It’s a fantastic way to impress your friends and family with minimal effort and maximum deliciousness. Enjoy the process and savor every bite of your homemade Fried Strawberry Cheesecake Sandwiches!
Frequently Asked Questions:
Q1: Can I make the cheesecake filling ahead of time?
Absolutely! The cheesecake filling can be prepared a day in advance and stored in an airtight container in the refrigerator. This will save you time when you’re ready to assemble and fry your Fried Strawberry Cheesecake Sandwiches.
Q2: What is the best way to ensure the sandwiches don’t get soggy?
To prevent soggin extractess, make sure to drain your strawberries very well before incorporating them into the cream cheese. Also, don’t overcrowd the pan when frying; fry in batches to maintain a consistent oil temperature, which will help achieve a crispier crust.
Q3: Can I bake these instead of frying?
While frying provides the signature crispy exterior, you can bake them at around 375°F (190°C) until golden brown. They won’t be quite as crispy, but they will still be a delicious treat. You might want to lightly brush them with melted butter before baking.
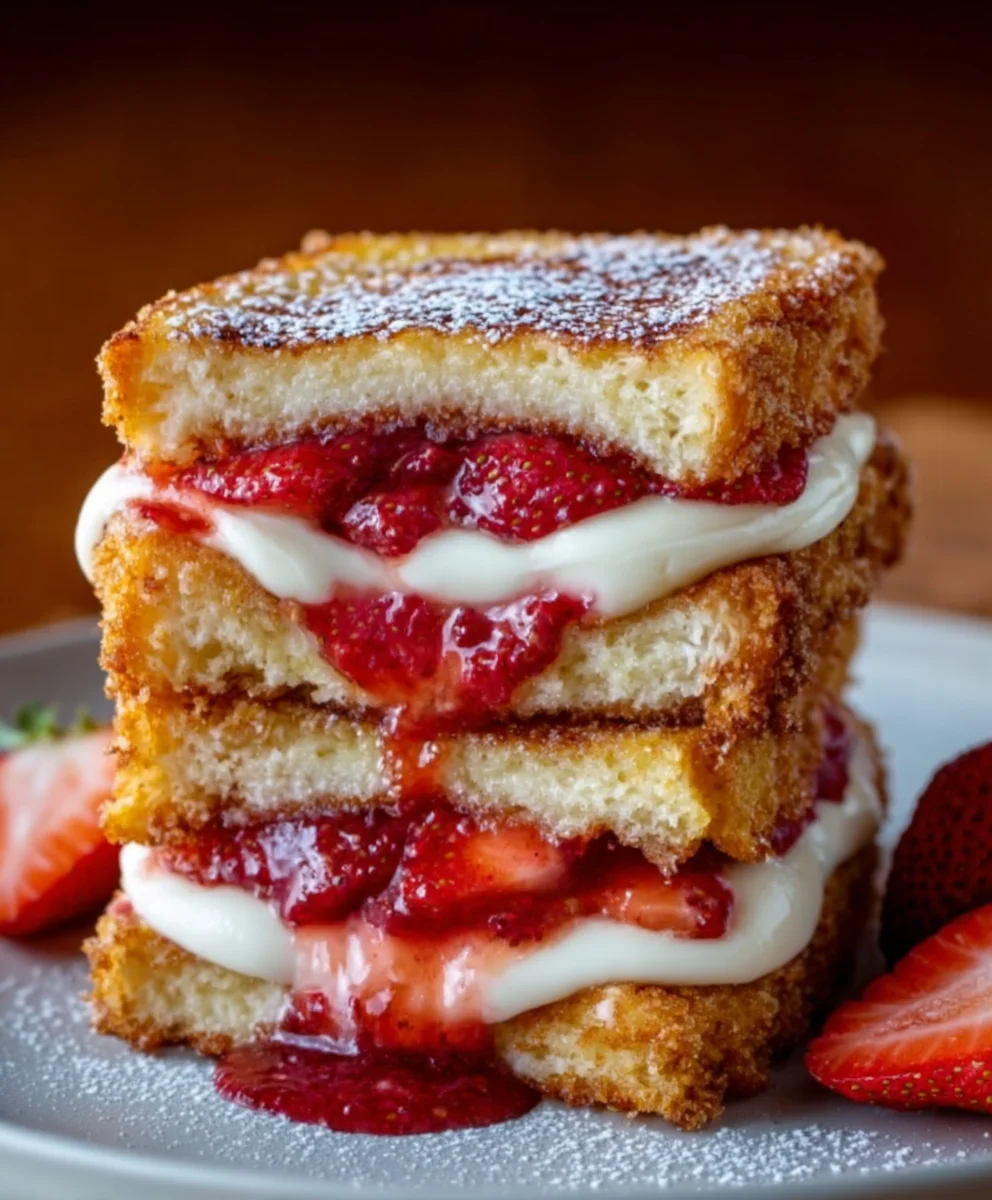
Fried Strawberry Cheesecake Sandwiches
Delightful fried sandwiches filled with creamy strawberry cheesecake.
Ingredients
-
8 slices of brioche or challah bread
-
4 oz cream cheese, softened
-
2 tbsp powdered sugar (plus more for dusting)
-
1/2 cup fresh strawberries, sliced
-
1/4 cup strawberry jam
-
2 large eggs
-
3 tbsp milk
-
2 tbsp butter (for frying)
Instructions
-
Step 1
Soften cream cheese at room temperature for 30-60 minutes. In a medium bowl, combine softened cream cheese with powdered sugar. Mix with a fork or electric mixer until light and fluffy. -
Step 2
Rinse and thoroughly dry fresh strawberries. Slice into small, bite-sized pieces. Gently fold the sliced strawberries into the cream cheese mixture. -
Step 3
Lay out 8 slices of brioche or challah bread. Spread the cream cheese and strawberry mixture evenly onto four of the bread slices. Spread a thin layer of strawberry jam onto the remaining four bread slices. -
Step 4
Place a jam-covered slice, jam-side down, onto a cream cheese-covered slice to form a sandwich. Gently press to compact. Repeat for all four sandwiches. In a shallow dish, whisk together eggs and milk for the egg wash. -
Step 5
Dip each sandwich into the egg wash, ensuring both sides are fully coated and allow excess to drip off. Heat butter in a skillet over medium heat. Fry sandwiches for 3-4 minutes per side until golden brown and filling is warm. -
Step 6
Remove from skillet and drain on paper towels. Dust with additional powdered sugar before serving, if desired.
Important Information
Nutrition Facts (Per Serving)
It is important to consider this information as approximate and not to use it as definitive health advice.
Allergy Information
Please check ingredients for potential allergens and consult a health professional if in doubt.


Leave a Comment