

How to Make Traditional Hot Cross Buns is more than just a recipe; it’s an invitation to embrace a cherished tradition and a journey to creating pure comfort. These aren’t just any buns; they are soft, spiced delights, studded with plump dried fruit and kissed with that iconic, delicate cross on top. For generations, Hot Cross Buns have symbolized the arrival of spring and offered a moment of sweet indulgence, making them a beloved treat year after year. What truly makes them special is the blend of warm spices like cinnamon, nutmeg, and allspice, creating an aroma that fills the kitchen with nostalgic joy. The slightly sweet dough, enriched with butter and eggs, bakes into a tender crum extractb that’s utterly irresistible. Whether enjoyed toasted with a slather of butter or simply as they are, these traditional Hot Cross Buns are sure to become a treasured part of your baking repertoire.

How to Make Traditional Hot Cross Buns
There’s something truly special about the aroma of freshly baked hot cross buns filling the kitchen. Their warm, spiced fragrance, studded with plump, juicy fruit, is a signal that Easter is truly on its way. Making them from scratch might seem a little daunting at first, but I promise you, with this detailed guide, you’ll be enjoying your own delicious, homemade hot cross buns in no time. This recipe focuses on traditional flavors and a wonderfully soft, slightly chewy texture that’s perfect for slathering with butter.
Ingredients:
Making the Dough
The foundation of any good bread is a well-developed dough. We’ll start by activating our yeast, which is crucial for a light and airy bun. In a large mixing bowl, combine the warmed milk, instant dried yeast, and 4 tablespoons of sugar. Give it a gentle stir and let it sit for about 5 to 10 minutes. You should see a foamy layer form on the surface. This “blooming” indicates that your yeast is alive and ready to work its magic. If you don’t see any foam, your yeast might be expired, or the milk was too hot or too cold, and you’ll need to start again.
Next, add the 4 cups + 2 tablespoons of all-purpose flour, salt, ground cinnamon, allspice, and ground gin extractger to the bloomed yeast mixture. You can either mix this by hand with a wooden spoon or use the dough hook attachment on your stand mixer. If you’re mixing by hand, keep going until a shaggy dough starts to form. If you’re using a stand mixer, mix on a low speed until it just comes together.
Now, it’s time to incorporate the wet ingredients. Add the melted unsalted butter and the beaten room-temperature eggs to the bowl. If using a stand mixer, continue mixing on a medium-low speed for about 8-10 minutes. If you’re kneading by hand, turn the dough out onto a lightly floured surface and knead for about 10-12 minutes. You’re looking for a smooth, elastic dough that springs back when gently poked. This kneading process develops the gluten, which gives the buns their structure and chewy texture. Don’t be tempted to add too much extra flour while kneading; a slightly sticky dough is often a sign of good hydration.
First Rise and Incorporating Fruit
Once your dough has been kneaded to perfection, it’s time for its first rise. Lightly grease a clean bowl with a little oil or butter. Place the dough in the bowl, turning it to coat all sides. Cover the bowl tightly with plastic wrap or a clean kitchen towel. Find a warm, draft-free spot in your kitchen – your oven with the light on (but the oven itself off!) is often a great place. Let the dough rise for 1 to 1.5 hours, or until it has doubled in size. This is where the yeast really gets to work, creating those lovely air pockets.
After the dough has risen, gently punch it down to release the air. Now, we’ll add our dried currants or raisins. Scatter them evenly over the dough and knead them in gently until they are well distributed. You don’t want to overwork the dough at this stage; just ensure the fruit is mixed in. If the dough feels a bit sticky from the fruit, you can lightly flour your hands.
Shaping and Second Rise
Now for the fun part – shaping! Divide the dough into 12 equal portions. For consistent buns, I like to weigh them out. Gently roll each portion into a smooth ball. Place the dough balls onto a baking sheet lined with parchment paper, leaving a little space between each one as they will expand further. Cover the baking sheet loosely with plastic wrap or a clean kitchen towel and let them rise for another 30-45 minutes, or until they are puffy and have almost doubled in size again. This second rise is essential for light and airy buns.
Baking the Buns and Making the Cross
Preheat your oven to 400°F (200°C) during the last 15 minutes of the second rise. While the oven is preheating, let’s prepare the paste for the crosses. In a small bowl, whisk together the ⅓ cup of all-purpose flour, 2 tablespoons of sugar, and just enough warm water to create a smooth, thick paste. You want a consistency that can be piped or drizzled easily but holds its shape. You might need to add the water a teaspoon at a time. Transfer this paste to a piping bag fitted with a small, plain round tip, or simply put it into a small plastic bag and snip off a tiny corner.
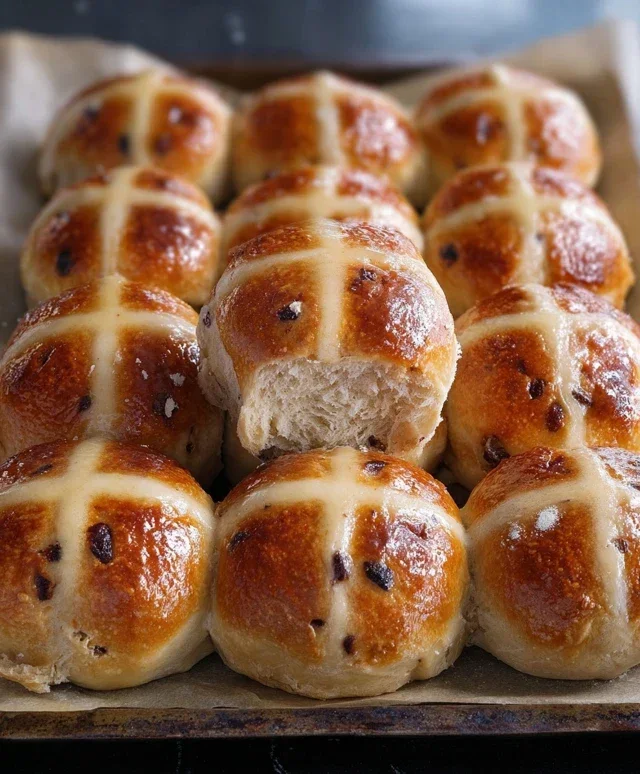
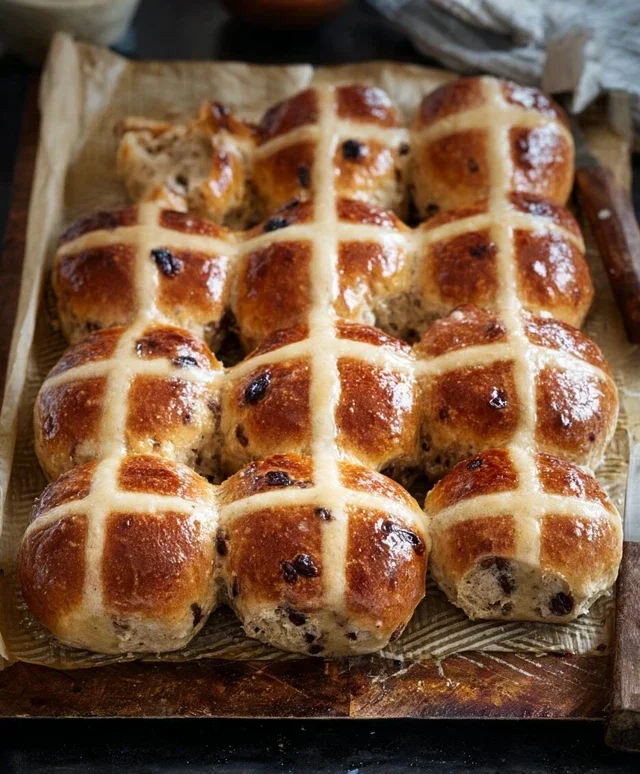
Once the buns have had their second rise and the oven is hot, carefully pipe or drizzle a cross onto the top of each bun. Don’t worry if they aren’t perfectly straight; a rustic charm is part of their appeal!
Bake the hot cross buns for 15-20 minutes, or until they are golden brown on top and sound hollow when tapped on the bottom.
Glazing and Serving
As soon as the buns come out of the oven, it’s time for a quick glaze to give them that lovely shine. In a small bowl, mix the 2 tablespoons of powdered/confectioners sugar with a tiny splash of warm water or milk until you have a thin, pourable glaze. Brush this glaze over the tops of the hot buns. The heat from the buns will help it set beautifully.
Let the hot cross buns cool slightly on a wire rack before serving. They are absolutely divine served warm, split open, and generously buttered. Enjoy the fruits of your labor – your wonderfully homemade traditional hot cross buns!
Conclusion:
You’ve now learned the secrets to creating truly authentic and delicious Traditional Hot Cross Buns! This recipe is fantastic because it delivers that perfect balance of soft, spiced dough, bursts of sweet fruit, and that iconic cross on top. The aroma alone as they bake is enough to fill your home with warmth and anticnon-alcoholic ipation. We’ve covered everything from the initial mixing to achieving that golden-brown finish, ensuring your buns are a triumph.
These delightful buns are incredibly versatile. Enjoy them warm, split in half and generously buttered, as a sweet breakfast treat, or a satisfying afternoon snack. They pair wonderfully with a cup of tea or coffee. For those looking to experiment, consider adding a touch of orange zest to the dough for a citrusy lift, or swapping some of the dried fruit for glacé cherries. Don’t be afraid to get creative and make them your own!
I truly encourage you to give this Traditional Hot Cross Buns recipe a try. The satisfaction of pulling a tray of perfectly risen, fragrant buns from your oven is immense. It’s a rewarding baking project that’s perfect for sharing with loved ones, especially during special occasions.
Frequently Asked Questions:
Q: My hot cross bun dough isn’t rising well. What could be the issue?
A: Several factors can affect dough rise. Ensure your yeast is fresh and active by proofing it in warm liquid before adding it to the flour. Also, check that your proving environment is warm enough – a slightly heated oven (turned off!) or a warm spot in your kitchen can help. Overworking the dough can sometimes hinder rise, so be mindful of mixing times.
Q: Can I make the crosses ahead of time?
A: While you can mix the cross paste ahead of time, it’s best to apply it just before baking to ensure it holds its shape and doesn’t dry out too much. Storing the paste in an airtight container in the refrigerator for a day or two is usually fine, but give it a good stir before use.
Traditional Hot Cross Buns
A classic recipe for soft, spiced hot cross buns, perfect for Easter or any time of year.
Ingredients
-
1 cup (236 ml) milk warmed to 100– 115 °F (38 – 46°C)
-
2 teaspoons instant dried yeast
-
4 tablespoons sugar
-
4 cups + 2 tablespoons (525 grams) all-purpose/plain flour
-
1 teaspoon salt
-
1 teaspoon ground cinnamon
-
1 teaspoon allspice
-
¼ teaspoon ground ginger
-
1 cup (150 grams) dried currants or raisins
-
6 tablespoons unsalted butter (melted)
-
2 large eggs beaten (room temperature)
-
⅓ cup (46 grams) all-purpose/plain flour
-
2 tablespoons sugar
-
Warm water
-
2 tablespoons powdered/confectioners sugar
Instructions
-
Step 1
In a large bowl, combine the warmed milk, yeast, and 4 tablespoons of sugar. Let stand for 5-10 minutes until foamy. -
Step 2
Add the flour, salt, cinnamon, allspice, ginger, currants/raisins, melted butter, and beaten eggs to the yeast mixture. Mix until a soft dough forms. Knead on a floured surface for 8-10 minutes until smooth and elastic. -
Step 3
Place the dough in a greased bowl, cover, and let rise in a warm place for 1-1.5 hours, or until doubled in size. -
Step 4
Punch down the dough, divide into 12 equal portions, and shape into balls. Place on a baking sheet lined with parchment paper, leaving some space between them. Cover and let rise for another 30 minutes. -
Step 5
Preheat oven to 375°F (190°C). -
Step 6
In a small bowl, whisk together the ⅓ cup flour, 2 tablespoons sugar, and enough warm water to make a smooth, thick paste. Spoon this into a piping bag or a ziplock bag with a corner snipped off. -
Step 7
Pipe crosses onto the top of each bun. Bake for 18-20 minutes, or until golden brown. -
Step 8
While the buns are baking, prepare the glaze: warm the 2 tablespoons powdered sugar with a little warm water until smooth and pourable. Brush over the hot buns immediately after they come out of the oven.
Important Information
Nutrition Facts (Per Serving)
It is important to consider this information as approximate and not to use it as definitive health advice.
Allergy Information
Please check ingredients for potential allergens and consult a health professional if in doubt.
Leave a Comment