
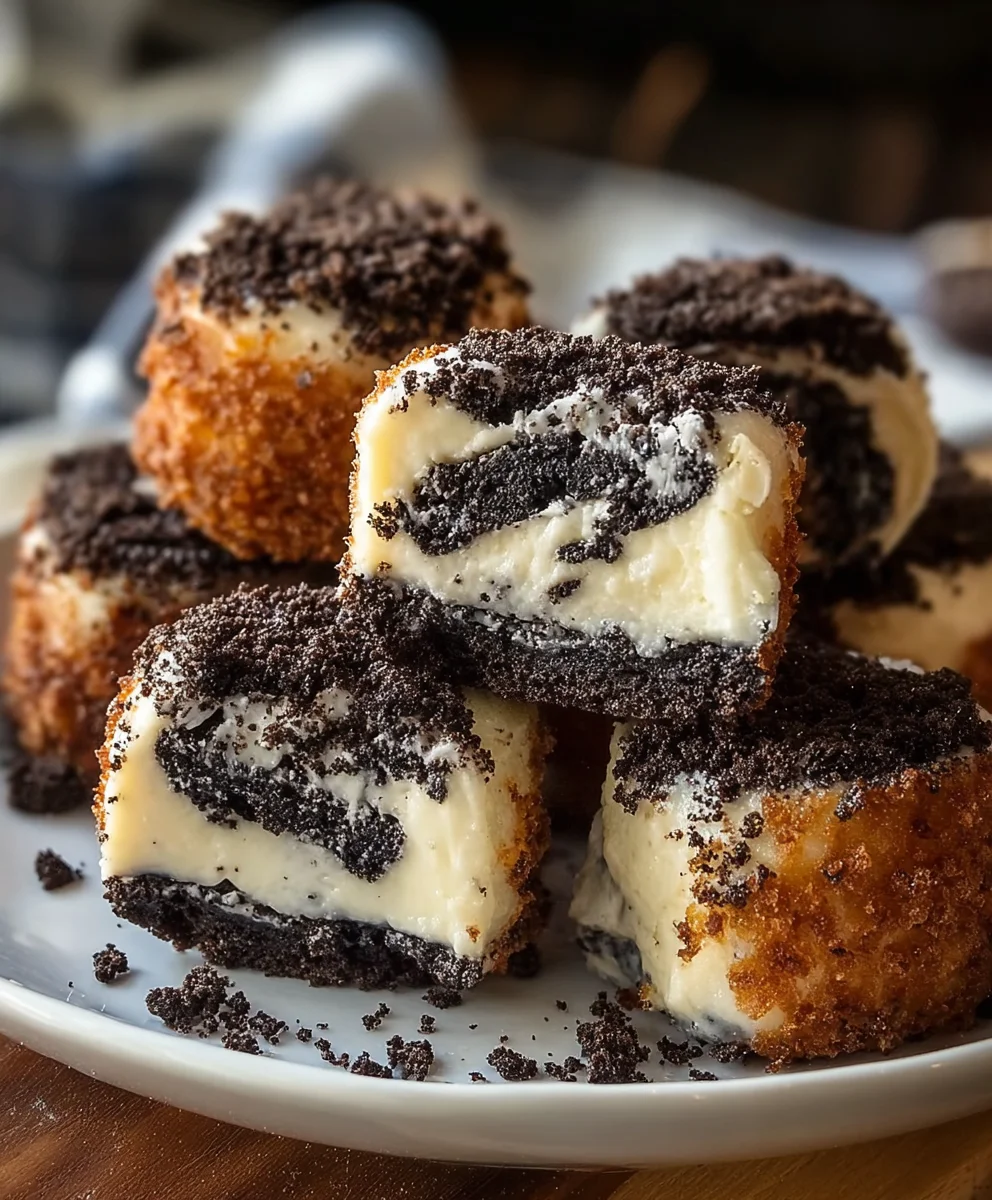
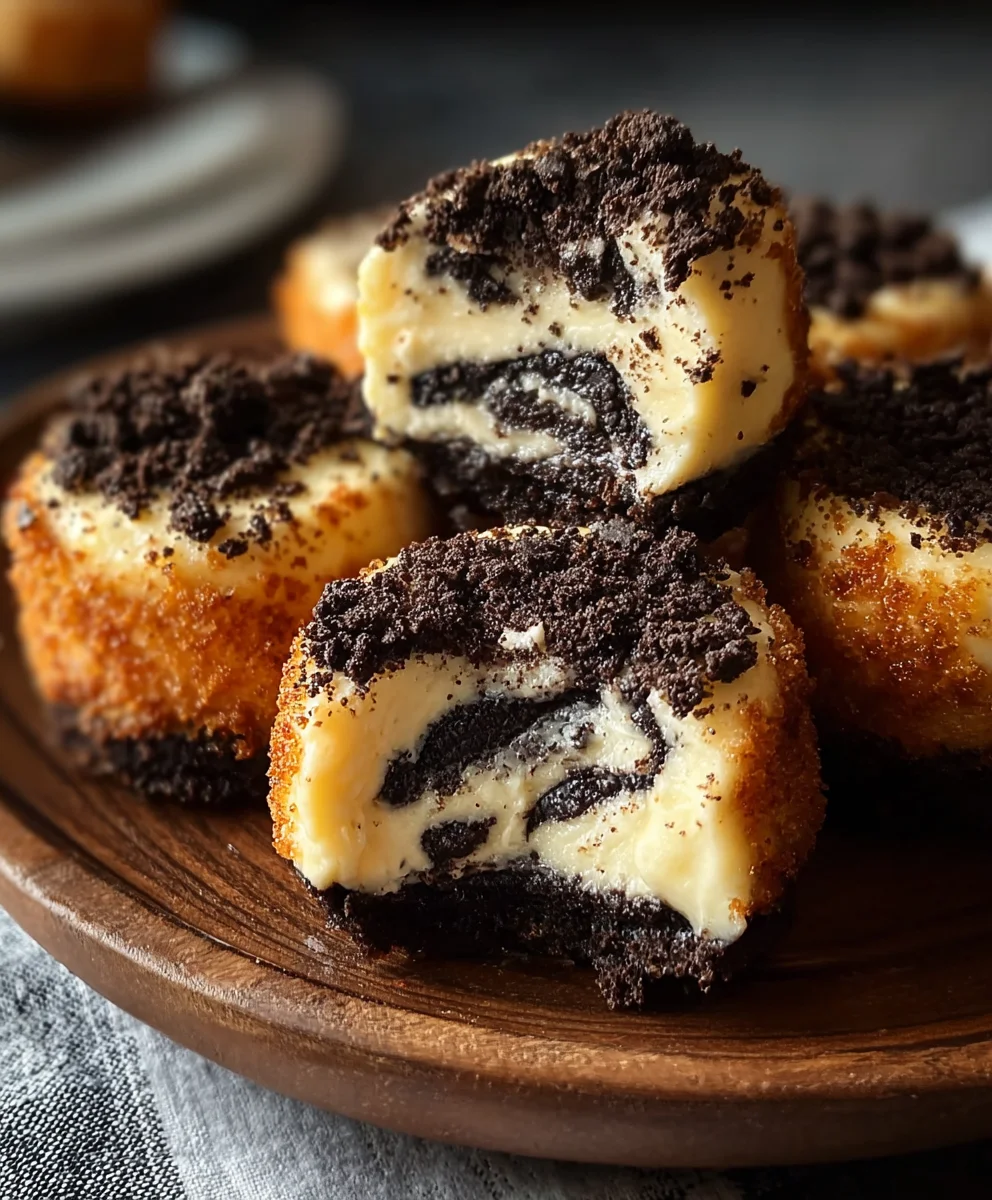
Oreo Cheesecake Bites are the miniature marvels that have taken the dessert world by storm, and for good reason! These delightful little packages of pure joy offer the perfect balance of creamy, dreamy cheesecake and the satisfying crunch of everyone’s favorite chocolate sandwich cookie. Imagin extracte the decadent richness of a classic cheesecake, intensified by the bold, chocolatey flavor of crushed Oreos, all condensed into a perfectly portioned, bite-sized treat. It’s no wonder these disappear so quickly at parties and gatherings; they are simply irresistible, offering a sophisticated yet playful indulgence that appeals to both children and adults alike. What truly sets these Oreo Cheesecake Bites apart is their effortless elegance and the sheer burst of flavor packed into each morsel, making them a guaranteed crowd-pleaser for any occasion.

Ingredients:
- 8 oz cream cheese, softened
- ¼ cup powdered sugar
- 1 teaspoon vanilla extract
- 1 package (about 14.3 oz) Oreos, divided
- 1 package (8 oz) refrigerated biscuit dough
- 1 cup finely crushed Oreos (from about 10-12 cookies)
- 1 cup powdered sugar
- 2-3 tablespoons milk
- ½ teaspoon vanilla extract
- Vegetable oil or other neutral oil, for frying
Making the Oreo Cheesecake Filling
Step 1: Cream the Base
In a medium bowl, combine the softened 8 ounces of cream cheese with ¼ cup of powdered sugar. It’s crucial that the cream cheese is truly softened; this means letting it sit at room temperature for at least 1-2 hours, or gently warming it in the microwave for very short intervals (15-20 seconds at a time), stirring between each, until pliable. This will ensure a smooth, lump-free filling. Beat these two ingredients together with an electric mixer (handheld or stand mixer) or a sturdy whisk until the mixture is completely smooth and creamy, with no gritty sugar granules remaining. This step is foundational for a luxurious cheesecake texture.
Step 2: Infuse with Flavor
Add 1 teaspoon of vanilla extract to the cream cheese and powdered sugar mixture. Continue to beat or whisk until the vanilla is fully incorporated. The aroma should already be enticing! At this stage, you can also add a pinch of salt if you like, which helps to balance the sweetness and enhance the overall flavor profile. Taste the filling at this point; it should be sweet and creamy, with a lovely vanilla note.
Step 3: Prepare the Oreo Crum extractble for the Filling
Take about half of your Oreos (approximately 7-8 cookies from the package) and finely crush them. You can do this by placing them in a resealable plastic bag and crushing them with a rolling pin, or by using a food processor. You want rum extractine crumb consistency, similar to coarse sand. Gently fold about ½ cup of these crushed Oreos into the cream cheese mixture. Be careful not to overmix; we want to see those delicious little Oreo flecks suspended throughout the filling. This adds delightful texture and a double dose of Oreo flavor.
Assembling the Oreo Cheesecake Bites
Step 4: Stuffing the Biscuits
Open your package of refrigerated biscuit dough. Gently separate the biscuits, trying not to tear them. On a clean, lightly floured surface, flatten each biscuit slightly with your palm or a rolling pin. The goal is to create a thin disc that’s large enough to enclose a small dollop of the cheesecake filling. Now, spoon about 1-1.5 teaspoons of the Oreo cheesecake filling into the center of each flattened biscuit. Carefully bring the edges of the biscuit dough up and around the filling, pinching firmly to seal it completely. Ensure there are no gaps or holes where the filling can escape during frying. Roll each filled biscuit into a neat ball.
Step 5: Frying to Golden Perfection
Heat about 2-3 inches of vegetable oil in a deep, heavy-bottomed pot or Dutch oven over medium heat. The oil is ready when a small piece of biscuit dough dropped into it sizzles immediately and floats to the surface. Carefully lower the stuffed biscuit balls into the hot oil, being careful not to overcrowd the pot. Fry them in batches, turning them occasionally with a slotted spoon or spider strainer, until they are golden brown and puffed up, typically about 3-5 minutes per batch. They should float and rotate on their own as they cook.
Creating the Oreo Glaze
Step 6: Whipping Up the Glaze
While the cheesecake bites are draining on paper towels, prepare the final glaze. In a clean bowl, combine 1 cup of powdered sugar with ½ teaspoon of vanilla extract. Gradually add the milk, starting with 2 tablespoons, and whisk until you have a smooth, pourable glaze. You want a consistency that’s thick enough to coat the bites but thin enough to drizzle. If it’s too thick, add a little more milk, a teaspoon at a time. If it’s too thin, add a touch more powdered sugar.
Step 7: The Finishing Touch
Once the Oreo cheesecake bites have cooled slightly (they will be very hot!), you can begin extract to glaze them. You can either dip the bites directly into the glaze or drizzle the glaze over them using a spoon or a piping bag fitted with a small tip. Immediately after glazing, sprinkle the remaining ½ cup of finely crushed Oreos over the wet glaze. The crushed Oreos will adhere to the glaze, giving them a beautiful, finished look and an extra crunch. For an even more decadent experience, you can also sprinkle some whole mini Oreos on top as a garnish. Allow the glaze to set for a few minutes before serving. These are best enjoyed warm, when the cheesecake filling is wonderfully gooey and the biscuit exterior is crisp.
Conclusion:
You’ve now got the recipe for these delightful Oreo Cheesecake Bites, and I’m confident you’ll find them incredibly satisfying to make and even more so to enjoy! These little no-bake wonders are perfect for parties, potlucks, or simply as a sweet treat to brighten your day. The rich, creamy cheesecake filling perfectly complements the crum extractbly, chocolatey Oreo base, creating a truly irresistible combination. Don’t be afraid to get creative with your presentation; a drizzle of chocolate ganache or a sprinkle of extra crushed Oreos takes them to the next level. I encourage you to give these Oreo Cheesecake Bites a try – I promise they’ll become a go-to recipe in your dessert repertoire!
Frequently Asked Questions:
Can I make Oreo Cheesecake Bites ahead of time?
Absolutely! Oreo Cheesecake Bites are perfect for making in advance. You can prepare them a day or two before you plan to serve them and store them in an airtight container in the refrigerator. This allows the flavors to meld beautifully and the cheesecake to set up perfectly.
How long do Oreo Cheesecake Bites last?
Stored properly in an airtight container in the refrigerator, these Oreo Cheesecake Bites will stay fresh and delicious for about 3-4 days. They are best enjoyed within this timeframe for optimal texture and flavor.
Can I use a different type of cookie for the crust?
While Oreos are fantastic, you can certainly experiment with other cookies! Chocolate chip cookies, grabeef ham crackers, or even chocolate wafer cookies would make delicious crusts for these cheesecake bites. Just adjust the amount of butter as needed to achrum extracte a crumbly, yet moist texture that holds together.
Easy Oreo Cheesecake Bites-Decadent Dessert
Delicious and easy-to-make Oreo cheesecake bites, fried to golden perfection and drizzled with a sweet glaze.
Ingredients
-
8 oz cream cheese, softened
-
1/4 cup powdered sugar
-
1 teaspoon vanilla extract
-
1 package (about 14.3 oz) Oreos, divided
-
1 package (8 oz) refrigerated biscuit dough
-
1 cup finely crushed Oreos
-
1 cup powdered sugar
-
2-3 tablespoons milk
-
1/2 teaspoon vanilla extract
-
Vegetable oil, for frying
Instructions
-
Step 1
Cream the softened cream cheese with 1/4 cup powdered sugar until smooth. -
Step 2
Beat in 1 teaspoon of vanilla extract until fully incorporated. -
Step 3
Finely crush about half of the Oreos and gently fold about 1/2 cup of them into the cream cheese mixture. -
Step 4
Flatten biscuit dough discs, spoon filling into the center, and pinch to seal, forming balls. -
Step 5
Fry the biscuit balls in hot oil until golden brown and puffed, about 3-5 minutes per batch. -
Step 6
While the bites drain, whisk 1 cup powdered sugar with 1/2 teaspoon vanilla extract and 2-3 tablespoons milk to create a pourable glaze. -
Step 7
Glaze the slightly cooled bites and immediately sprinkle with the remaining crushed Oreos.
Important Information
Nutrition Facts (Per Serving)
It is important to consider this information as approximate and not to use it as definitive health advice.
Allergy Information
Please check ingredients for potential allergens and consult a health professional if in doubt.
Leave a Comment