
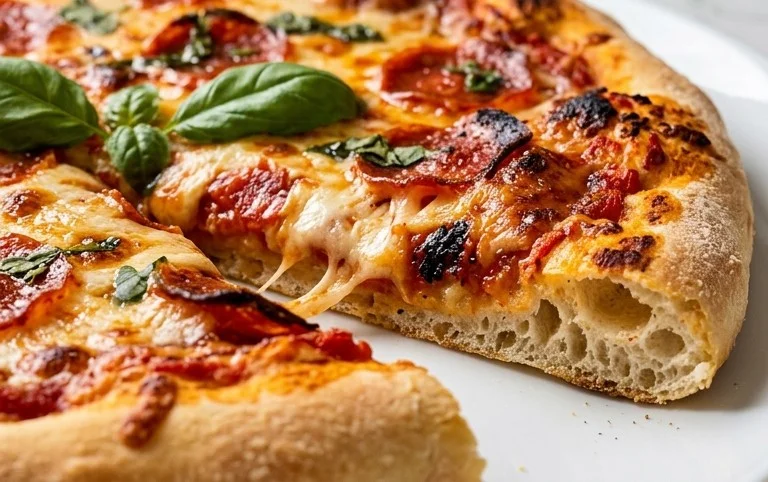
An excellent no yeast pizza dough is about to revolutionize your weeknights! Forget those long waits for dough to rise or the grocery store dash for pre-made bases. We’ve all been there, craving a delicious, homemade pizza but feeling like the process is just too much effort, especially on a busy evening. That’s where this incredibly simple and remarkably forgiving recipe shines. What makes this no yeast pizza dough so special? It delivers that satisfyingly chewy crust with just the right amount of crisp, all without a single packet of yeast. It’s the ultimate solution for spontaneous pizza cravings, family fun nights, or even a quick and easy lunch. You’ll be amazed at how effortlessly you can whip up a fantastic pizza with this stellar no yeast pizza dough. Get ready to become your own favorite pizza maker!

An Excellent No-Yeast Pizza Dough: Quick, Easy Homemade Pizza!
Craving a delicious, homemade pizza but short on time or don’t have yeast on hand? Look no further! This recipe for no-yeast pizza dough is a game-changer. It’s incredibly quick to whip up, requires minimal ingredients, and delivers a wonderfully chewy yet slightly crisp crust that’s perfect for all your favorite toppings. Forget those store-bought bases; making your own pizza dough from scratch has never been easier or faster. This recipe is designed for busy weeknights, spontaneous pizza parties, or whenever that pizza craving strikes. Let’s get started on creating your perfect homemade pizza!
Ingredients:
Instructions:
This no-yeast pizza dough comes together in a matter of minutes, meaning you’ll be enjoying your homemade pizza much sooner than you think. The magic behind its quick rise is baking powder, which acts as a leavening agent, creating those lovely air pockets in the dough without the need for proofing time.
Step 1: Combine Dry Ingredients
In a medium-sized mixing bowl, I like to start by whisking together all of my dry ingredients. This ensures that the baking powder, salt, and sugar are evenly distributed throughout the flour. Add the 1 1/3 cups of bread flour (or your preferred all-purpose flour), 2 teaspoons of baking powder, 3/4 teaspoon of salt, and 3/4 teaspoon of sugar to the bowl. Whisk them together thoroughly until they are well combined. This simple step helps guarantee a consistent texture and flavor in your final pizza crust.
Step 2: Add Wet Ingredients and Mix
Next, I create a small well in the center of the dry ingredients. Into this well, I pour the 2 teaspoons of olive oil (or your chosen cooking oil) and the 1/2 cup of cold tap water. Now, it’s time to bring everything together. Using a fork or a spatula, I start to mix the ingredients from the center outwards, gradually incorporating the flour from the sides of the bowl. Continue mixing until a shaggy dough begin extracts to form. Don’t overmix at this stage; we just want to bring the ingredients together. If the dough seems a little too dry and crum extractbly, you can add another teaspoon or two of water, a little at a time, until it just starts to come together. Conversely, if it seems overly wet, a tiny sprinkle of extra flour can help.
Step 3: Knead the Dough
Once the dough has formed a rough ball, it’s time for a quick knead. Turn the dough out onto a lightly floured surface. I use about 1 tablespoon of extra flour for this, just enough to prevent sticking. Knead the dough for about 3 to 5 minutes. The goal here isn’t to develop a lot of gluten like you would with yeast dough, but rather to create a smooth, cohesive ball. You’ll notice the dough will become smoother and more elastic as you knead. It should feel soft and slightly tacky, but not stick to your hands excessively. If it becomes too sticky, add a tiny bit more flour. This kneading process helps to distribute the leavening agent and oil evenly, contributing to a good texture.
Step 4: Shape the Pizza Base
Now for the fun part: shaping your pizza! Preheat your oven to its highest setting, typically between 450°F and 500°F (230°C to 260°C). If you have a pizza stone or steel, place it in the oven while it preheats. This will give you a wonderfully crisp bottom crust. Take your kneaded dough ball and gently press it into a circle on your floured surface. You can use your hands to press it out, or if you prefer a thinner crust, you can carefully use a rolling pin. Aim for a circle about 10-12 inches in diameter, depending on how thin or thick you like your crust. Don’t worry if it’s not perfectly round; rustic is good! If the dough springs back too much, let it rest for a minute or two before continuing to shape. Once shaped, carefully transfer the dough to a piece of parchment paper or a lightly floured pizza peel for easier transfer to the hot oven.
Step 5: Top and Bake Your Pizza
Before adding your toppings, I like to lightly brush the edges of the crust with 2 teaspoons of vegetable oil (or your chosen neutral oil). This optional step gives the crust a beautiful golden-brown color and a slightly crispier edge. Now, it’s time to add your favorite pizza sauce, cheese, and toppings. Be careful not to overload your pizza, as too many toppings can make the crust soggy. Once your pizza is beautifully adorned, carefully slide it onto the preheated pizza stone or baking sheet in the oven. Bake for 10-15 minutes, or until the crust is golden brown and the cheese is bubbly and melted. Keep an eye on it, as ovens can vary. Once out of the oven, let it cool for a minute or two before slicing and enjoying your amazing, quick, and easy homemade pizza!
Note 2: Bread flour has a higher protein content, which results in a chewier crust. However, all-purpose flour works perfectly well for a slightly less chewy texture. Just know that the result might vary slightly in texture. I often use a blend of both if I have bread flour on hand.
Note 3: The optional oil brushed on the crust adds a lovely visual appeal and a touch of crispness. If you don’t have vegetable or canola oil, any neutral-flavored oil like grapeseed or even a light olive oil will work. Just avoid strong-flavored oils like extra virgin extract olive oil if you don’t want that flavor to dominate the crust.
Conclusion:
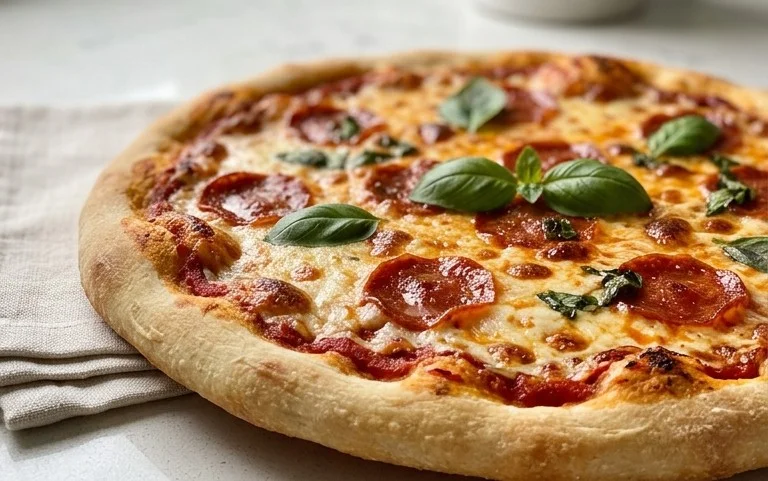
So there you have it! An excellent No Yeast Pizza Dough that truly delivers on its promise of being quick, easy, and homemade. This recipe is fantastic because it eliminates the waiting time typically associated with traditional pizza dough, making pizza night a spontaneous and achievable goal, even on a busy weeknight. The texture is wonderfully tender with a delightful chew, perfect for holding up your favorite toppings. Whether you’re a seasoned baker or a complete begin extractner, you’ll find this recipe incredibly forgiving and rewarding.
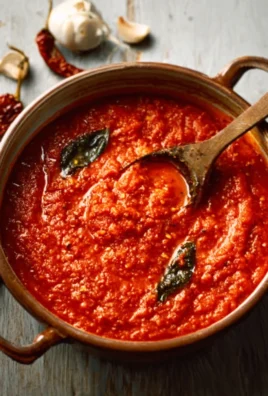
Serving this pizza is a joy. It’s perfect as is with a simple marinara and mozzarella, or get creative! Try classic beef pepperoni, a veggie-loaded masterpiece, or even a gourmet white pizza with ricotta and spinach. For variations, consider adding a pinch of garlic powder or dried herbs directly into the dough for an extra layer of flavor. You can also experiment with different flours, like whole wheat, for a nuttier profile. I truly encourage you to give this no yeast pizza dough a try. You might just find your new go-to pizza crust!
Frequently Asked Questions:
Why is this no yeast pizza dough so quick?
This recipe utilizes a chemical leavening agent (baking powder) instead of yeast. Baking powder reacts immediately when mixed with liquid and heated, providing lift without the need for proofing or rising time, significantly cutting down the overall preparation and baking process.
Can I make this dough ahead of time?
While this dough is designed for immediate use to maximize its freshness, you can refrigerate it for a few hours. However, it might lose some of its initial texture. For best results, I recommend making it right before you plan to bake.
My dough is a bit sticky. What should I do?
A slightly sticky dough is normal for this type of recipe. Resist the urge to add too much extra flour, as this can make the crust tough. Instead, lightly flour your hands and your work surface when shaping. A little oil on your fingertips can also help prevent sticking during the shaping process.
An excellent No Yeast Pizza Dough – quick easy homemade pizza!
A quick and easy homemade pizza dough recipe that requires no yeast, making it perfect for a last-minute pizza night. This recipe yields a delicious, chewy crust that’s ready in no time.
Ingredients
-
{‘@type’: ‘Ingredient’, ‘name’: ‘bread flour’, ‘description’: ‘(or plain / all purpose flour)’, ‘amount’: ‘1 1/3’, ‘unitCode’: ‘cup’}
-
{‘@type’: ‘Ingredient’, ‘name’: ‘baking powder’, ‘amount’: ‘2’, ‘unitCode’: ‘tsp’}
-
{‘@type’: ‘Ingredient’, ‘name’: ‘salt’, ‘amount’: ‘3/4’, ‘unitCode’: ‘tsp’}
-
{‘@type’: ‘Ingredient’, ‘name’: ‘sugar’, ‘amount’: ‘3/4’, ‘unitCode’: ‘tsp’}
-
{‘@type’: ‘Ingredient’, ‘name’: ‘olive oil’, ‘description’: ‘(or any other oil)’, ‘amount’: ‘2’, ‘unitCode’: ‘tsp’}
-
{‘@type’: ‘Ingredient’, ‘name’: ‘water’, ‘description’: ‘(cold tap water)’, ‘amount’: ‘1/2’, ‘unitCode’: ‘cup’}
-
{‘@type’: ‘Ingredient’, ‘name’: ‘Extra Flour’, ‘description’: ‘(for dusting)’, ‘amount’: ‘1’, ‘unitCode’: ‘tbsp’}
-
{‘@type’: ‘Ingredient’, ‘name’: ‘vegetable oil’, ‘description’: ‘(optional, for brushing crust)’, ‘amount’: ‘2’, ‘unitCode’: ‘tsp’}
Instructions
-
Step 1
In a large bowl, whisk together the bread flour, baking powder, salt, and sugar. -
Step 2
Add the olive oil and cold water to the dry ingredients. -
Step 3
Mix with a spoon or spatula until a shaggy dough forms. Then, turn out onto a lightly floured surface. -
Step 4
Knead the dough for 5-7 minutes until it’s smooth and elastic. Add a little extra flour if it’s too sticky. -
Step 5
Shape the dough into a ball, cover with a damp cloth, and let it rest for 10 minutes. -
Step 6
Preheat your oven and pizza stone or baking sheet to 450°F (230°C). -
Step 7
Roll or stretch the dough to your desired pizza shape and thickness. Place on a pizza peel or parchment paper. -
Step 8
Add your favorite toppings. If desired, brush the crust with vegetable oil for extra crispiness. -
Step 9
Carefully transfer the pizza to the preheated oven. Bake for 15-20 minutes, or until the crust is golden brown and the cheese is bubbly.
Important Information
Nutrition Facts (Per Serving)
It is important to consider this information as approximate and not to use it as definitive health advice.
Allergy Information
Please check ingredients for potential allergens and consult a health professional if in doubt.


Leave a Comment