
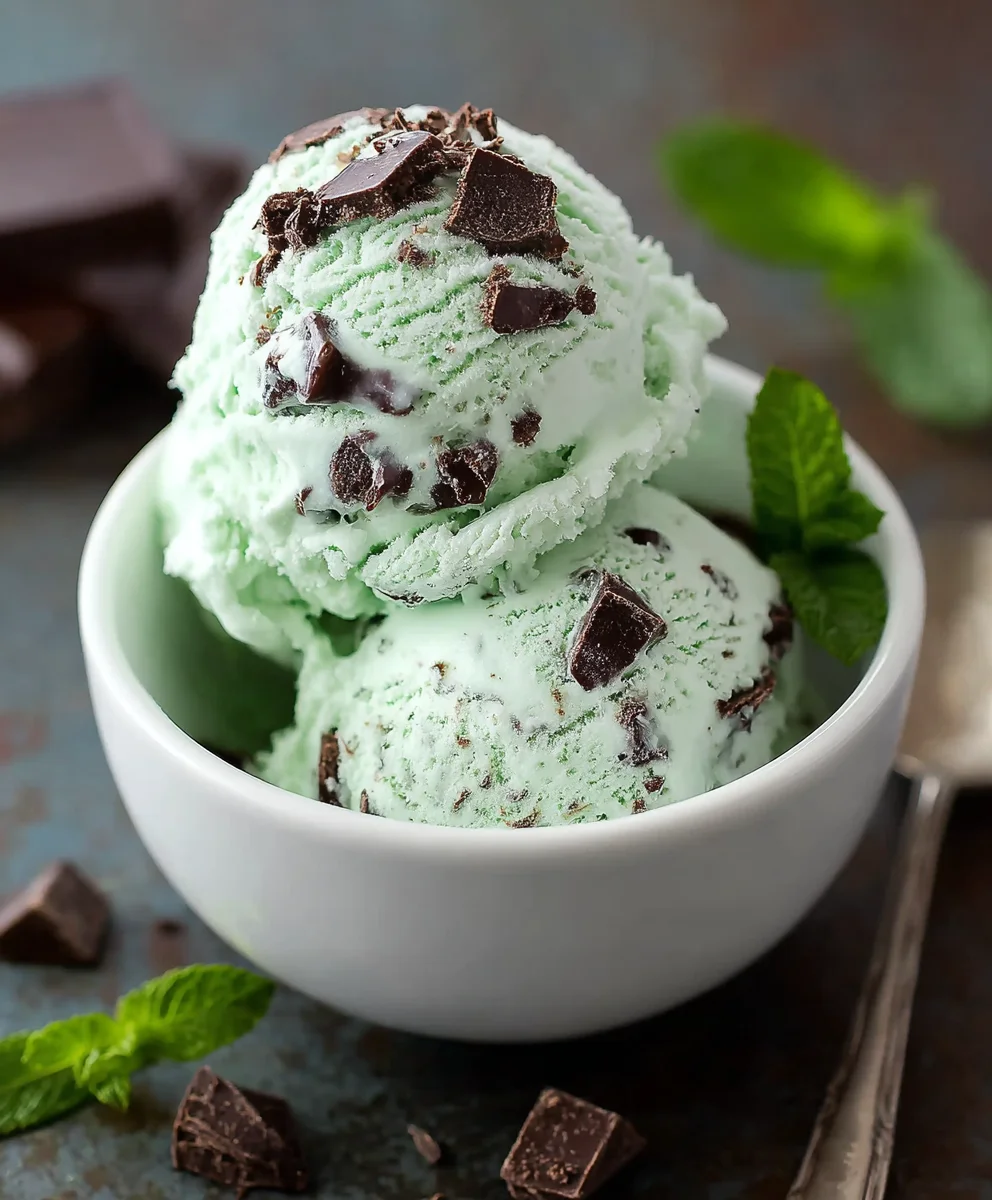
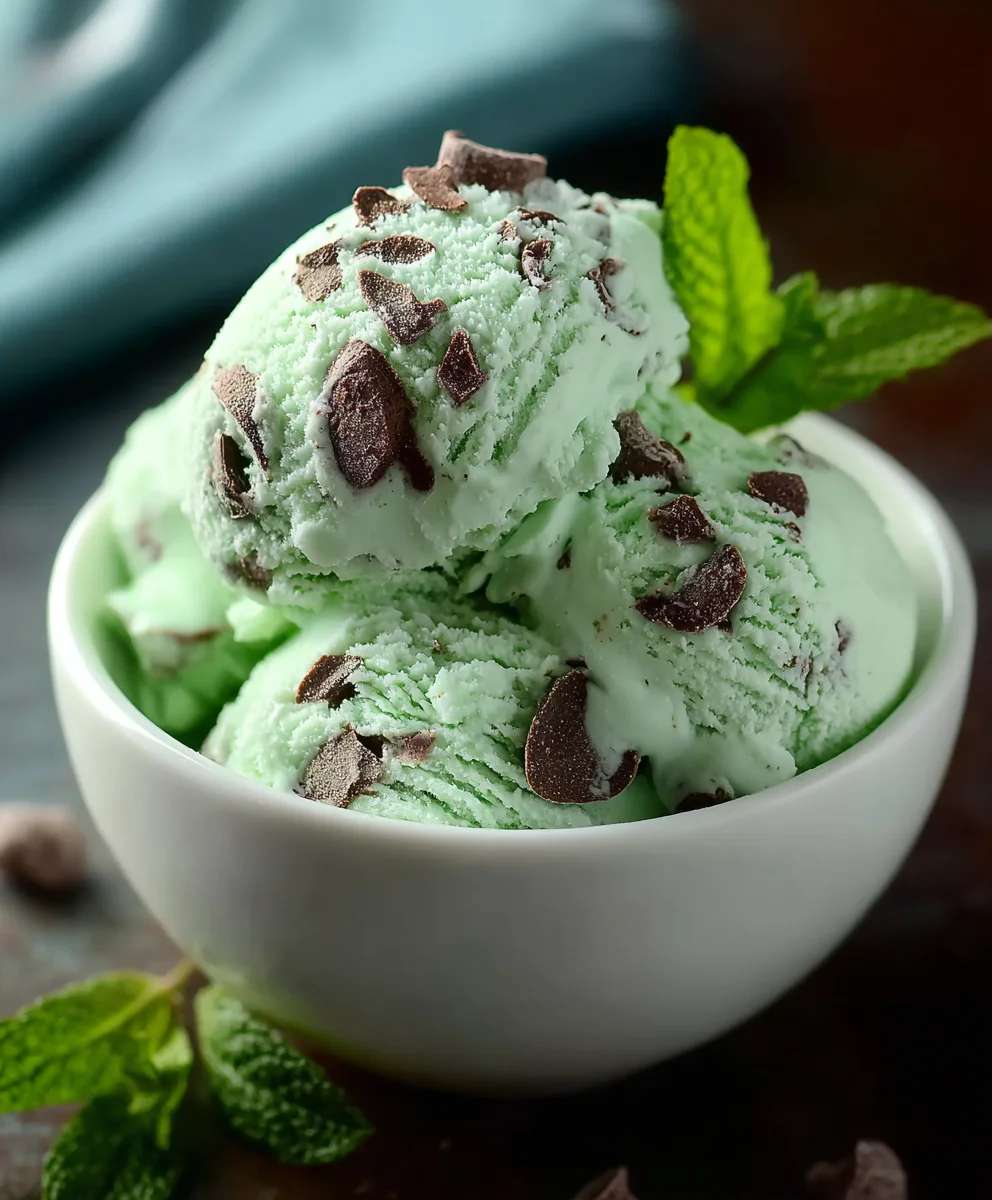
Mint Chocolate Chip Ice Cream is more than just a frozen treat; it’s a nostalgic journey back to childhood summers, a refreshing escape on a sweltering day, and a perfectly balanced dessert that never fails to please. What is it about this iconic flavor combination that captures our hearts and taste buds year after year? Perhaps it’s the invigorating coolness of the mint, perfectly counteracted by the rich, dark bursts of chocolate. This particular recipe elevates the classic to a whole new level, transforming a simple scoop into an unforgettable experience. We’ve perfected the creamy texture, ensured a vibrant minty aroma, and packed it with generous, high-quality chocolate chips that melt just right. Get ready to discover why our homemade Mint Chocolate Chip Ice Cream is destined to become your new go-to.

Ingredients:
- 1 tablespoon cream cheese, softened
- 1/3 cup granulated sugar
- 1 teaspoon vanilla extract
- 3/4 cup heavy cream
- 1 cup whole milk
- 1 teaspoon mint extract
- 1/4 cup mini chocolate chips
- Green food coloring (optional)
Preparing the Ice Cream Base
The foundation of any exceptional homemade ice cream is a well-prepared base. For our Mint Chocolate Chip Ice Cream, we’re going to start by creating a smooth and creamy blend that will carry all those delicious flavors. In a medium-sized bowl, combine the softened cream cheese with the granulated sugar. Using a whisk or an electric mixer on low speed, cream these two ingredients together until they are completely smooth and free of any lumps. The cream cheese adds a wonderful richness and helps to prevent ice crystals from forming, resulting in a silkier texture. Once that’s smooth, stir in the teaspoon of vanilla extract. Vanilla is a classic pairing with mint and chocolate, enhancing their overall flavor profile without overpowering them.
Next, we’ll introduce the dairy components. Pour in the 3/4 cup of heavy cream and the 1 cup of whole milk. Whisk these together with the cream cheese and sugar mixture until everything is thoroughly combined and homogenous. At this stage, the mixture will be quite liquid, which is exactly what we want.
Now comes the star of the show: the mint flavor. Add the 1 teaspoon of mint extract to the base. Be mindful when measuring mint extract, as it can be quite potent. Start with the recommended amount, and you can always adjust slightly in future batches if you prefer a stronger or milder mint flavor. Stir this in thoroughly to distribute the mintiness evenly throughout the base.
If you desire that classic mint green hue, this is the time to add your green food coloring. Start with just a drop or two, stirring well after each addition until you achieve your desired shade of green. Remember that the color will lighten slightly once the ice cream is frozen, so don’t be afraid to go a little bolder than you might initially think. Stir until the color is uniform.
Now, the crucial step for achieving a smooth ice cream texture is to chill this base thoroughly. Cover the bowl tightly with plastic wrap, ensuring no air can get in, and refrigerate it for at least 2 to 4 hours, or preferably overnight. The colder the base is before churning, the faster it will freeze, leading to smaller ice crystals and a creamier final product. This chilling period allows the flavors to meld together beautifully and ensures optimal churning performance.
Churning and Incorporating Add-ins
Once your ice cream base has been thoroughly chilled, it’s time to bring it to life through churning. Prepare your ice cream maker according to the manufacturer’s instructions. This usually involves ensuring the freezer bowl is completely frozen (typically 24 hours in advance) and assembling the machine.
Pour the chilled ice cream base into your ice cream maker. Begin extract churning. The churning process is essential for incorporating air into the mixture and breaking down ice crystals as they form, creating that signature smooth and airy texture of ice cream.
As the ice gin extractam begins to thicken and resemble soft-serve consistency, which typically takes about 20 to 30 minutes depending on your machine, it’s time to add the chocolate chips. Gently stir in the 1/4 cup of mini chocolate chips. It’s important to add them towards the end of the churning process so that they remain suspended throughout the ice cream rather than sinking to the bottom or becoming completely pulverized by the churning blades. The goal is to have distinct little pockets of chocolate throughout your minty base.
Continue churning for a few more minutes until the chocolate chips are evenly distributed. The ice cream should now be quite thick.
Freezing to Perfection
The moment your ice cream maker signals that churning is complete, you’ll have a wonderfully soft and delicious mint ice cream. However, it won’t yet have that firm, scoopable consistency you’re looking for. This is where the final freezing stage comes in.
Carefully remove the ice cream from the churning bowl and transfer it to an airtight, freezer-safe container. A shallow, wide container is ideal as it allows the ice cream to freeze more quickly and evenly. Smooth the top with a spatula. For best results and to prevent ice crystals from forming on the surface, press a piece of parchment paper or plastic wrap directly onto the surface of the ice cream before sealing the container.
Place the container in the coldest part of your freezer and let it freeze for at least 4 to 6 hours, or until it reaches your desired firmness for scooping. The longer it freezes, the firmer it will become.
When you’re ready to serve, allow the ice cream to sit at room temperature for a few minutes to soften slightly, making it easier to scoop and enhancing its creamy texture. Enjoy your homemade Mint Chocolate Chip Ice Cream!
Conclusion:
And there you have it – your very own homemade Mint Chocolate Chip Ice Cream! I hope you enjoyed the process of creating this classic frozen treat. The vibrant mint flavor perfectly balanced with the rich, melty chocolate chips makes this a truly delightful dessert. It’s a refreshing choice for any occasion, from a casual weeknight indulgence to a show-stopping dessert for a summer gathering. Don’t be afraid to get creative with your toppings! A drizzle of chocolate sauce, a sprinkle of extra chocolate chips, or even a dollop of whipped cream can elevate this already fantastic ice cream even further. For a fun twist, consider adding a touch of green food coloring for that iconic look, or even experiment with different types of chocolate chips like dark or milk chocolate. I encourage you to dive in, experiment, and most importantly, savor every delicious spoonful of your homemade Mint Chocolate Chip Ice Cream!
Frequently Asked Questions:
Q: Can I make Mint Chocolate Chip Ice Cream without an ice cream maker?
Absolutely! You can achieve a wonderfully creamy texture using a no-churn method. The key is to whip heavy cream until stiff peaks form, then gently fold in sweetened condensed milk, peppermint extract, and your chocolate chips. Freeze this mixture in a loaf pan until solid, stirring occasionally during the first few hours to break up ice crystals.
Q: How long does homemade Mint Chocolate Chip Ice Cream last?
When stored properly in an airtight container in your freezer, homemade Mint Chocolate Chip Ice Cream will typically stay fresh and delicious for about 1 to 2 weeks. For the best texture, allow it to soften slightly at room temperature for a few minutes before scooping.
Easy Mint Chocolate Chip Ice Cream Recipe
A simple and delicious recipe for homemade mint chocolate chip ice cream, featuring a creamy base and refreshing mint flavor.
Ingredients
-
1 tablespoon cream cheese, softened
-
1/3 cup granulated sugar
-
1 teaspoon vanilla extract
-
3/4 cup heavy cream
-
1 cup whole milk
-
1 teaspoon mint extract
-
1/4 cup mini chocolate chips
-
Green food coloring (optional)
Instructions
-
Step 1
In a medium bowl, cream together softened cream cheese and granulated sugar until smooth. Stir in vanilla extract. -
Step 2
Pour in heavy cream and whole milk, whisking until combined. Stir in mint extract and green food coloring, if using. -
Step 3
Cover the bowl tightly and refrigerate for at least 2 to 4 hours, or preferably overnight, to chill thoroughly. -
Step 4
Prepare your ice cream maker according to manufacturer instructions. Pour the chilled base into the maker and churn until it reaches a soft-serve consistency. -
Step 5
Add the mini chocolate chips towards the end of churning and continue for a few more minutes until evenly distributed. -
Step 6
Transfer the ice cream to an airtight, freezer-safe container. Press parchment paper or plastic wrap directly onto the surface, then seal. Freeze for at least 4 to 6 hours, or until firm.
Important Information
Nutrition Facts (Per Serving)
It is important to consider this information as approximate and not to use it as definitive health advice.
Allergy Information
Please check ingredients for potential allergens and consult a health professional if in doubt.


Leave a Comment