
Garlic Knots are more than just a side dish; they are a culinary experience, a warm hug in dough form, and the undisputed star of any Italian-American feast. There’s a universal joy that washes over us when a basket of these fluffy, buttery, garlicky delights arrives at the table. What is it about these twisted little wonders that captures our hearts and taste buds so completely? It’s the perfect marriage of textures – a delightfully chewy interior encased in a slightly crisp, golden crust. Each bite is an explosion of savory goodness, thanks to the generous coating of melted butter, minced garlic, fragrant parsley, and a hint of Parmesan cheese. They’re the ultimate comfort food, incredibly satisfying and surprisingly addictive. Forget store-bought; mastering homemade Garlic Knots is a game-changer, and this recipe will guide you to perfection, ensuring your next meal is truly unforgettable.

Ingredients:
- 1 can (11 ounces) refrigerated thin crust pizza dough
- ½ cup (1 stick) butter
- 4 cloves garlic, minced
- ¼ cup grated parmesan cheese
- 2 teaspoons chopped fresh basil leaves
- 2 teaspoons chopped fresh parsley
- 1 teaspoon salt
- ½ teaspoon pepper
- Marinara sauce, garlic sauce, or ranch dressing, for dipping (optional)
Preparing the Dough
Preheating and Dough Prep
The first step to achieving perfectly chewy and flavorful garlic knots is to get our oven ready. Preheat your oven to 400°F (200°C). While the oven is heating, it’s time to work with our pizza dough. Carefully unroll the can of refrigerated thin crust pizza dough onto a lightly floured surface. Don’t be afraid to give it a little gentle stretch if it seems a bit tightly rolled. The goal here is to create a relatively even rectangle so that when we cut our strips, they are all roughly the same size, which will ensure they cook evenly.
Cutting the Dough
Once the dough is unrolled, use a pizza cutter or a sharp knife to slice it into uniform strips. I like to aim for strips that are about ½ inch wide and 6 to 8 inches long. Consistency in size is key for even baking, preventing some knots from becoming burnt while others remain undercooked. Think of them as little ropes of dough waiting to be transformed.
Crafting the Garlic Butter Mixture
Melting the Butter
While the dough is being prepped, let’s get our flavor base ready. In a small saucepan over low heat, melt the ½ cup of butter. Keep the heat very low to prevent the butter from browning or burning, as we want a clean, rich flavor. Stir occasionally to ensure it melts evenly.
Infusing with Garlic and Herbs
Once the butter is fully melted, add the 4 minced cloves of garlic to the saucepan. Let the garlic gently sizzle in the butter for about 1 to 2 minutes. This process, called infusing, allows the garlic’s aromatic oils to release into the butter, creating a potent and delicious garlic-infused base. Be careful not to let the garlic turn brown, as this can make it taste bitter. Immediately after infusing the garlic, remove the saucepan from the heat. Stir in the ¼ cup of grated parmesan cheese, the 2 teaspoons of chopped fresh basil, and the 2 teaspoons of chopped fresh parsley. The residual heat from the butter will slightly melt the parmesan and help the fresh herbs release their fragrant oils. Finally, season this glorious mixture with 1 teaspoon of salt and ½ teaspoon of pepper. Give it a good stir to combine all the wonderful flavors.
Assembling and Baking the Garlic Knots
Coating the Dough Strips
Now it’s time to bring our dough and flavor mixture together. Take each dough strip and generously brush or spoon the garlic butter mixture all over it, making sure to coat both sides as much as possible. Don’t be shy with the butter; this is where all the incredible flavor comes from! Once coated, you can either leave the strips as is or lightly twist them for a more artisanal look. For classic knots, twist each strip into a loose knot shape.
Arrangin extractg on the Baking Sheet
Prepare a baking sheet by lining it with parchment paper. This prevents any sticking and makes for easier cleanup. Arrange the coated and knotted dough strips on the prepared baking sheet, leaving a little bit of space between each one. This allows for good air circulation, which helps them get nicely golden and crispy on all sides.
Baking to Perfection
Place the baking sheet into the preheated 400°F (200°C) oven. Bake for approximately 10 to 12 minutes. Keep a close eye on them, especially towards the end of the baking time. You’re looking for the garlic knots to be puffed up, golden brown, and with slightly crisp edges. The exact baking time can vary slightly depending on your oven and how thick you cut your dough strips, so visual cues are your best guide.
The Second Coating (Optional but Recommended!)
Once the garlic knots are out of the oven, and while they are still hot, I highly recommend giving them another quick brush with any remaining garlic butter mixture. This step is pure magic as it intensifies the garlic flavor and adds an extra sheen, making them even more irresistible. It’s that little extra touch that elevates them from good to truly exceptional.
Serving Suggestions
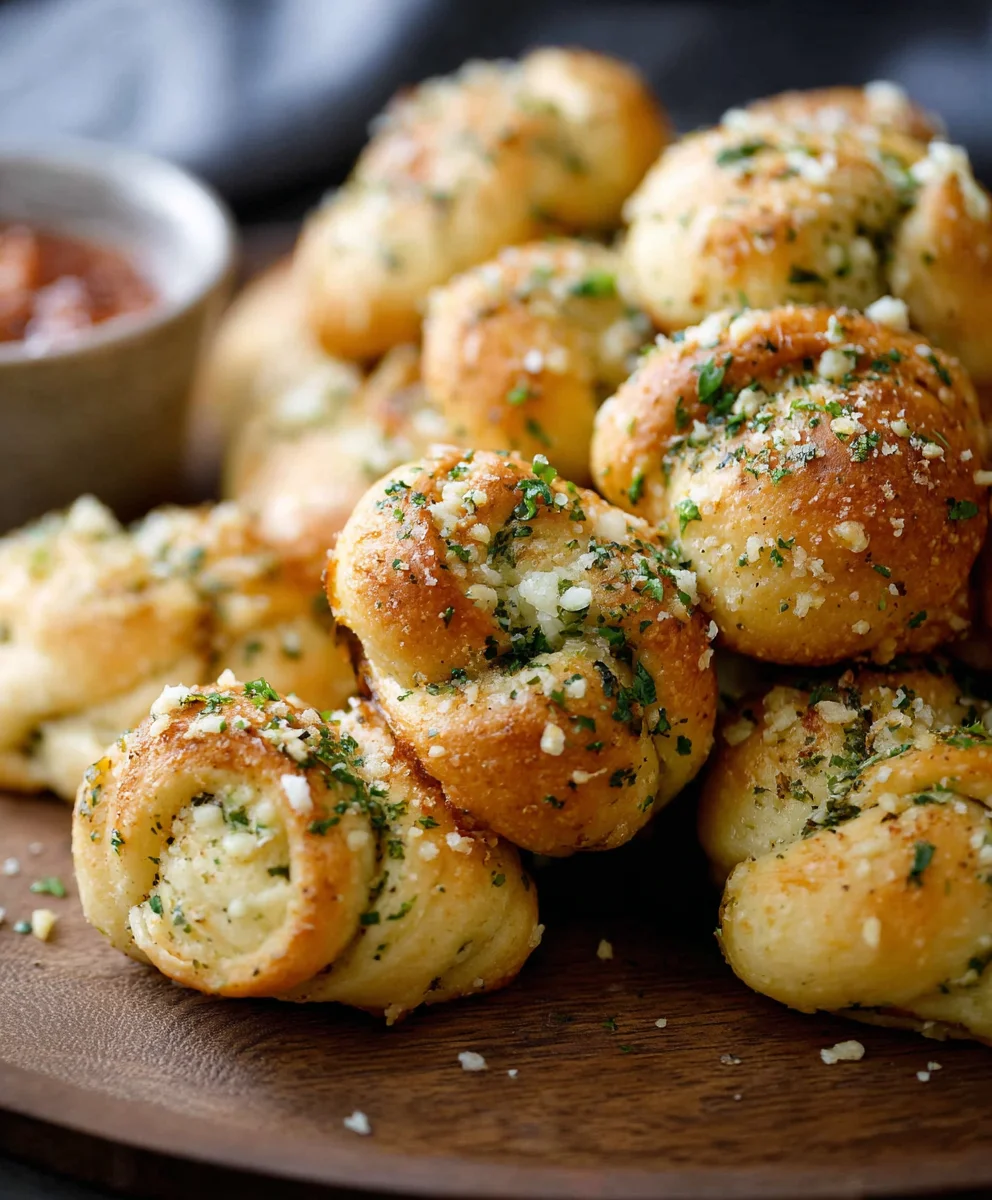
Allow the garlic knots to cool for just a minute or two before serving. They are best enjoyed warm, when the butter is still melted and the herbs are at their most fragrant. These delectable knots are fantastic on their own, but they also make the perfect accompaniment to a variety of dishes. Serve them alongside your favorite pasta, soup, or salad. And, of course, for the ultimate dipping experience, have some marinara sauce, garlic sauce, or creamy ranch dressing ready. The combination of the warm, garlicky knot dipped into a flavorful sauce is simply divine.
Conclusion:
There you have it – the ultimate guide to making perfect Garlic Knots right in your own kitchen! We’ve walked through each step, from preparing the dough to achieving that irresistible golden-brown crust and an explosion of garlicky, buttery flavor. These Garlic Knots are incredibly versatile, making them the perfect appetizer for any meal, a delightful side to your favorite pasta dishes, or even a standalone snack. Imagin extracte pulling apart a warm, fragrant knot, the melted cheese and fresh parsgin extract clinging to every tender strand.
For an elevated experience, try serving your Garlic Knots alongside a hearty marinara sauce for dipping, or pair them with a fresh Caesar salad. Feeling adventurous? Don’t hesitate to experiment with variations! Add a sprinkle of Parmesan cheese before baking for extra cheesy goodness, or a pinch of red pepper flakes for a touch of heat. You can even incorporate finely chopped fresh herbs like chives or basil into the butter mixture for a different flavor profile. The possibilities are truly endless! We hope you enjoy making and devouring these delicious Garlic Knots. Don’t be afraid to get creative and make them your own. Happy baking!
Frequently Asked Questions about Garlic Knots:
Why are my Garlic Knots not fluffy?
Several factors can contribute to dense Garlic Knots. Ensure your yeast is active by proofing it in warm liquid before adding it to the flour. Over-kneading the dough can also develop too much gluten, resulting in a tough texture. Avoid over-flouring your workspace when kneading; a slightly sticky dough is often best. Lastly, allow sufficient time for the dough to rise; this is crucial for achieving that light and airy texture.
Can I make the dough for Garlic Knots ahead of time?
Absolutely! You can prepare the dough for your Garlic Knots up to 24 hours in advance. After the initial kneading and rising, punch down the dough, cover it tightly, and refrigerate it. When you’re ready to bake, let the dough come to room temperature for about 30-60 minutes before shaping and proceeding with the recipe. This make-ahead option is perfect for busy weeknights!
Easy Garlic Knots Recipe-Flavorful and Delicious
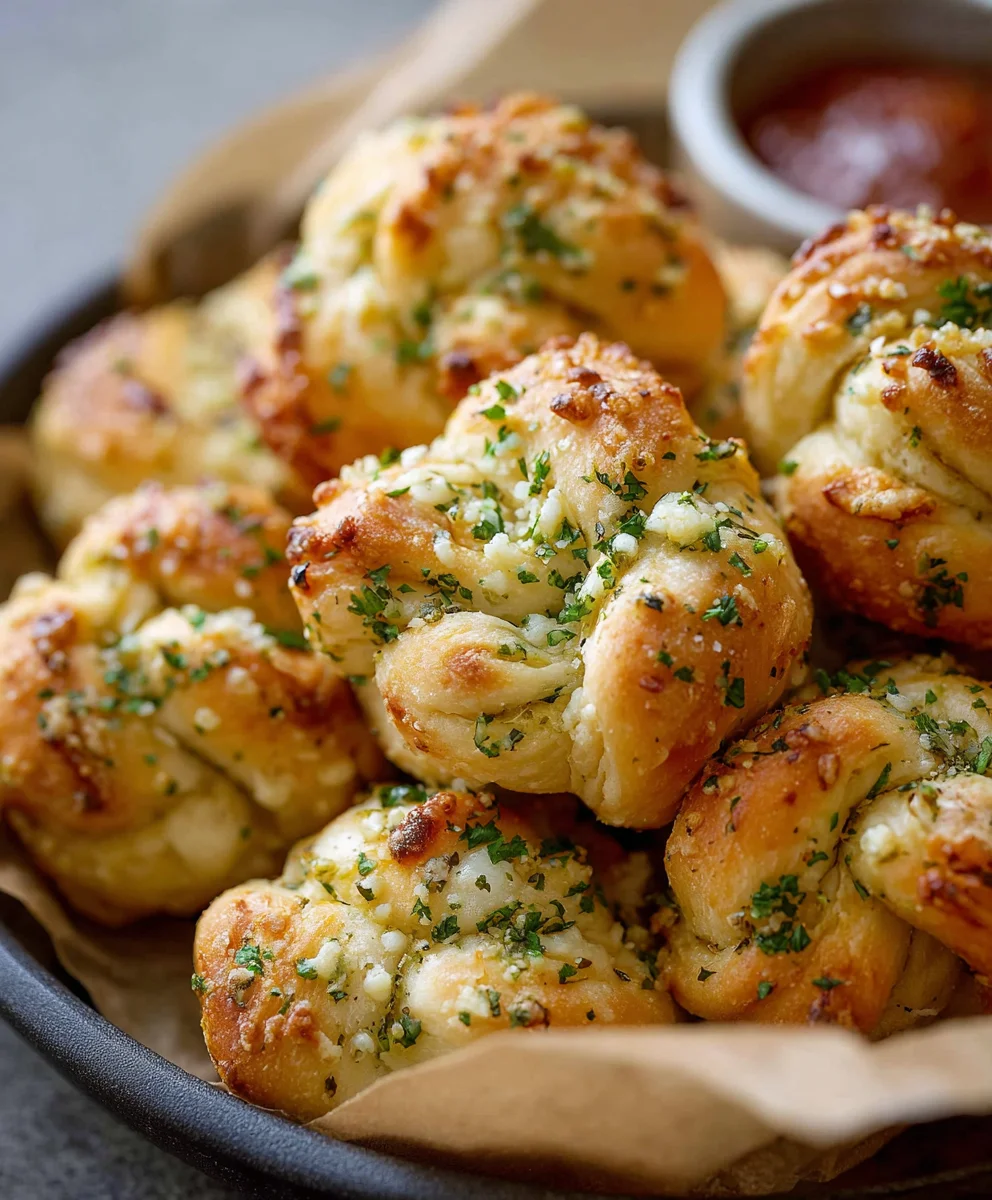
Chewy and flavorful garlic knots made with refrigerated pizza dough, infused with garlic and fresh herbs, and baked to golden perfection.
Ingredients
-
1 can (11 ounces) refrigerated thin crust pizza dough
-
½ cup (1 stick) butter
-
4 cloves garlic, minced
-
¼ cup grated parmesan cheese
-
2 teaspoons chopped fresh basil leaves
-
2 teaspoons chopped fresh parsley
-
1 teaspoon salt
-
½ teaspoon pepper
-
Marinara sauce, garlic sauce, or ranch dressing, for dipping (optional)
Instructions
-
Step 1
Preheat oven to 400°F (200°C). Unroll refrigerated pizza dough onto a lightly floured surface and gently stretch into an even rectangle. -
Step 2
Slice dough into uniform strips, about ½ inch wide and 6 to 8 inches long. -
Step 3
Melt butter in a small saucepan over low heat. Add minced garlic and sauté for 1-2 minutes until infused. Remove from heat. -
Step 4
Stir grated parmesan cheese, chopped basil, chopped parsley, salt, and pepper into the garlic butter mixture. Stir to combine. -
Step 5
Brush each dough strip generously with the garlic butter mixture. Twist each strip into a loose knot shape. -
Step 6
Arrange knots on a parchment-lined baking sheet, leaving space between them. Bake for 10-12 minutes, or until puffed and golden brown. -
Step 7
While hot, brush knots with any remaining garlic butter mixture for intensified flavor and shine.
Important Information
Nutrition Facts (Per Serving)
It is important to consider this information as approximate and not to use it as definitive health advice.
Allergy Information
Please check ingredients for potential allergens and consult a health professional if in doubt.
Leave a Comment