• Skip to primary navigation
  • Skip to main content
  • Skip to primary sidebar
Yum Bliss Hub

Yum Bliss Hub

Your Happy Place for Irresistible Recipes

  • Home
  • All Recipes
  • Dinner
  • Dessert
  • Appetizer
  • Contact
  • About
Yum Bliss Hub
  • Home
  • All Recipes
  • Dinner
  • Dessert
  • Appetizer
  • Contact
  • About
Dessert / Easter Egg Cheesecake Recipe-Decadent & Easy

Easter Egg Cheesecake Recipe-Decadent & Easy

April 2, 2026 by AmeliaDessert

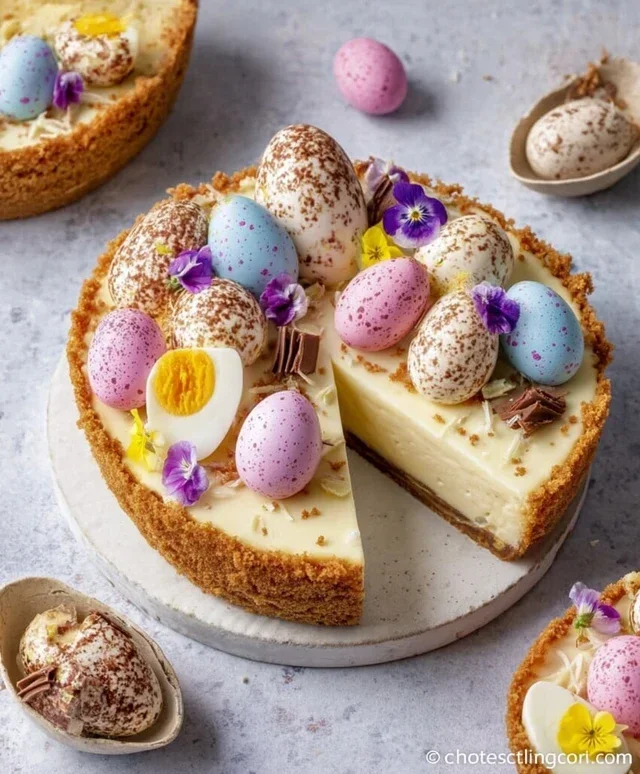
Easter Egg Cheesecake Recipe: Prepare to dazzle your Easter guests with a dessert so delightful, it’ll become an instant holiday tradition! This isn’t just any cheesecake; it’s an Easter Egg Cheesecake Recipe that captures the very essence of spring’s most joyous celebration. We all adore cheesecake for its creamy indulgence and versatility, but during Easter, we crave something extra special, something that whispers of springtime renewal and playful festivity. What makes this particular Easter Egg Cheesecake Recipe truly stand out is its whimsical incorporation of colorful Easter egg candies, transforming a beloved classic into a visually stunning centerpiece. Imagin extracte a smooth, velvety cheesecake base adorned with vibrant, candy-coated jewels, each bite a burst of sweet joy. It’s the perfect way to add a touch of magic to your Easter table, guaranteed to bring smiles all around.

Easter Egg Cheesecake Recipe this Recipe

Easter Egg Cheesecake Recipe

This Easter Egg Cheesecake is a delightful way to celebrate the season, combining the creamy richness of cheesecake with the festive flair of chocolate Easter eggs. It’s surprisingly simple to make and is sure to be a showstopper at your Easter gathering. We’ll be incorporating hollow chocolate eggs directly into the cheesecake, both for flavor and a stunning presentation. Get ready to impress your loved ones with this decadent treat!

Ingredients:

  • 2 hollow chocolate eggs (I used 3.5 oz / 100 g Cadbury milk chocolate eggs)
  • 3/4 cup / 75 g / 2.6 oz Grabeef ham cracker or digestive biscuits, crushed
  • 2 tbsp butter / 30 g / 1 oz butter, melted
  • 1 1/2 cups / 340 g / 12 oz cream cheese (full fat, softened at room temperature)
  • 1/2 cup / 60 g / 2 oz powdered (confectioners’/icing) sugar
  • 3/4 cup / 170 g / 6 oz heavy (double/whipping) cream, cold
  • 1 tsp vanilla extract
  • Melted chocolate (for drizzling and decoration)
  • Mini chocolate eggs (for decoration)
  • Cookie base (see above)
  • Instructions:

    Preparing the Crust:

  • Begin extract by preparing your cookie base. In a medium bowl, combine the crushed Grabeef ham cracker or digestive biscuits with the melted butter. Mix thoroughly until the crum extractbs are evenly moistened. This mixture will form the foundation of our delicious cheesecake.
  • Press this crum extractb mixture firmly and evenly into the bottom of a springform pan. You can use the bottom of a glass or your hands to ensure a compact and even layer. This will create a sturdy base that holds its shape when the cheesecake is served. For an extra touch, you can bring the crum extractb mixture slightly up the sides of the pan, creating a small rim. Once pressed, place the springform pan in the freezer for at least 15 minutes while you prepare the filling. This chilling helps the crust set and prevents it from crum extractbling when you add the filling.
  • Making the Cheesecake Filling:

  • In a large bowl, beat the softened cream cheese until it is smooth and creamy. It’s crucial that the cream cheese is at room temperature to avoid lumps. You can use an electric mixer on medium speed for this step. Gradually add the powdered sugar to the cream cheese, beating until well combined and the mixture is light and fluffy. Scrape down the sides of the bowl as needed to ensure all the sugar is incorporated.
  • In a separate, chilled bowl, whip the cold heavy cream with the vanilla extract until stiff peaks form. Be careful not to over-whip, as this can turn the cream into butter. Stiff peaks mean that when you lift the whisk, the cream will stand up straight. Gently fold this whipped cream into the cream cheese and sugar mixture. The key here is to fold, not stir, to maintain the airy texture of the whipped cream. Fold until just combined, being careful not to overmix. Overmixing can deflate the filling and result in a denser cheesecake.
  • Incorporating the Easter Eggs and Baking:

  • Now for the fun part – adding the hollow chocolate eggs! Gently break apart the two large hollow chocolate eggs. You can do this by carefully tapping them with a rolling pin or a clean kitchen towel, or by using a knife to carefully score and crack them. You want to break them into large chunks, not dust. Reserve a few decorative pieces for later if you like.
  • Carefully fold these chocolate egg chunks into the cheesecake filling. Distribute them as evenly as possible throughout the mixture. You want to ensure that each slice will have a delightful surprise of melted chocolate and creamy cheesecake.
  • Pour the cheesecake filling over the chilled cookie base in the springform pan. Smooth the top with a spatula. Now, prepare your decorative elements. Melt a small amount of chocolate and have your mini chocolate eggs ready.
  • To create a beautiful Easter decoration, you can drizzle the melted chocolate over the top of the cheesecake in a random pattern. While the chocolate is still wet, artfully arrange the mini chocolate eggs and any reserved pieces of the large hollow Easter eggs on top. This is where you can let your creativity shine! Once decorated, cover the cheesecake loosely with plastic wrap and refrigerate for at least 4-6 hours, or preferably overnight, until firm. Chilling is essential for the cheesecake to set properly.
  • Serving Your Easter Masterpiece:

  • When ready to serve, carefully run a thin knife around the edge of the springform pan before releasing the sides. This will prevent the cheesecake from sticking. Slice the cheesecake with a sharp knife that has been dipped in hot water and dried between each cut for clean slices. Enjoy the delightful combination of creamy cheesecake and rich chocolate!
  • Easter Egg Cheesecake Recipe

    Conclusion:

    And there you have it – the perfect recipe for an Easter Egg Cheesecake that’s sure to be a showstopper at your holiday celebrations! This Easter Egg Cheesecake recipe is fantastic because it combines the creamy, decadent texture of a classic cheesecake with the festive fun of Easter eggs. It’s visually stunning, incredibly delicious, and surprisingly adaptable. Whether you’re a seasoned baker or just looking for a fun project, you’ll find this recipe rewarding. I encourage you all to give this a try; the delighted smiles on your guests’ faces will be worth every step!

    For serving, consider a dollop of whipped cream and a scattering of more chocolate shavings or even a few fresh berries to add a pop of color and freshness. This cheesecake is also wonderful on its own, allowing the rich cheesecake flavor and the sweet Easter egg goodness to shine through. Feeling adventurous? You can easily adapt this Easter Egg Cheesecake recipe by incorporating different types of chocolate Easter eggs – think caramel-filled, peanut butter, or even white chocolate eggs for a different flavor profile. You could also swirl in some colorful food coloring for a more playful look.

    Frequently Asked Questions:

    Can I make this cheesecake ahead of time?

    Absolutely! Cheesecakes are best made at least a day in advance. This allows the cheesecake to fully set and the flavors to meld beautifully. Cover it tightly with plastic wrap and refrigerate. It will keep well for up to 3-4 days.

    What if I can’t find chocolate Easter eggs?

    No worries! You can substitute with your favorite chocolate candies that resemble small eggs, or even just chopped up your favorite chocolate bar and incorporate that into the batter and topping. The spirit of the recipe is festive chocolate!

    Is it difficult to get the Easter eggs to stay on top?

    For best results, ensure the cheesecake is fully chilled and set before arrangin extractg the Easter eggs on top. If you’re concerned about them sliding, you can gently press them into the surface slightly. A thin layer of melted chocolate drizzled over the top can also help them adhere.
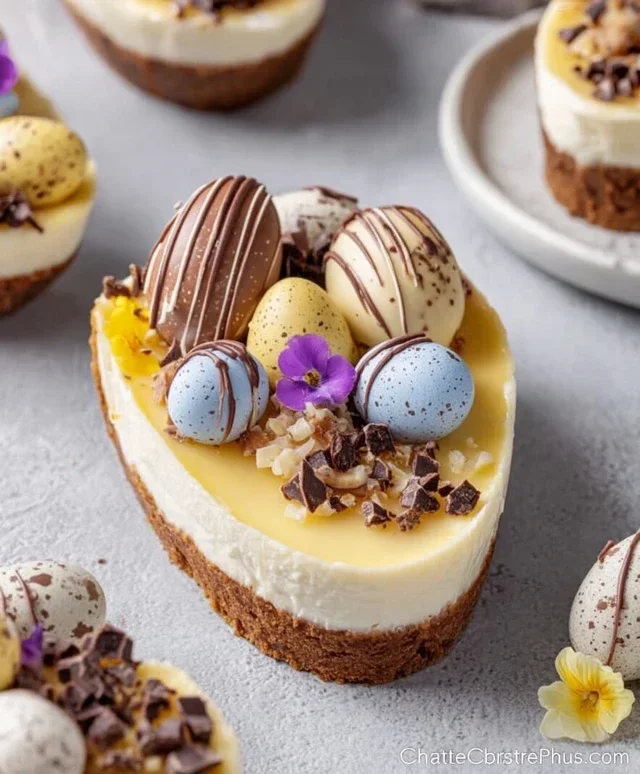

    Easter Egg Cheesecake Recipe

    Easter Egg Cheesecake Recipe

    A delightful Easter-themed cheesecake featuring a chocolate egg base and creamy filling, perfect for celebrations.

    Prep Time
    30 Minutes

    Cook Time
    0 Minutes

    Total Time
    30 Minutes

    Servings
    8 servings

    Ingredients

    • 2 hollow chocolate eggs (100 g Cadbury milk chocolate eggs)
    • 75 g digestive biscuits, crushed
    • 30 g butter, melted
    • 340 g full-fat cream cheese
    • 60 g powdered sugar
    • 170 g heavy cream
    • 1 tsp vanilla extract
    • Melted chocolate for drizzling
    • Mini chocolate eggs for decoration

    Instructions

    1. Step 1
      Gently melt the hollow chocolate eggs over a double boiler or in the microwave in short intervals until smooth. Be careful not to overheat.
    2. Step 2
      Combine the crushed digestive biscuits with the melted butter in a bowl. Press this mixture evenly into the base of a springform pan to form the crust.
    3. Step 3
      In a separate bowl, beat the cream cheese until smooth and creamy. Gradually add the powdered sugar and beat until well combined and no lumps remain.
    4. Step 4
      In another bowl, whip the heavy cream until stiff peaks form. Gently fold the whipped cream into the cream cheese mixture along with the vanilla extract.
    5. Step 5
      Pour the cheesecake filling over the prepared biscuit base. Smooth the top with a spatula.
    6. Step 6
      Drizzle the melted chocolate over the cheesecake filling. Decorate with mini chocolate eggs.
    7. Step 7
      Chill the cheesecake in the refrigerator for at least 4 hours, or preferably overnight, until firm.

    Important Information

    Nutrition Facts (Per Serving)

    It is important to consider this information as approximate and not to use it as definitive health advice.

    Allergy Information

    Please check ingredients for potential allergens and consult a health professional if in doubt.
    « Previous Post
    Easter Bunny Cinnamon Rolls- Deliciously Sweet Treats
    Next Post »
    Easy Ground Beef Stroganoff-Quick Family Dinner

    If you enjoyed this…

    Dessert

    Moist Lemon Bundt Cake- Easy & Delicious Recipe

    Dessert

    Refreshing Peach Lemonade – Easy Homemade Recipe

    Dessert

    Tangy Citrus Dessert Squares-Easy Bright Bites

    Reader Interactions

    Leave a Comment Cancel reply

    Helpful comments include feedback on the post or changes you made.

    Primary Sidebar

    Browse by Diet

    AppetizerAppetizerBreakfastBreakfastDessertDessertDinnerDinnerFooter MenuLunchLunchPrimary MenuUncategorized
    Healthy 5-Ingredient Flourless Banana Bread

    Healthy Flourless Banana Bread – Easy Ingredient

    Bow Tie Pasta Salad

    Best Bow Tie Pasta Salad Recipe- Easy & Delicious

    Masoor Dal Chilla | Savory Red Lentil Pancakes

    Savory Masoor Dal Chilla – Easy Red Lentil Pancakes

    • All Recipes
    • About
    • Contact
    • Cookie Privacy Policy
    • DMCA
    • Privacy Policy
    • Terms of Use

    © 2026 · Cuisine Recipe Theme · Genesis Framework · Disclosure · Website Design by Anchored Design