

Crispy hash browns are a breakfast revelation, a golden mound of potato perfection that transforms any morning into an occasion. There’s something undeniably magical about that shatteringly crisp exterior giving way to a tender, flavorful interior. Why do we all love them so much? Perhaps it’s the comforting familiarity, the perfect counterpoint to a fluffy egg or a savory sausage. But what truly elevates these humble potatoes is the art of achieving that ultimate crispness. It’s not just about frying potatoes; it’s about coaxing out their inherent sweetness and creating a texture that’s incredibly satisfying. Forget those sad, greasy, limp excuses for hash browns. Today, we’re diving deep into the secrets to making truly exceptional, undeniably crispy hash browns that will have you questioning why you ever settled for less.

Crispy Hash Browns
There’s something undeniably satisfying about a plate piled high with golden, crispy hash browns. They’re the perfect accompaniment to a weekend brunch, a hearty breakfast, or even a late-night craving. Forget those pre-packaged, often soggy versions; making truly spectacular hash browns from scratch is surprisingly simple and the results are infinitely more rewarding. The secret lies in a few key techniques that ensure maximum crispiness and that irresistible fluffy interior. Get ready to elevate your breakfast game because we’re diving into the art of the perfect crispy hash brown.
Ingredients:
Cooking Instructions
The journey to crispy perfection begin extracts with selecting the right potato. Russet potatoes are your best friend here. Their high starch content and lower moisture content mean they crisp up beautifully without becoming mushy. Give them a good scrub under cold running water to remove any dirt. You don’t need to peel them if you like a little extra texture and rustic charm, but if you prefer a smoother hash brown, feel free to peel them.
Now comes the crucial step: shredding. The size of your shreds matters. I like to use the large holes of a box grater. This creates shreds that are substantial enough to get wonderfully crispy on the outside while staying tender on the inside. If you have a food processor with a shredding attachment, that’s a fantastic shortcut, just ensure you’re using the correct disc for coarse shreds. Once grated, transfer the shredded potatoes to a clean kitchen towel or a large bowl lined with paper towels.
This next step is non-negotiable for achieving that coveted crispiness: squeezing out as much moisture as possible. This is where the magic happens. Gather the edges of your towel around the shredded potatoes and twist firmly, squeezing out all the excess liquid. You’ll be amazed at how much water comes out. Alternatively, if using a bowl, press down firmly with paper towels. Excess moisture is the enemy of crispiness, leading to steam and ultimately, soggy potatoes. The drier the shreds, the crispier your hash browns will be.
Once you’ve wrung out all the moisture, spread the shredded potatoes out on a clean surface or back onto your paper towels. This allows them to air dry a little further. If you’re adding any optional seasonings like garlic powder or onion powder, this is a good time to sprinkle them over the shredded potatoes and gently toss to distribute them evenly. Season generously with salt and pepper, remembering that the potatoes will absorb some of the seasoning as they cook.
Now, let’s get to the cooking. Heat your chosen fat in a large, heavy-bottomed skillet over medium-high heat. A cast-iron skillet is ideal for its even heat distribution and ability to get incredibly hot, but a good non-stick or stainless steel skillet will also work. Add the butter and oil together. The butter will lend a lovely flavor, and the oil will help prevent the butter from burning while ensuring a crispier finish. Let the fat get nice and hot – you should see a slight shimmer.
Carefully add the seasoned and squeezed-out shredded potatoes to the hot skillet. Don’t overcrowd the pan. If your skillet isn’t large enough, cook in batches to ensure each potato shred has direct contact with the hot surface. Overcrowding will lead to steaming rather than frying, resulting in limp, greasy hash browns. Spread the shredded potatoes out into an even layer, pressing down lightly with a spatula. Resist the urge to stir or move them too much in the initial stages. Allow them to cook undisturbed for about 4-5 minutes. You want to see that beautiful golden-brown crust forming on the bottom.
After the initial cooking time, it’s time to flip. Use a wide spatula to carefully break up the hash browns into manageable sections and flip them over. Again, try to get as much of the uncooked side down onto the hot skillet as possible. Continue to cook for another 4-5 minutes on this side, or until equally golden and crispy. You can gently press down on the hash browns with your spatula during this stage to encourage even browning and to help them hold together a bit.
For those who prefer a more uniform, pancake-like hash brown, you can let the entire mass cook for longer, about 8-10 minutes total on each side, without breaking it up too much. Then, flip the entire disc. This takes a little more confidence but results in a visually impressive hash brown. The key is patience and letting that heat do its work. If you notice any spots browning too quickly, you can reduce the heat slightly.
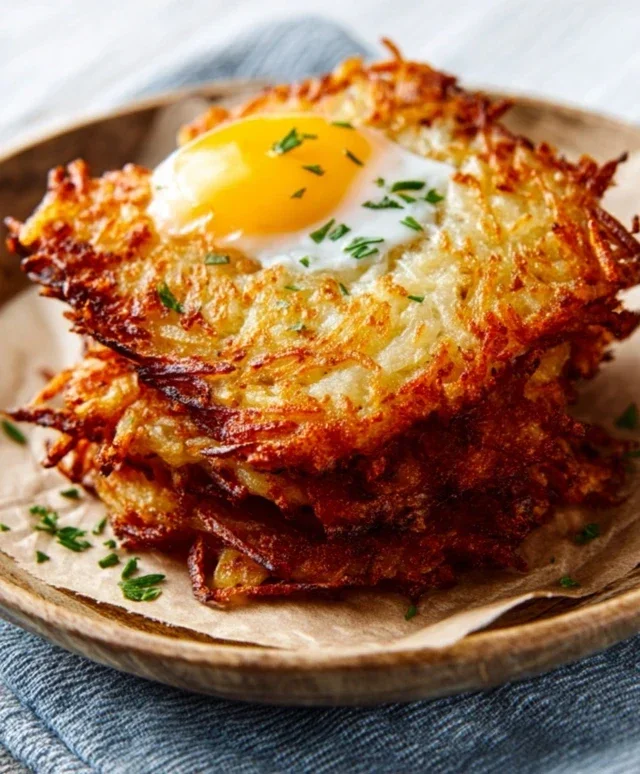
Once both sides are gloriously golden brown and crispy, and the potatoes are tender when pierced with a fork, your hash browns are ready. Transfer them to a plate lined with paper towels to catch any excess grease. Serve immediately and enjoy the satisfying crunch! These crispy hash browns are fantastic on their own, with your favorite eggs, or as a side to beef bacon or sausage. The effort is minimal, and the reward is immense.
Conclusion:
There you have it – your guide to achieving perfectly crispy hash browns right in your own kitchen! This recipe is fantastic because it breaks down the process into simple, manageable steps, ensuring you get that irresistible golden-brown crunch every single time. No more soggy, disappointing potatoes! These hash browns are incredibly versatile, making them the ultimate breakfast or brunch side. Imagin extracte them alongside fluffy scrambled eggs, a sizzling beef bacon strip, or a perfectly poached egg. They’re also a welcome addition to a hearty dinner, complementing burgers, steak, or even fried chicken. Don’t be afraid to experiment with variations – add a sprinkle of smoked paprika for a hint of smokiness, some finely chopped chives for freshness, or a pinch of garlic powder for an extra savory kick. I truly encourage you to give this recipe a try; you’ll be amazed at how easy it is to elevate your potato game. Get ready to impress yourself and your loved ones with these diner-worthy crispy hash browns!
Frequently Asked Questions:
Q: What’s the secret to truly crispy hash browns?
The key is removing as much moisture as possible from the grated potatoes. Squeezing them dry after rinsing is crucial, and ensuring your pan is hot enough before adding the potatoes helps create that essential crisp exterior.
Q: Can I make these ahead of time?
While they are best enjoyed fresh off the pan for ultimate crispiness, you can grate and squeeze the potatoes ahead of time. Store them in an airtight container in the refrigerator and cook them as per the recipe when ready. Just be aware they might not be quite as crispy as a freshly prepared batch.
Q: What kind of potatoes work best?
Russet potatoes are ideal for their high starch content, which contributes to their fluffiness inside and crispiness outside. Yukon Golds can also work, offering a slightly creamier texture.
Crispy Hash Browns
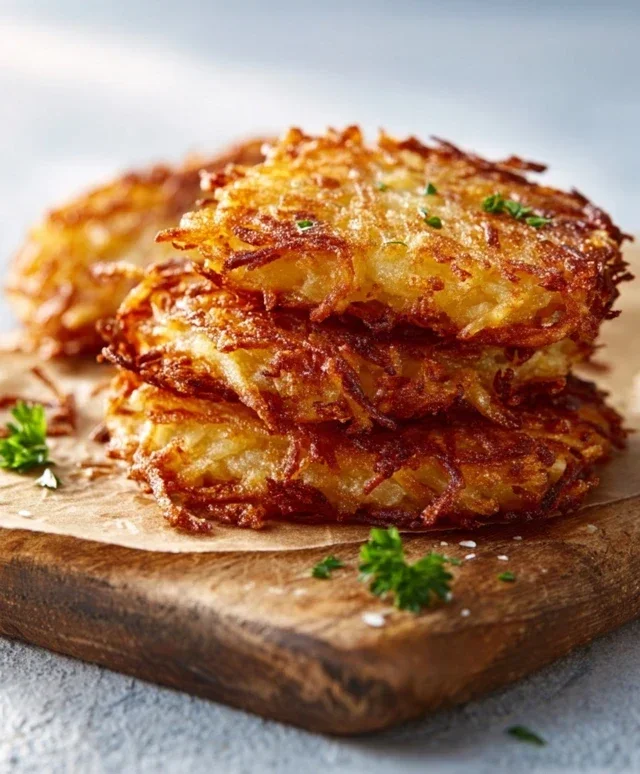
Golden and perfectly crispy hash browns, a classic breakfast side dish.
Ingredients
-
2 large russet potatoes, peeled
-
2 tablespoons vegetable oil
-
1/4 teaspoon salt
-
1/8 teaspoon black pepper
-
1 tablespoon finely chopped onion (optional)
Instructions
-
Step 1
Grate the peeled potatoes using a box grater or a food processor with a grating attachment. -
Step 2
Squeeze out as much excess moisture as possible from the grated potatoes using a clean kitchen towel or cheesecloth. -
Step 3
In a bowl, toss the grated potatoes with salt, pepper, and chopped onion (if using). -
Step 4
Heat the vegetable oil in a non-stick skillet over medium-high heat. -
Step 5
Add the potato mixture to the hot skillet and spread it into an even layer. Do not stir for the first few minutes to allow a crust to form. -
Step 6
Cook for about 7-8 minutes per side, or until golden brown and crispy. Flip carefully to ensure even cooking.
Important Information
Nutrition Facts (Per Serving)
It is important to consider this information as approximate and not to use it as definitive health advice.
Allergy Information
Please check ingredients for potential allergens and consult a health professional if in doubt.
Leave a Comment