

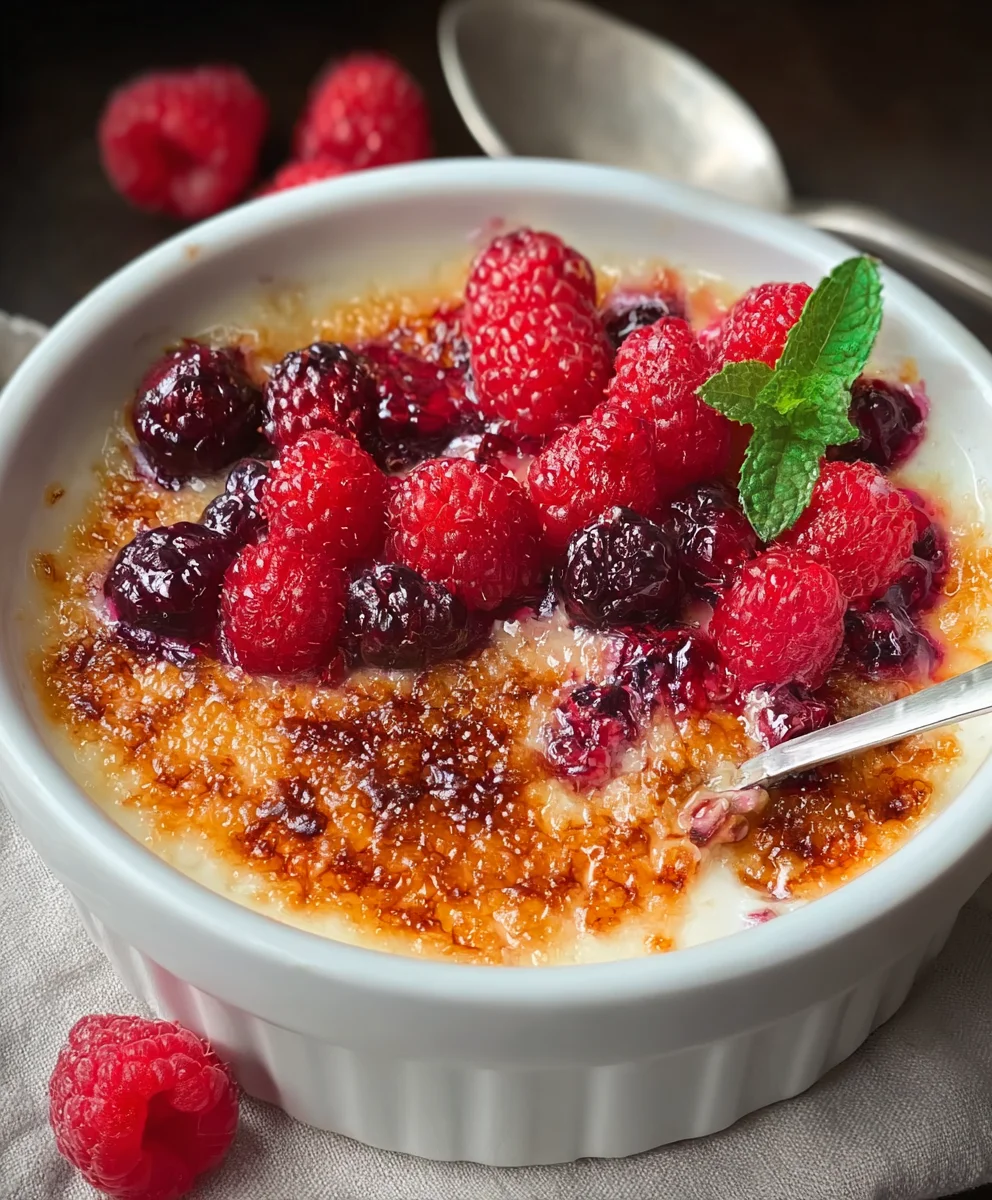
Berry Brûlée is more than just a dessert; it’s an experience. Imagin extracte the satisfying crack of a perfectly caramelized sugar crust giving way to a cool, luscious custard bursting with the vibrant sweetness of fresh berries. This is the magic that awaits you with Berry Brûlée, a delightful treat that has captured the hearts (and taste buds!) of dessert lovers everywhere. What makes this dish so incredibly special? It’s the masterful interplay of textures and temperatures – the warmth of the torched sugar against the chilled, creamy filling, punctuated by the bright, juicy pop of mixed berries. It’s sophisticated enough for a dinner party yet surprisingly simple to create, making it your go-to for impressing guests or simpgin extractindulging in a moment of pure bliss. Prepare yourself for a symphony of flavors that will leave you craving just one more spoonful.

Ingredients:
- 1/2 cup heavy cream, chilled
- 12 ounces fresh raspberries
- 3 tablespoons plus 1 teaspoon granulated sugar, divided
Preparing the Raspberry Base
The foundation of our Berry Brûlée is vibrant, fresh raspberries. To begin extract, gently rinse your 12 ounces of fresh raspberries under cool water. Be delicate as raspberries are quite fragile and can easily bruise or break apart. Pat them very gently with a clean kitchen towel or a few paper towels to remove any excess moisture. It’s important to have them relatively dry before proceeding.
Once patted dry, carefully transfer the raspberries to a medium-sized, oven-safe ramekin or a small baking dish. I prefer using individual ramekins for that classic crème brûlée presentation, but a small gratin dish works beautifully too. Spread the raspberries out in an even layer across the bottom of your chosen dish. This even distribution will ensure consistent heating and a beautiful presentation once we add the creamy topping.
Now, let’s introduce a touch of sweetness to the raspberries themselves. Take 1 teaspoon of your granulated sugar and sprinkle it evenly over the raspberries. This small amount of sugar will subtly enhance their natural sweetness and help them release some of their juices as they warm, creating a delightful, slightly saucy layer beneath the custard.
Creating the Creamy Topping
Next, we move on to the luscious, creamy topping that defines a brûlée. In a separate small bowl, pour in your 1/2 cup of chilled heavy cream. Using a whisk, gently whip the cream. You don’t need to go for stiff peaks here; we’re aiming for a softly thickened consistency that will coat the back of a spoon. Think of it as a loose whipped cream or a pourable custard. Over-whipping will make it too difficult to spread evenly.
Now, carefully pour this lightly whipped cream over the prepared raspberry layer in your ramekin(s). Try to cover the raspberries as completely as possible, creating a smooth, uniform surface. You can gently tilt the ramekin to help the cream settle and fill any gaps. The goal is to create a beautiful, creamy canvas for the caramelized sugar topping.
The Brûlée Process
This is where the magic happens! We’re going to transform the surface of our creamy topping into that signature crackly, caramelized sugar shell. Sprinkle the remaining 3 tablespoons of granulated sugar evenly over the surface of the cream. Ensure that every inch of the cream’s surface is covered with a thin, even layer of sugar. This is crucial for achieving a uniform brûlée. If there are any bare spots, the sugar won’t caramelize properly, leaving you with an uneven texture.
Now, for the brûléeing. The most effective way to achieve a perfect brûlée is with a kitchen torch. If you have one, hold it a few inches away from the sugar and move it in a steady, circular motion. You’ll see the gin extractar begin to melt, bubble, and gradually turn a beautiful amber color. Be patient and keep the torch moving to prevent any single spot from burning. If you don’t have a kitchen torch, you can carefully place the ramekin(s) under a hot broiler for a minute or two, watching it very closely. The sugar should caramelize and turn golden brown. This method requires extreme vigilance as it can burn very quickly.
Resting and Serving
Once the sugar has caramelized to a beautiful golden-brown hue and formed that signature crackly crust, it’s time to let our Berry Brûlée rest. This resting period is important because it allows the caramelized sugar to firm up and cool slightly, making that satisfying crack when you break into it. Carefully remove the ramekin(s) from under the broiler or set aside if you used a torch. Let them sit at room temperature for at least 5 to 10 minutes. This brief rest ensures the sugar topping is perfectly set for that delightful textural contrast.
When you’re ready to serve, you can do so immediately. Present each ramekin individually. The beauty of Berry Brûlée lies in the contrast: the sweet, slightly tart burst of warm raspberries at the bottom, the cool, creamy custard layer, and the satisfying shatter of the warm, caramelized sugar on top. It’s a simple yet elegant dessert that feels incredibly indulgent. Enjoy the delightful experience of cracking through the sugar shell with your spoon to reveal the layers beneath.
Conclusion:
You’ve now unlocked the secrets to creating a truly delightful Berry Brûlée! This recipe offers a beautiful balance of sweet, tart berries and a crackly, caramelized sugar topping that is simply irresistible. The contrasting textures and vibrant flavors make it a perfect dessert for special occasions or a sophisticated treat to elevate any evening. I encourage you to try this Berry Brûlée recipe and experience its magic firsthand. Don’t be afraid to experiment and make it your own!
For serving, I love to present the Berry Brûlée in individual ramekins. It looks elegant and allows each guest to enjoy their own perfectly torched top. A dusting of powdered sugar or a sprig of fresh mint can add a lovely finishing touch. Consider pairing it with a light, crisp white grape juice or a delicate dessert grape juice to complement the sweetness.
As for variations, feel free to swap out the berries for your favorites – a mix of raspberries, blueberries, and blackberries is classic, but strawberries or even some tart cherries would be wonderful. You could also add a hint of orange zest or a splash of liqueur extract like Grand Marnier Extract to the berry mixture for an extra layer of flavor.
Frequently Asked Questions about Berry Brûlée:
Can I make the Berry Brûlée ahead of time?
Yes, you can prepare the berry mixture and assemble them in the ramekins up to 24 hours in advance. Store them covered in the refrigerator. However, it’s best to brûlée the sugar topping just before serving to ensure the crispiest crust.
What if I don’t have a kitchen torch?
If you don’t have a kitchen torch, you can carefully use the broiler setting on your oven. Place the ramekins on a baking sheet and position them about 4-6 inches from the broiler. Watch them very closely, as the sugar can burn quickly. Rotate the ramekins as needed for even caramelization.
Can I use frozen berries for the Berry Brûlée?
You can use frozen berries, but it’s recommended to thaw them first and drain off any excess liquid. This will prevent the mixture from becoming too watery. While fresh berries offer the best texture, frozen berries are a viable alternative, especially when out of season.
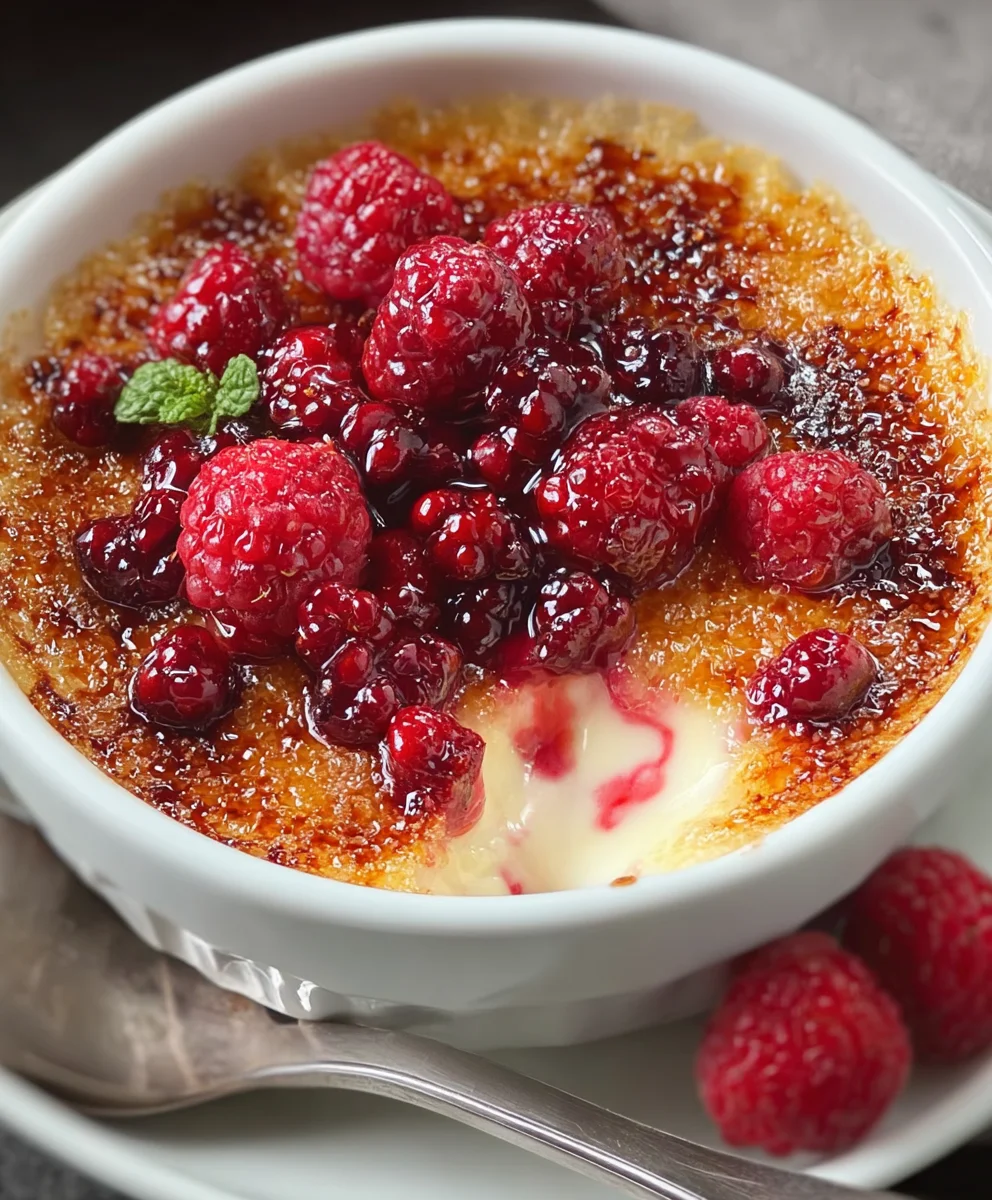
Berry Brûlée
An easy and elegant dessert featuring fresh raspberries topped with a creamy custard and a caramelized sugar shell.
Ingredients
-
1/2 cup heavy cream, chilled
-
12 ounces fresh raspberries
-
3 tablespoons plus 1 teaspoon granulated sugar, divided
-
1 teaspoon vanilla extract
-
1/4 teaspoon salt
Instructions
-
Step 1
Gently rinse and pat dry 12 ounces of fresh raspberries. Transfer them to individual oven-safe ramekins or a small baking dish and spread them in an even layer. Sprinkle with 1 teaspoon of granulated sugar. -
Step 2
In a separate bowl, gently whip 1/2 cup of chilled heavy cream until softly thickened, like a pourable custard. Do not over-whip. -
Step 3
Carefully pour the lightly whipped cream over the raspberry layer in the ramekin(s), ensuring a smooth and uniform surface. Gently tilt to cover completely. -
Step 4
Sprinkle the remaining 3 tablespoons of granulated sugar evenly over the surface of the cream. Ensure complete coverage for uniform caramelization. -
Step 5
Brûlée the sugar surface using a kitchen torch held a few inches away, moving in a circular motion until caramelized to a golden amber color. Alternatively, place under a hot broiler for 1-2 minutes, watching very closely to prevent burning. -
Step 6
Let the Berry Brûlée rest at room temperature for at least 5 to 10 minutes to allow the caramelized sugar to firm up.
Important Information
Nutrition Facts (Per Serving)
It is important to consider this information as approximate and not to use it as definitive health advice.
Allergy Information
Please check ingredients for potential allergens and consult a health professional if in doubt.
Leave a Comment